VendingTweets

A Tweeting Vending Machine

[Sigurd] manage to obtain an old vending machine from his dorm. The only problem was that the micocontroller on the main board was broken. He and his friend decided they could most likely get the machine back into working order, but they also knew they could probably give it a few upgrades.

This system uses two Arduino Pro Minis and an Electric Imp to cram in all of the new features. One Arduino is connected to the machine’s original main board. The Arduino interfaces with some of the shift registers, relays, and voltage regulators. This microcontroller also lights up the buttons on the machine as long as that particular beverage is not empty. It controls the seven segment LED display, as well as reading the coin validator.

The team had to reverse engineer the original coin validator in order to figure out how the machine detected and counted the coins. Once they figured out how to read the state of the coins, they also built a custom driver board to drive the solenoids.

A second Arduino is used to read NFC and RFID cards using a Mifare RC522 reader. The system uses its own credit system, so a user can be issued a card with a certain amount of pre-paid credit. It will then deduct credit appropriately once a beverage is vended. The two Arduinos communicate via Serial.

The team also wanted this machine to have the ability to communicate with the outside world. In this case, that meant sending cheeky tweets. They originally used a Raspberry Pi for this, but found that the SD card kept getting corrupted. They eventually switched to an Electric Imp, which worked well. The Arduino sends a status update to the Imp every minute. If the status changes, for example if a beverage was dispensed, then the Imp will send a tweet to let the world know. It will also send a tweet to the maintenance person if there is a jam or if a particular slot becomes empty. Continue reading “A Tweeting Vending Machine”

Finding An Active TX Pin On Cheap GPS

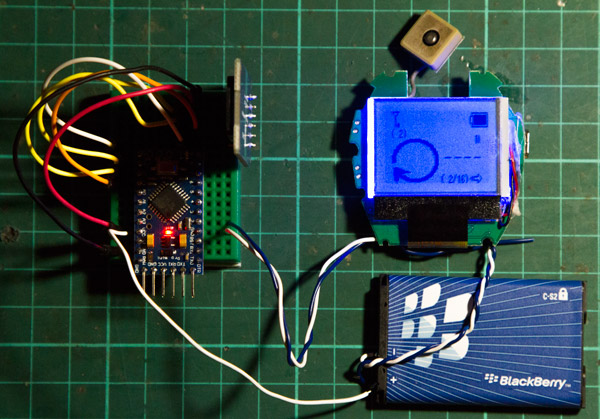
Twenty Euros will score you a small, self-contained GPS keychain. Crack that case open and you can have a lot more. [j3tstream] explored the guts of the thing and found that the NMEA data can be streamed out of the TX pin on the GPS chip.

First off, check out that miniscule GPS antenna module, crazy! But we digress. For testing purposes the asynchronous UART of the GPS was probed, proving that the data can be acquired. From there [j3tstream] moved to an Arduino Pro Mini with an SD card for data logging. The uC is powered from the GPS board but this will quickly exhaust the stock battery so [j3tstream] swapped it out for one from an old cellphone.

That little dot-matix LCD that comes with the unit also caught our eye. If you can hack a headless interface for the GPS that could be repurposed for your next project. May we suggest a wearable gaming project for it?

Closed Loop Control For 3D Printers

One of the bigger problems with any CNC machine or 3D printer is the issue of missed steps when moving the toolhead. If a stepper motor misses a step, the entire layer of the print – and every layer thereafter – will be off by just a tiny bit. Miss a few more steps, and that print will eventually make its way into the garbage. [Misan] has the solution to this: closed loop control of DC motors for a 3D printer.

Most printer firmwares use an open loop control system for moving their motors around. Step a few times in one direction, and you know where the nozzle of a 3D printer will be. Missed steps confound the problem, and there’s no way for the firmware to know if the nozzle is where it should be at any one time.

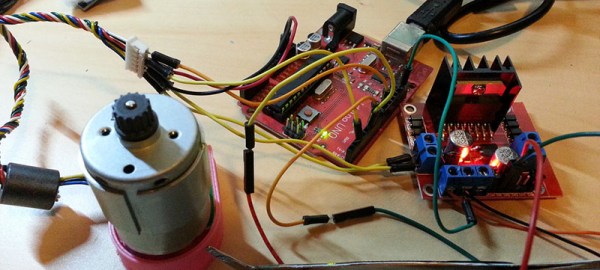
[Misan]’s solution to this was a DC motor coupled to an optical encoder. Both the motor and the encoder are connected to an Arduino Pro Mini which receives step and direction commands from the printer controller. The controller takes care of telling the motor where to go, the Arduino takes care of making sure it gets there.

The entire build is heavily derived from ServoStrap, but [Misan] has a very cool demo of his hardware: during a print, he can force the X and Y axes to either side, and the Arduino in each motor will move the print head back to where it needs to be. You can check that out below.

Continue reading “Closed Loop Control For 3D Printers”

Dial

Dial Is A Simple And Effective Wireless Media Controller

[Patrick] was looking for an easier way to control music and movies on his computer from across the room. There is a huge amount of remote control products that could be purchased to do this, but as a hacker [Patrick] wanted to make something himself. He calls his creation, “Dial” and it’s a simple but elegant solution to the problem.

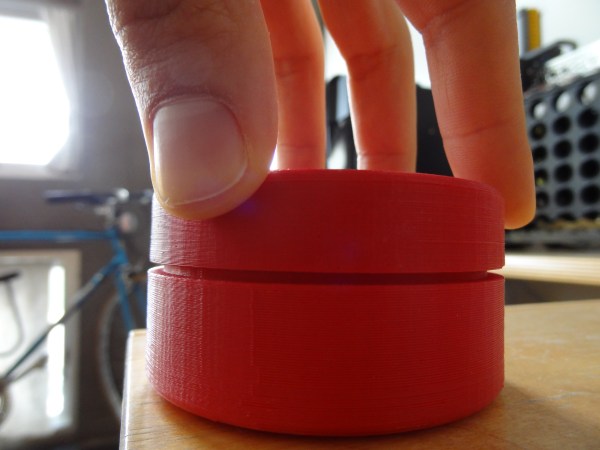
Dial looks like a small cylindrical container that sits on a flat surface. It’s actually split into a top and bottom cylinder. The bottom acts as a base and stays stationary while the top acts as a dial and a push button. The case was designed in SOLIDWORKS and printed on a 3D printer.

The Dial runs on an Arduino Pro mini with a Bluetooth module. The original prototype used Bluetooth 2.0 and required a recharge after about a day. The latest version uses the Bluetooth low energy spec and can reportedly last several weeks on a single charge. Once the LiPo battery dies, it can be recharged easily once plugged into a USB port.

The mechanical component of the dial is actually an off-the-shelf rotary encoder. The encoder included a built-in push button to make things easier. The firmware is able to detect rotation in either direction, a button press, a double press, and a press-and-hold. This gives five different possible functions.

[Patrick] wrote two pieces of software to handle interaction with the Dial. The first is a C program to deal with the Bluetooth communication. The second is actually a set of Apple scripts to actually handle interaction between the Dial and the various media programs on his computer. This allows the user to more easily write their own scripts for whatever software they want. While this may have read like a product review, the Dial is actually open source! Continue reading “Dial Is A Simple And Effective Wireless Media Controller”

Budget Wrist-Controlled RC Car Is A Nice Touch

Does your RC car’s crude, push-button controller make you feel like you’re mashing tv remote buttons like a caveman? We think so too, but [Noel] has actually done the heavy-lifting to fix just that. He’s revamped his kids’ rc controller for gesture control. Now their rc car can be guided by the crisp, intuitive control of one’s wrist movements.

To tackle this project, [Noel] has integrated a gyroscope and accelerometer, an Arduino, and the existing remote. Data from the gyroscope-and-accelerometer limits are mapped to the buttons through an Arduino, which parses the raw data and triggers the controller’s switches, now wired directly to the Arduino and pulled up with resistors. In his overview video, [Noel] tells us that he’s binarized the gyroscope-and-accel data to trigger at certain limits, a choice that adequately suits the controller’s original push-button controls. Finally, the entire setup is cleanly strapped to a 3D-printed case. Not bad, for a grand total of $20 and a quick trip to Target.

[Noel]’s custom wrist-controller takes its place on the shelf of many other unique controllers, and his demo is a great example of using existing open hardware to tailor our toys to more personal tastes. After all, the hardware shopping list is just a breakout board, an Arduino, and a few jumper wires. When the next zombie apocalypse hits, we can easily see some practical components like these making their way into our suitcase. At the very least, we’ll be able to build a few wrist controllers and dispatch some toy cars to greet the undead.

Continue reading “Budget Wrist-Controlled RC Car Is A Nice Touch”

Gesture Controlled Quadcopter

Controlling A Quadcopter With Gestures

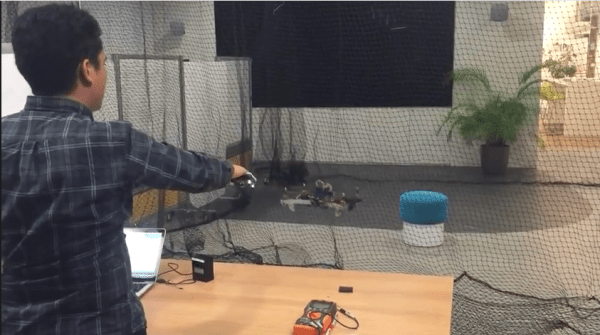
[grassjelly] has been hard at work building a wearable device that uses gestures to control quadcopter motion. The goal of the project is to design a controller that allows the user to intuitively control the motion of a quadcopter. Based on the demonstration video below, we’d say they hit the nail on the head. The controller runs off an Arduino Pro Mini-5v powered by two small coin cell batteries. It contains an accelerometer and an ultrasonic distance sensor.

The controller allows the quadcopter to mimic the orientation of the user’s hand. The user holds their hand out in front of them, parallel to the floor. When the hand is tilted in any direction, the quadcopter copies the motion and will tilt the same way. The amount of pitch and roll is limited by software, likely preventing the user from over-correcting and crashing the machine. The user can also raise or lower their hand to control the altitude of the copter.

[grassjelly] has made all of the code and schematics available via github.

Mood Lighting With LEDs And An Arduino

Regular candles can be awfully boring at times. They can only produce one color and the flicker is so… predictable. They can’t even be controlled by an infrared remote control, not to mention the obvious fire hazard. Now, however, [Jose] has come up with an LED candle that solves all of these problems. (Original link to the project in Spanish.)

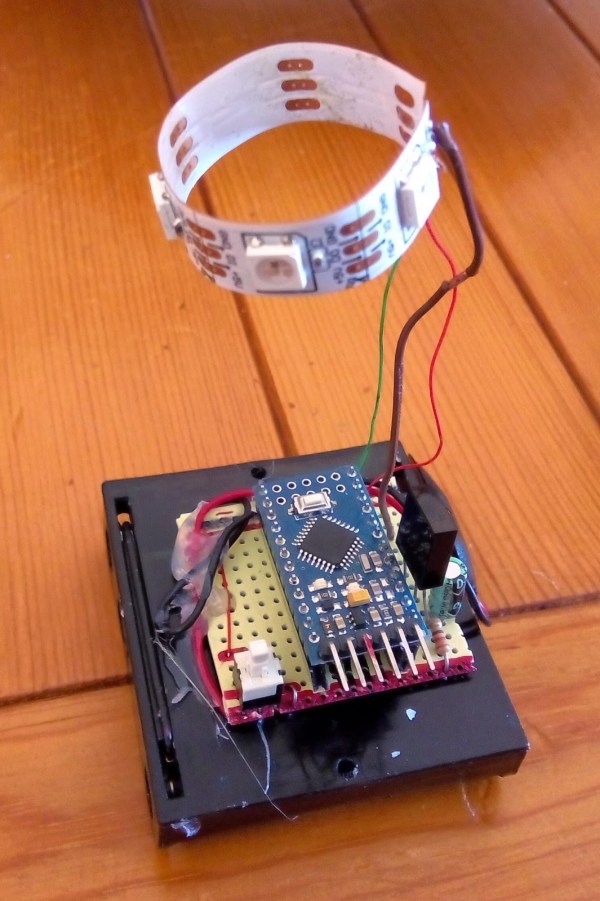
The heart of the project is an Arduino Pro Mini, which is especially suited for this project because of its size. [Jose] put the small form-factor microcontroller in the base of a homemade wax enclosure and wired it to a Neopixel WS2812b LED strip. The strip can produce any color, and has some programmed patterns including flicker, fade, rainbow, and fire.

The artificial candle is controlled with an infrared remote control, and all of the code for the project is available on the project site if you want to build your own. [Jose] has been featured here before for his innovative Arduino-driven RGB lighting projects, and this is another great project which builds on that theme!