A Colorful Way To Play Chess On An ATmega328

We’ve all seen those chess computers that consist out of a physical playing field, and a built-in computer that would indicate where you should put its pieces while inputting the position of your pieces in some way. These systems are usually found in a dusty cardboard box in a back room’s closet, as playing like this is fairly cumbersome, and a lot depends on the built-in chess computer.

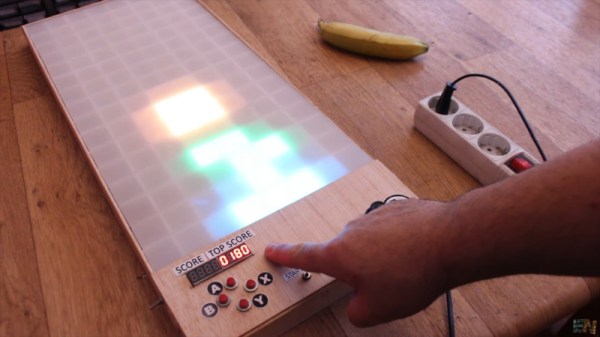
This take by [andrei.erdei] on this decades-old concept involves an ATmega328p-based Arduino Pro Mini board, a nice wooden frame, and 4 WS2812-based 65×65 mm RGB 8×8 LED matrices, as well as some TTP223 touch sensors that allow one to control the on-board cursor. This is the sole form of input: using the UP and RIGHT buttons to select the piece to move, confirm with OK, then move to the new position. The chess program will then calculate its next position and indicate it on the LED matrix.

Using physical chess pieces isn’t required either: each 4×4 grid uses a special pattern that indicates the piece that occupies it.  This makes it highly portable, but perhaps not as fun as using physical pieces. It also kills the sheer joy of building up that collection of enemy pieces when you’ve hit that winning streak. You can look at the embedded gameplay video after the break and judge for yourself.

Continue reading “A Colorful Way To Play Chess On An ATmega328”

Feeding Chickens, With Style

Ah, the joys of domestic animals. Often adorable, occasionally useful, they’re universally unable to care for themselves in the slightest. That’s part of the bargain though; we take over responsibility for their upkeep and they repay us with whatever it is they do best. Unless the animal in question is a cat, of course – they have their own terms and conditions.

Chickens, though, are very useful indeed. Give them food and water and they give you delicious, nutritious, high-quality protein. Feeding them every day can be a chore, though, unless you automate the task. This Twitch-enabled robotic chicken feeder may be overkill for that simple use case, but as [Sean Hodgins] tell it, there’s a method to all the hardware he threw at this build. That would include a custom-welded steel frame holding a solar panel and batteries, a huge LED matrix display, a Raspberry Pi and camera, and of course, food dispensers. Those are of the kind once used to dispense candy or gum for a coin or two in the grocery; retooled with 3D-printed parts, the dispensers now eject a small scoop of feed whenever someone watching a Twitch stream decides to donate to the farm that’s hosting the system. You can see the build below in detail, or just pop over to Sweet Farm to check out the live feed and gawk at some chickens.

It’s an impressive bit of work on [Sean]’s part for sure, and we did notice how he used his HCC rapid prototyping module to speed up development. Still, we’re not convinced there will be many donations at $10 a pop. Then again, dropping donations to the micropayment level may lead to overfed chickens, and that’s not a good thing.

Continue reading “Feeding Chickens, With Style”

Sensor Lets Gestures And An Arduino Control The Tunes

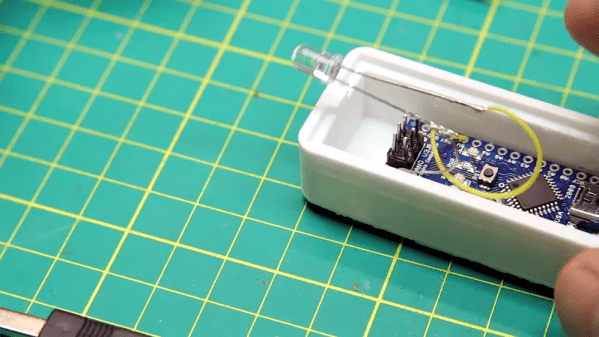
Every time we watch Minority Report we want to make wild hand gestures at our computer — most of them polite. [Rootsaid] wanted to do the same and discovered that the PAJ7620 is an easy way to read hand gestures. The little sensor has a serial interface and can recognize quite a bit of hand waving. To be precise, the device can read nine different motions: up, down, left, right, forward, backward, clockwise, anticlockwise, and wave.

There are plenty of libraries to read it for common platforms. If you have an Arduino that can act as a keyboard for a PC, the code almost writes itself. [Rootsaid] uses a specific library for the PAJ7620 and another — Nicohood — for sending media keys.

Continue reading “Sensor Lets Gestures And An Arduino Control The Tunes”

Itty Bitty MIDI Piano Sings With Solenoids

Toy pianos are fun to plink around on for a minute, but their small keyboards and even smaller sound make them musically uninteresting pretty quickly. [Måns Jonasson] found a way to jazz up a two-octave toy piano almost beyond recognition. All it took was thirty solenoids, a few Arduinos, a MIDI shield, and a lot of time and patience.

This particular piano’s keys use lever action to strike thin steel tines. These tines are spaced just wide enough for tiny 5V solenoids to fit over them. Once [Måns] got a single solenoid striking away via MIDI input, he began designing 3D printed holders to affix them to the soundboard.

Everything worked with all thirty solenoids in place, but the wiring was a bird’s nest of spaghetti until he upgraded to motor driver shields. Then he designed a new bracket to hold eight solenoids at once, with a channel for each pair of wires. Every eight solenoids, there’s an Arduino and a motor shield.

The resulting junior player piano sounds like someone playing wind chimes like a xylophone, or a tiny Caribbean steel drum. Check out the build video after the break.

Hate the sound of toy pianos, but dig the convenient form factor? Turn one into a synth.

Continue reading “Itty Bitty MIDI Piano Sings With Solenoids”

Stepper-Controlled Chop Saw Automates A Tedious Job

We’re not going to question why [Absorber Of Light] needs to cut a bazillion little fragments of aluminum stock. We assume his reasoning is sound, so all we’re interested in is the automated chop saw he built to make the job less tedious, and potentially less finger-choppy.

There are probably many ways to go about this job, but  [Absorber] leaves few clues as to why he chose this particular setup. Whatever the reason, the build looks like fun, with a long, stepper-driven threaded rod pushing a follower down a track to a standard chop saw. The aluminum stock rides in the track and gets pushed out a set amount before being lopped off cleanly as the running saw is lowered by a linear actuator. The cycle then repeats until the stock is gone.

An Arduino controls the stock-advance stepper in the usual way, but the control method for the linear actuator is somewhat unconventional. A second stepper motor has two cams offset by 180° on the shaft. The cams actuate four microswitches which are set up in an H-bridge configuration. The stepper swivels back and forth to run the linear actuator first in one direction then the other, with a neutral position in between. It’s an interesting approach using mechanical rather than the typical optical isolation. Check it out in action in the video below.

We’ll admit to some curiosity as to the use of the coupons this rig produces, so maybe we’ll get lucky with some details from [Absorber Of Light] in the comment section. After all, we knew exactly what the brass tubes being cut by the similar “Auto Mega Cut-O-Matic”  were being used for.

Continue reading “Stepper-Controlled Chop Saw Automates A Tedious Job”

A Macro Keyboard In A Micro Package

Remember back in the early-to-mid 2000s when pretty much every cheap USB keyboard you could find started including an abundance of media keys in its layout? Nowadays, especially if you have a customized or reduced-sized mechanical keyboard, those are nowhere to be seen. Whenever our modern selves need those extra keys, we have to turn to external peripherals, and [Gary’s] Knobo is one that looks like it could’ve come straight out of a fancy retail package.

The Knobo is a small macro keypad with 8 mechanical Cherry-style keys and a clickable rotary encoder knob as its main feature. Each key and knob gesture can be customized to any macro, and with five gestures possible with the knob, that gives you a total of thirteen inputs. On top of that, the build and presentation look so sleek and clean we’d swear this was a product straight off of Teenage Engineering’s money-printing machine.

The actions you can do with those inputs range from simple media controls with a volume knob all the way to shortcuts to make a Photoshop artist’s life easier. Right now you can only reprogram the Knobo’s Arduino-based firmware with an In-Circuit Serial Programmer to change what the inputs do, but [Gary] is currently working on configuration software so that users without any programming knowledge will be able to customize it too.

Knobs are just one of those things that everyone wants to use to control their computers, much like giant red buttons. Alternative input devices can range from accessibility-designed to just downright playful. Whatever the inspiration is for them, it’s always nice to see the creativity of these projects.

Continue reading “A Macro Keyboard In A Micro Package”

Blue Pill Makes Cheap But Powerful Morse Tutor

[W8BH] attended a talk by another ham, [W8TEE] that showed a microcontroller sending and receiving Morse code. He decided to build his own, and documented his results in an 8 part tutorial. He’s using the Blue Pill board and the resulting device sends code with paddles, sends canned text, provides an LCD with a rotary knob menu interface, and even has an SD card for data storage.

All the code is on GitHub. If you are interested in Morse code or in learning how to write a pretty substantial application using the Blue Pill and the Arduino IDE (or any other similar processor), this is a great exposition that is also a practical tool.

Continue reading “Blue Pill Makes Cheap But Powerful Morse Tutor”