Know Audio: Get Into The Groove

The legendary Technics SL1200 direct-drive turntable, as used by countless DJs. Dydric [CC BY-SA 2.5)], via Wikimedia Commons.
The legendary Technics SL1200 direct-drive turntable, as used by countless DJs. Photo by Dydric CC-BY-SA 2.5
For me, the vinyl record player is the spiritual home of my audio listening experience, probably because I’m of the last generation to grow up when vinyl was king. The 12″ album, with its full-size sleeve and copious sleeve notes, used to be an integral part of musical enjoyment that hasn’t been adequately replicated in the age of streaming.

And like anyone who became an adult while CD players were still expensive luxury items, I started my journey into Hi-Fi with a turntable set-up that sounded pretty good. Since a new generation have in recent years rediscovered vinyl, it’s once again something that should be part of any review of audio technology.

I would have started this piece with a full run-down of the constituent parts of a good turntable, but since that’s a piece that I wrote back in 2017, it’s time to investigate some of the audiophile claims about vinyl recordings. It’s fair to say that this is an area where a lot of complete rubbish is spouted by people who should know better, and that’s something I find immensely entertaining to poke fun at. Buckle up. Continue reading “Know Audio: Get Into The Groove”

Binaural Hearing Modeled With An Arduino

You don’t have two ears by accident. [Stoppi] has a great post about this, along with a video you can see below. (The text is in German, but that’s what translation is for.) The point to having two ears is that you receive audio information from slightly different angles and distances in each ear and your amazing brain can deduce a lot of spatial information from that data.

For the Arduino demonstration, cheap microphone boards take the place of your ears. A servo motor points to the direction of sound. This would be a good gimmick for a Halloween prop or a noise-sensitive security camera.

Continue reading “Binaural Hearing Modeled With An Arduino”

Visualizing Audio With An LCD VU Meter

We all love seeing data represented in pretty ways — whether it’s necessary or not. Take VU meters for example. They’re a super useful tool for audio editors to balance signals, but they also look really cool, even if you’re only listening to music. Who didn’t use a Winamp skin with a built-in VU meter back in the day? Even after the demise of everyone’s favorite media player, we still see these great graphs popping up all over the place.

Most recently, we’ve seen VU meters circle back around to have a bit of a retro vibe in this awesome Arduino-controlled LCD VU meter built by [mircemk]. Based on the KTAudio VU Meter project, it features an ultra-wide LCD, audio input, and volume knob, all tidily wrapped up in a case whose color scheme that can only conjure images of the famed Altair 8800, or an old Tektronix oscilloscope. The LCD itself is fairly responsive — but you can judge for yourself in the video below. The signature fading that so commonly accompanies screen refreshes on LCDs such as this one really adds to the retro effect.

You may just need one of these displays on your desk — after all, while you may not need to know how loud each audio channel is, don’t you at least want the information available? Just in case. Bar graph display a bit too modern-looking for you? Well then you should check out [mircemk]’s OLED version that displays dual analog meters.

Continue reading “Visualizing Audio With An LCD VU Meter”

Cheap DIY Mic Sounds (And Looks) Damn Good

As any musician, podcaster, or youtuber will be quick to tell you, there’s no substitute for a good microphone. They’ll also be quick to tell you all about their favorite microphone, why it’s better than all the others, and how much it cost (oh, and how round it sounds, whatever that means). But what if you could build your own that sounds as good, if not better, and do it for only $30?

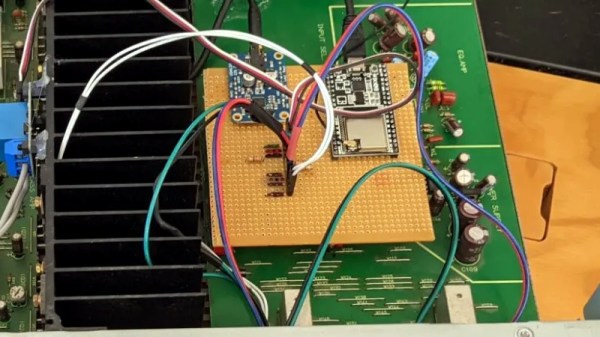
That’s what [Matt] from DIY Perks set out to discover when he built his DIY USB-C Microphone. He was able to source the same microphone capsule that can be found in his high-end, $600 CAD E100S, and built a simple pre-amplifier that bumps its quiet output up to line-level. He even connected it to the mic module with some custom cable made from two tiny enameled wires that won’t transmit bumps and vibrations, wrapped inside desoldering braiding which acts as a shield. He fed the output from the pre-amp into a cheap USB audio interface and voilĂ ! — top-notch sound for next to nothing. Make sure you check out the video below to hear a comparison between the mic and its professional counterparts.

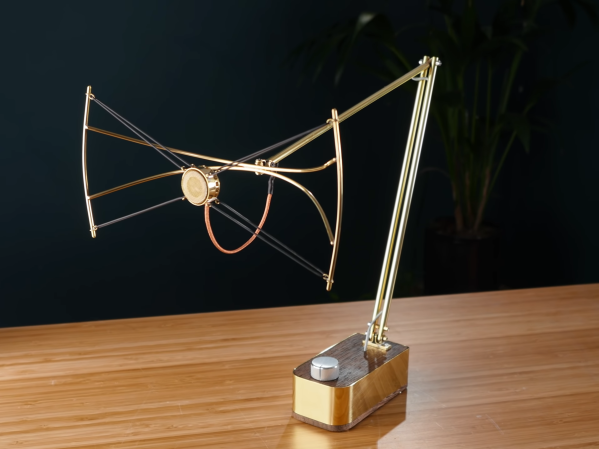
Of course, sounding good isn’t quite enough. [Matt] wasn’t satisfied until the piece looked the part as well, which is why he encased the mic module in custom-bent brass mesh shielding and tubing (which also helps to reduce electrical interference). The brass cage sits suspended via rubber o-rings on a beautiful bent brass mount, which sits atop an articulated brass arm of [Matt]’s own design. Finally, the arm is mounted to a wood and brass enclosure that also serves to house the electronics.

And, in true open-source fashion, the video description is full of links to parts, schematics, and templates in case you want to build one of these beauties for yourself. Between this fantastic build and this other, super-overkill scratch-built USB microphone we featured earlier in the year, there has never been a better time to make yourself a mic you won’t have to trade your car for.

Thanks to [RichV] and [BaldPower] for the tip!

Continue reading “Cheap DIY Mic Sounds (And Looks) Damn Good”

Bring That Old Hi-Fi Into The 2020s

It’s a distressing moment for some of us, when a formerly prized piece of electronic equipment reaches a point of obsolescence that we consider jettisoning it. [Jon Robinson] ran into this dilemma by finding the Kenwood Hi-Fi amplifier his 17-year-old self had spent his savings on. It was a very good amp back in the day, but over two decades later, it’s no longer an object of desire in a world of soundbars and streaming music boxes. After a earlier upgrade involving an Arduino to auto-power it he’s now given it an ESP32 and an i2S codec which performs the task of digital audio streaming as well as a better job than the Arduino of controlling the power.

Inside the case is a piece of stripboard with the ESP and codec modules, but there was still the problem of seamlessly integrating it with the amp’s distinctly analogue-era controls. The output from the codec is wired into an audio input – quaintly labelled for a DAT player – and a simple cam on the input selector switch operates a microswitch to select the ESP32.

If you’re dipping your toe in decent audio then an old amp from decades past can make an excellent purchase, but you might wish to educate yourself through our Know Audio series.

Know Audio: It All Depends On The DAC

Our trip through the world of audio technology has taken us step-by step from your ears into a typical home Hi-Fi system. We’ve seen the speakers and the amplifier, now it’s time to take a look at what feeds that amplifier.

Here, we encounter the first digital component in our journey outwards from the ear, the Digital to Analogue Converter, or DAC. This circuit, which you’ll find as an integrated circuit, takes the digital information and turns it into the analogue voltage required by the amplifier.

There are many standards for digital audio, but in this context that used by the CD is most common. CDs sample audio at 44.1 kHz 16 bit, which is to say they express the level as a 16-bit number 44100 times per second for each of the stereo channels. There’s an electrical standard called i2s for communicating this data, consisting of a serial data line, a clock line, and an LRclock line that indicates whether the current data is for the left or the right channel. We covered i2s in detail back in 2019, and should you peer into almost any consumer digital audio product you’ll find it somewhere. Continue reading “Know Audio: It All Depends On The DAC”

A Deep Dive Into The Sound Of An Apple II

A major part of the retrocomputing scene for many of us lies in the world of chiptunes, music created either using original retrocomputing hardware or in the style of those early synthesiser chips. There’s one machine we don’t hear much about among all this though, and that’s the Apple II. Though probably one of the most expandable of all the 8-bit home computers, it lacked a sound channel beyond a speaker hooked up to a memory location port so any complex sound work had to be done via an add-on card. It’s something [Nicole Branagan] has investigated in depth, as she demonstrates first the buzz from the speaker and then what must have been an object of extreme desire back in the day, a Mockingboard sound card.

Her card is not an original but a modern recreation using the same hardware, which is to say a pair of 6522 VIA port chips, each driving an AY-3-8910 audio chip. This is already a familiar device to those who have heard an Amstrad CPC, a later Sinclair Spectrum or, an MSX, and in the Apple it delivers an impressive stereo sound thanks to both channels being present. Interestingly though, it delivers a far smoother output than an MSX playing the same music, probably because of a superior filtering circuit.

She wraps up with a discussion of coding on the Apple for the AY, and how to best accommodate the card on the later Apple IIgs. If the AY chip catches your interest, it’s also easy to drive from a microcontroller.