Numerous Quiz Buttons Built On The Cheap

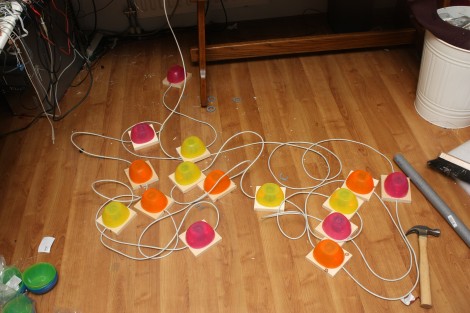
[Sprite_TM] was tapped to build a rather large quiz buzzer system. Judging from his past work we’re not surprised that he seemed to have no trouble fulfilling the request. As the system is not likely to be used again (or rarely if it is) he found a way to finish the project that was both quick and inexpensive.

Each buzzer consists of a base, a button (both mechanical and electrical), and a couple of LEDs to indicate who buzzed in first. The mechanical part of the button uses a plastic bowl from Ikea and a wooden dowel surrounded by some pipe insulation. A momentary push switch is glued on the top of that dowel, and the insulation projects above that just a bit. This way it acts as a spring. The Dowel has been sized so that the bowl lip will hit the wooden base just as it clicks the switch.

As you can see, all of the buzzers are interlinked using Ethernet cable. The real trick here is how to read 14 buttons using just one CAT5 cable. This is done with the clever use of a 4×4 button matrix for a total of 16 buttons. The matrix also includes the LEDs for each buzzer. Since CAT5 has four twisted pairs this works out perfectly.

Looking for a more robust system thank this? Here’s a pretty nice one.

AVR External Memory Interface (XMEM) Reads Input Matrix

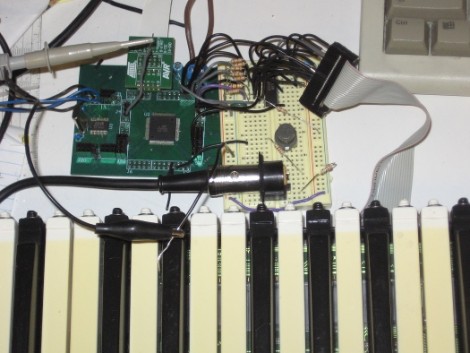
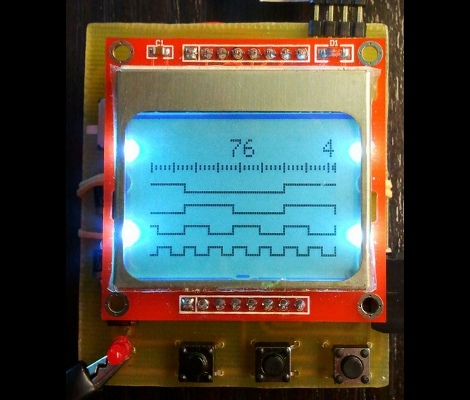
Reading from a large number of inputs, like this piano keyboard, can be tedious. Even when multiplexing there’s a lot to keep track of. But if you choose the right microcontroller, you may have hardware assistance. Here’s an ATmega640 is using it’s external memory interface to read the key matrix.

You may remember the Open Music Labs article about reading from a shift register using just one pin of a microcontroller. This time around a shift register is still used, but instead of pulling in a long line of parallel inputs, the switches are multiplexed to reduce the number of I/O pins used to read them.

A 74HC573 is used to facilitate the multiplexing. We won’t go into how that part is accomplished; there’s a separate post that explains the process. What’s unique here is that the XMEM peripheral of the AVR microcontroller is used to grab the data. This is intended for external memory chips, but if you get the timing just right, it greatly simplifies reading in a matrix of up to 128 inputs.

Pushing FPGA Config Files Via Serial Using ‘cat’

[Andrew] is trying to buckle down and hammer out his PhD project but was surprised by the sorry state of the configuration options for his FPGA/ARM dev board. Using JTAG was painfully slow, so he studied the datasheet to see if there was another way. It turns out the Xilinx FPGA he’s using does have a slave serial mode so he came up with a way to push configuration from the ARM to the FPGA serially.

Four of the connects he needed were already mapped to PortC pins on the AT91SAM9260 ARM System on a Chip. He ended up using the EN_GSM pin on the FPGA, since there is no GSM module on this board; connecting it to the microcontroller with a piece of wire. Now he can SSH into the ARM processor, grabbing information on the FPGA from /dev/fpga0. When it comes time to program, it’s as easy as using the cat command on the binary file and redirecting the output to the same hook.

LUFA Open Source USB Stack Now For NXP ARM Processors

Looks like the Lightweight USB Framework for AVRs (LUFA) has just been ported for ARM microcontrollers. NXP recently released a package for their LPC Cortex M3 family of ARM controllers. You won’t find a reference to LUFA on their nxpUSBlib description page (which we think is kind of sad), but if you grab a copy of the beta code the Version.h header file shows that it is indeed a port of the project. This is further backed up by the LUFA creator, [Dean Camera], who consulted with the NXP team doing the work.

The package provides an open-source USB stack that you can use in your projects as a USB host or USB device. We’re advocates of open source packages like this one as it makes it much easier for hobbyists to get help using the tools, and it allows the community to give back through bug fixes and feature additions.

We’ve highlighted a few LUFA projects, like this keyboard remapper and this AVR programmer. We’re looking to seeing the first set of NXP LUFA projects roll through!

[Thanks Johnny]

TV-B-Gone Can Double As A Camera Remote Control

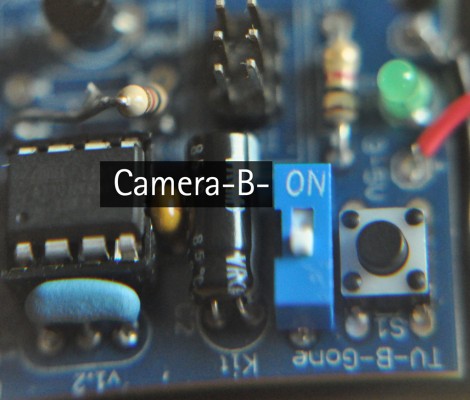
[Christopher] found a way to get a bit more mileage out of his TV-B-Gone kit. The little device is intended to turn off every television in range with the push of a button. But at its core it’s really just a microcontroller connected to some infrared LEDs. Instead of sending codes to shut of televisions, you can rewrite the firmware to send a camera remote shutter release code.

It doesn’t take too much to pull this off. You need a way to flash new firmware to the device, and you need to know the new code timing that you want to send. Since the firmware is open source it’s easy enough to make code changes, and there are several easy methods of flashing AVR devices (like the tiny85 used here), including using an Arduino as an ISP.

But [Christopher] did more than just add the Nikon code for his camera. He realized that there’s a jumper to select between European or American television codes. Since he wasn’t using the foreign option, he replace that pin header with a switch that selects between normal TV-B-Gone operation and camera shutter release modes. Nice.

AVR Chiptune Project Turns This Simple Code Into Music

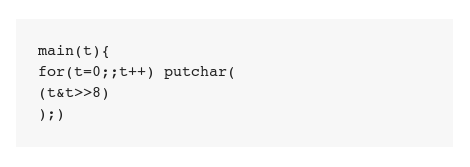
[Mark] had seen a few examples of algorithmic music generation that takes some simple code and produces complex-sounding results. Apparently it’s possible to pipe the output of code like this directly to audio devices on a Linux box, but [Mark] decided to go a different direction. His project lets you play simple algorithms as audio using AVR microcontrollers.

Now the code work for this is very simple, but he hardware implementation is where things get interesting. Ostensibly, [Mark] didn’t have the components available to build a filter to use PWM as an audio signal. Being that he’s a ham operator, he grabbed some radio equipment he had on hand and whipped up an alternative. He’s feeding the PWM from an Arduino into the voltage controlled oscillator on a board meant for high-altitude balloon telemetry. The signal broadcast by this board is then picked up by his radio receiver, and played on some speakers.

Rube-Goldberg contraptions aside, the effect is pretty interesting, as you can hear in the latter half of the video clip which we’ve embedded after the jump.

Continue reading “AVR Chiptune Project Turns This Simple Code Into Music”

Bread Head Makes AVR Programming A Snap

bread_head_quick_avr_programming_header

[Quinn] over at Blondihacks has been working with AVR microcontrollers a lot recently, and wanted a quick way to program the ATtiny13a (her current AVR of choice) while the chip is still seated in a breadboard.

To speed up code revision and testing, she built a small programming header that she calls the Bread Head. The device is wonderfully simplistic, consisting of little more than snappable header pins and a bit of upside-down protoboard.

She soldered six headers to the top (formerly the bottom) side of the board, while a set of eight oversized headers were soldered to the opposite side of the programmer. Small bits of wire were soldered in to connect all of the appropriate pins together before [Quinn] slipped the header snugly over the top of the ATtiny and gave it a quick test. Everything worked perfectly, so she slathered in in epoxy for sturdiness and called it a day.

She says that the programmer works so well that she’s likely to make a similar header for other common AVRs too.