Recycle LCDs Into LEDs

We always find it funny when we see ads for modern LED TVs. These TVs don’t use LEDs to show the picture. They are nothing more than LCD screens with LED backlighting instead of cold cathode fluorescent lamps. [Akshaylals] had a few LCD laptop and phone panels that were defunct and decided to recycle them to get to the LEDs within.

Most panels are lit from one or two edges with a bar of LEDs. You only have to peel off some tape and plastic. If you wonder what all those plastic sheets do, see the [Engineer Guy’s] video, below.

Continue reading “Recycle LCDs Into LEDs”

Building A Supersized Game Boy Advance

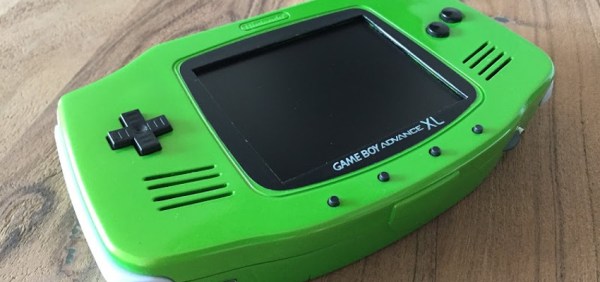
Unless you really look closely at the image above, you might not realize you aren’t looking at a normal Game Boy Advance; which is sort of the point. Even though it retains the looks of the iconic Nintendo handheld, this version built by [Akira] is supersized for adult hands. How big is it? To give you an idea, that screen is 5 inches, compared to the 2.9 inch screen the original sported.
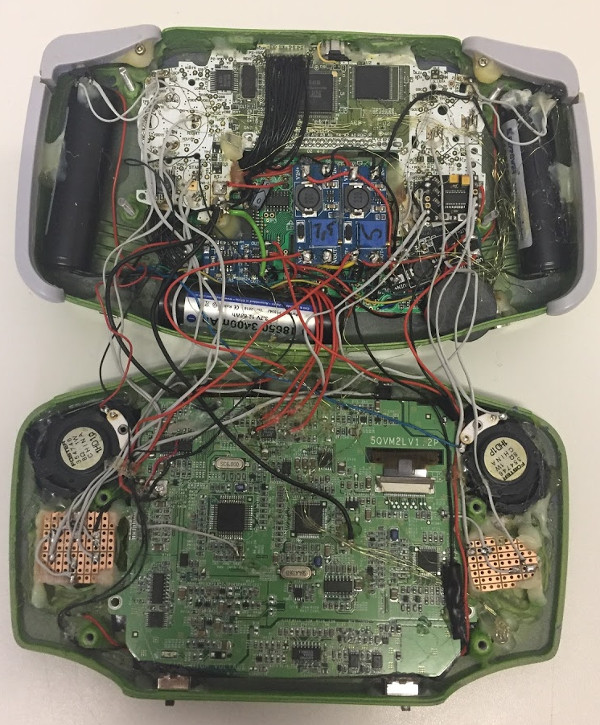
Unlike most of the portable gaming hacks we’ve covered recently, this big-boy GBA isn’t powered by a Raspberry Pi. Internally it’s packing a genuine GBA motherboard, which has been wired into a portable screen originally intended for the PlayStation.

Though that may be understating things a bit, as getting the round PCB of the original screen into the rectangular shape of the GBA meant it had to be cut down and the traces recreated with jumper wires. The original CCFL backlight of the screen had to go in the name of battery life, and in its place is the backlight system pulled from a Nintendo DSi XL.

But where did [Akira] get a giant GBA case to begin with? No, it isn’t 3D printed. It’s actually a hard carrying case that was sold for the GBA. The carrying case obviously didn’t have a cartridge slot or openings for buttons, so those sections were grafted from a donor GBA case. So despite the system overall being so much bigger than the original, the D-Pad, face buttons, and cartridge slot on the back are at normal GBA scale.

The GBA XL is really a labor of love; browsing through the build log you can see that [Akira] actually started the project back in 2014, but it kept getting shelved until more research could be done on how to pack all the desired features into the final device.

While this may be the most historically accurate attempt at making a bigger Game Boy, it certainly isn’t the first. There seems to be a fascination with turning the quintessential pocket game system into something that’s quite the opposite.

Continue reading “Building A Supersized Game Boy Advance”

Cheap LCD TV Gets Cheaper Fix

Most hacks need some fair bit of skill and knowledge if you want to come out successful at the other end. Others, you just plunge in blindly with a “heck, it’s already broken so I can’t make it any worse” attitude. Throwing caution to the wind, you dive in, rip things up, and see if you can manage to catch the bull by the horns.

[Jim]’s cheap LCD TV, barely a few years old, died. It was purchased from the store whose blue polo-shirted cashiers can drive you nuts with their incessant questions. [Jim] just rolled up his sleeves and rather haphazardly managed to fix his TV while adding an extra feature along the way.

His initial check confirmed that the LCD panel worked. Using a flashlight, he could see that the panel was displaying video which meant it was the backlight that wasn’t working. Opening up the TV, he located the LED driver board whose output turned out to be zero volts. [Jim] happened to have a lot of WS2812B strips lying around, along with their power supplies and RGB color controllers. The obvious solution was to ditch the existing LEDs and power supply and use the WS2812B strips.

Surprisingly, the original backlight consisted of just 21 LEDs arranged in three rows. He ripped those out, put in the WS2812B strips, and taped the jumble of wires out of sight. After putting it back together, [Jim] was happy to see it worked, although the new strips were not as bright as the old ones, causing some uneven light bands. He solved this by adding a few more strips of LEDs. It took him a couple of hours to fix his TV, but by the end of it, he had a TV whose backlight could be adjusted to any color using the external color controllers — although we’re not too sure what good that would be.

Fixing A Broken CCFL Backlight

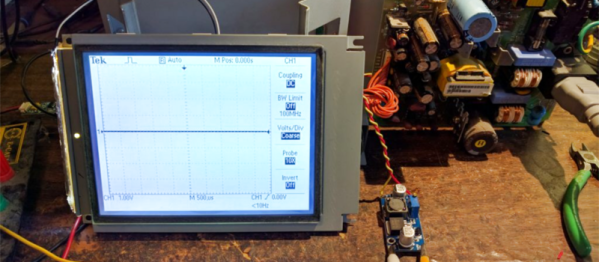
When you work at Tektronix and they make a difficult to refuse offer for their ‘scopes, you obviously grab it. Even if the only one you can afford is the not-so-awesome TDS1012. [Jason Milldrum] got his unit before cheaper, and better ‘scopes appeared on the market. It served him well for quite a long time. But keeping it switched on all the time took a toll, and eventually the CCFL backlight failed. Here’s how he replaced the CCFL back light with a strip of LED’s and revived the instrument.

Searching for an original replacement CCFL backlight didn’t turn up anything – it had been obsoleted long back. Even his back-channel contacts in Tektronix couldn’t help him nor could he find anything on eBay. That’s when he came across a video by [Shahriar] who hosts the popular The Signal Path blog. It showed how the CCFL can be replaced by a thin strip of SMD LEDs powered by a DC-DC converter. [Jason] ordered out the parts needed, and having worked at Tektronix, knew exactly how to tear down the ‘scope. Maybe he was a bit rusty, as he ended up breaking some (non-critical) plastic tabs while removing the old CCFL. Nothing which could not be fixed with some silicone sealant.

The original DC-DC converter supplied along with his LED strip needed a 12V input, which was not available on the TDS1012. Instead of trying to hack that converter to work off 6V, he opted to order out another suitable converter instead. [Jason]’s blog details all the steps needed, peppered with lots of pictures, on how to make the swap. The one important caveat to be aware of is the effect of the LED DC-DC converter on the oscilloscope. Noise from the converter is likely to cause some performance issues, but that could be fixed by using a more expensive module with RF and EMI filtering.

This is not an original hack for sure. Here’s a “Laptop backlight converted from CCFL to LED” from a few years back, and this one for “LCD: Replacing CCFL with LEDs” from even further back in time. Hopefully if you have an instrument with a similar issue, these ought to guide you on how to fix things.

Directional Booklight Invisible To Everyone But You

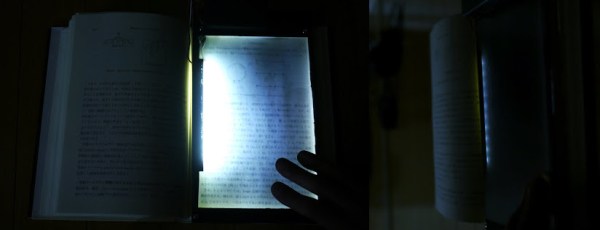
Consistent contributor [Ken] has cooked up another contraption with his directional booklight. Combining an LED strip and privacy screen filter inside a wooden enclosure, this handy tool is made for someone who wants to read in bed without disturbing anyone else. The booklight sits on top of the page, the LEDs light up just the given area, and because the privacy screen only allows light to come straight off the page, only the reader can see any light and any other viewing angle is obscured.

[Ken] thought of everything. Rather than have the light stay on while the booklight is lifted to turn the page and possibly flash an unsuspecting slumberer, a tactile switch on the underside turns the light on only when it is pressed against the page, allowing very little light to escape.

Future upgrades include another switch on top to detect when the book is closed, and an accelerometer to detect when the reader may have fallen asleep.

We’ve reported a few of [Ken]’s projects before, like his 3D popup cardsunique weather display, and semi-real-life Mario Kart

Continue reading “Directional Booklight Invisible To Everyone But You”

Meter Backlight

Adding A Backlight To A Cheap Multimeter

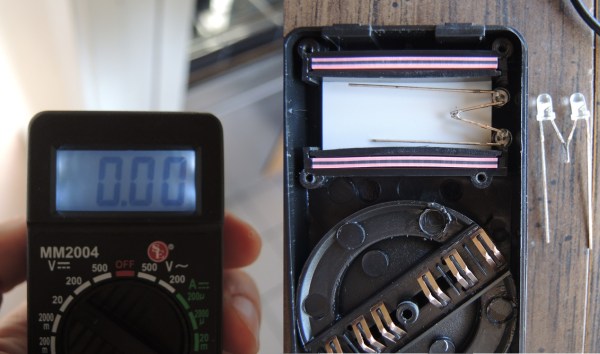
We don’t all need super high quality electronic testing gear. Sometimes second-hand or inexpensive equipment is accurate enough to get the job done. Though it can be a bit annoying to miss out on some of those “luxury” features. [Ekriirke] had this problem with his cheap multimeter. He wished the LCD screen had a backlight for easier visibility, so rather than upgrade to a more expensive unit he just added one himself.

After opening up the multimeter [Ekriirke] found that it ran on a single 12V battery. He realized that the simplest thing to do would be to wire up four white LEDs in series. The four LEDs were arranged within the case off to each side of the LCD, one in each corner. The leads were bent at 90 degree angles and soldered together “dead bug” style. Thin strips of copper foil tape were attached to the PCB in such a way that the anode and cathode from the LEDs would make contact when the case was closed back up.

The tape wraps around to the other side of the PCB where there was more room for the next piece of the circuit. A capacitor, resistor, and transistor are used in conjunction with a momentary switch. This circuit allows [Ekriirke] to turn on the light for about ten seconds by pressing the button one time. The circuit also runs through the meter’s dial switch, preventing the LEDs from being turned on while the meter itself is turned off.

[via Reddit]

DIY Keyboard Backlighting Takes Forever, Worth It

LED Keyboard with Custom Lights

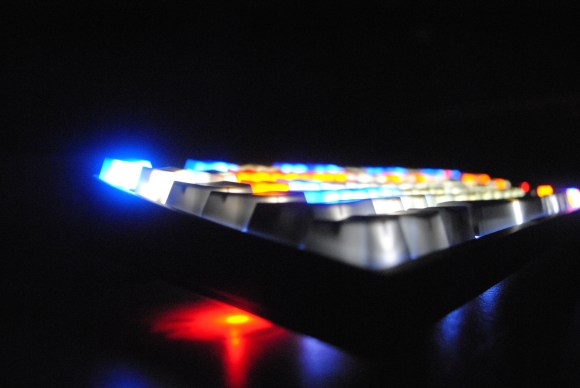
Want a back-lit keyboard? Make one yourself. Though you may not want to after seeing this build by [prodigydoo], who devoted 40 hours to upgrade his mechanical keyboard with a smattering of shiny.

No eye rolling just yet, though, because [prodigydoo’s] work is a monument to meticulous craftsmanship and dedication. So what if he accidentally dropped the keyboard’s PCB and cracked it? He patched that up with a few wires in true hacker-problem-solving fashion and no one will ever know.

With the electronics “safely” removed, [prodigydoo] set about desoldering every single key switch, then carefully detaching and disassembling the Cherry MX Blues. He then inserted an LED into each switch’s backplate, reassembled them, mounted the keys back on the board, then added some current-limiting resistors and heat shrink to the circuit. [prodigydoo] cut a few necessary holes for a power switch, state indicator LEDs (Caps Lock, etc.) and some under-the-board lighting, then rounded off the build by hooking up a power supply capable of running all the lights.

No microcontroller? No RGBLEDs? We like it anyway, and it seems [prodigydoo] is glad he kept it simple. Go check out the gallery for gritty details, an explanation of the circuit, and more pictures than your family vacation album.