One SMT Breakout To Rule Them All

You need to use surface-mount technology (SMT) parts in your design. But you also need to prototype. How to fit those little buggers into your breadboard?

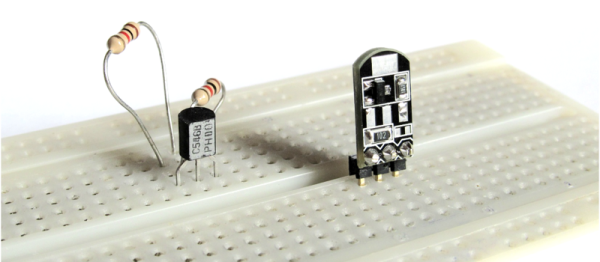
[Simon] came up with a general-purpose SMT-to-breadboard solution. Now, there are already myriad adapter boards for the many-pin devices: SSOP-to-DIP adapters and so on. But what do you do when you just need to work that tiny SOT223 voltage regulator into a breadboarded circuit?

[Simon]’s solution fills that gap with one breadboardable design to handle all of your small-pin-count part needs. It accommodates SOT223, SOT323, and SOT23 three-pin parts like transistors or voltage regulators, and also has pads for all of the common two-terminal parts like resistors and capacitors from 0402 on up to 1206. You could build up a full voltage regulator circuit on one of these things. He’s even included some whitespace on the back for your notes.

SMT parts aren’t even the future any more. And with the right procedure, they’re not hard to hand-assemble. So the next time you have some extra space in a PCB order, toss in a couple of [Simon]’s breakouts and you’ll be ready for your next breadboarding session.

Breadboard Colecovision

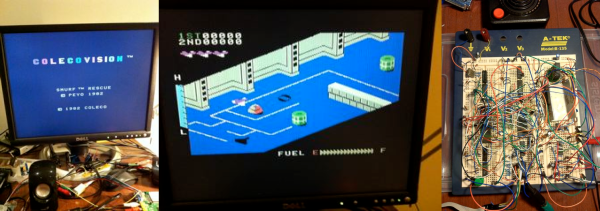
The Colecovision was a state-of-the-art game console back in 1983. Based around the Z-80, it was almost a personal computer (and, with the Adam add-on, it could serve that function, complete with a daisy wheel printer for output). [Kernelcrash] set out to recreate the Colecovision on a breadboard and kept notes of the process.

His earlier project was building a Funvision (a rebranded VTech Creativision) on a breadboard, so he started with the parts he had from that project. He did make some design changes (for example, generating separate clocks instead of using the original design’s method for producing the different frequencies needed).

Continue reading “Breadboard Colecovision”

At Last! A SIL-Duino!

There are some standard components that have been so continuously refined as to have become if not perfect then about as good as they’re going to get. Take the Arduino Uno for instance, and compare it with its ancestor from a decade ago. They are ostensibly the same board and they are compatible with each other, yet the Uno and its modern clones have more processing power, memory and storage, a USB interface rather than serial, and a host of small component changes to make them better and cheaper.

You’d think that just another Arduino clone couldn’t bring much to the table then. And you’d be right in a broad sense, just what is there left to improve?

[Clovis Fritzen] has an idea for an Arduino clone that’s worth a second look. It’s not an amazing hardware mod that’ll set the Arduino world on fire, instead it’s a very simple design feature. He’s created an Arduino that mounts vertically on a single row of pins. Why might you find that attractive, you ask? A SIL vertical Arduino takes up a lot less breadboard space than one of the existing DIL Arduinos. A simple idea, yet one that is very useful if you find yourself running out of breadboard.

[Clovis] took the circuit of an Arduino Uno and simplified it by removing the USB interface, so this board has to be programmed through its ICSP header. And he’s made it a through-hole board for easy construction by those wary of SMD soldering. The resulting board files can all be found on GitHub.

Every now and then along comes a hack so simple, obvious, and useful that it makes you wonder just why you didn’t think of it yourself. Many of us will have used a DIL Arduino and probably found ourselves running out of breadboard space. This board probably won’t change the world, but it could at least make life easier in a small way for some of us who tinker with microcontrollers.

This is just the latest of many Arduino clones to find its way onto these pages. In 2013 we asked why the world needed more when featuring one made as a PCB design exercise. There’s even a Hackaday version called the HaDuino developed by [Brian Benchoff]. But while it’s true that Yet Another Vanilla Arduino Clone brings nothing to the table, that should not preclude people from taking the Arduino and hacking it. Every once in a while something useful like this project will come from it, and that can only be a benefit to our community.

ARMing A Breadboard — Everyone Should Program An ARM

I’m always a little surprised that we don’t see more ARM-based projects. Of course, we do see some, but the volume isn’t what I’d expect given that low-level ARM chips are cheap, capable, low power, and readily available. Having a 32-bit processor with lots of memory running at 40 or 50 MIPS is a game changer compared to, say, a traditional Arduino (and, yes, the Arduino Due and Zero are ARM-based, so you can still stay with Arduino, if that’s what you want).

A few things might inhibit an Arduino, AVR, or PIC user from making the leap. For one thing, most ARM chips use 3.3V I/O instead of the traditional 5V levels (there are exceptions, like the Kinetis E). There was a time when the toolchain was difficult to set up, although this is largely not a problem anymore. But perhaps the largest hurdle is that most of the chips are surface mount devices.

Of course, builders today are getting pretty used to surface mount devices and you can also get evaluation boards pretty cheaply, too. But in some situations–for example, in classrooms–it is very attractive to have a chip that is directly mountable on a common breadboard. Even if you don’t mind using a development board, you may want to use the IC directly in a final version of a project and some people still prefer working with through hole components.

The 28 Pin Solution

One solution that addresses most, if not all, of these concerns is the LPC1114FN28 processor. Unlike most other ARM processors, this one comes in a 28 pin DIP package and works great on a breadboard. It does require 3.3V, but it is 5V tolerant on digital inputs (and, of course, a 3.3V output is usually fine for driving a 5V input). The chip will work with mbed or other ARM tools and after prototyping, you can always move to a surface mount device for production, if you like. Even if you are buying just one, you should be able to find the device for under $6.

Continue reading “ARMing A Breadboard — Everyone Should Program An ARM”

Organize That Messy Prototype

You’re working away busily at your project. A pcb here cabled to a breadboard in the middle, and over there some motors and other devices. It should work but it doesn’t. Time to hook-up the multimeter but the test point is on the other side. As things are moved around to reach the point, the magic smoke escapes from a critical component. Should have put those pliers away.

Workbenches are always messy. [Ryan Clark] may have an idea that can help.  His Jigmod system — currently running a kickstarter campaign — uses an acrylic a polycarbonate sheet with a grid of mounting holes to keep prototyping hardware in place. If you need to move the prototype around there is no strain on the wiring and no way to set a circuit down on that pair of pliers. The positioning of everything is your decision.

[Ryan] is also providing breakout type boards for connectors like USB and Ethernet, switches, battery holders, and other typical components. This is one place where the system really shines. A lot of these interface connectors tend to be breadboard-unfriendly and the terminal blocks these modules offer solves those issues. When you need to demonstrate your project it’s easy to transport since everything is attached to the plate. No more disconnecting cables, especially jumper wires, and hoping you get them all hooked back the right way at the destination.

With so many dev boards out there we really enjoy seeing jigs that can hold them along with a breadboard. This Stickvise-inspired 3D printed jig sticks out in our minds as a favorite. Do you have your own system of organizing your prototype builds? We’d love to hear about it in the comments!

Breadboards Go To Pot

Solderless breadboards are great for ICs and discrete components like resistors, capacitors, and transistors (at least the through hole kind). They aren’t so good at holding big components like potentiometers. Sure, you can jam trimmers in maybe. You can also solder leads to a pot, but that’s not pretty and tend to pull out when handled. [PaulStoffregen] got tired of it, so he put together some good looking PC boards that mount a 6mm shaft pot securely to a breadboard.

[Paul] noticed that having delicate or knobless adjustments on a breadboard inhibited people from playing with demo circuits. The new set up invites people to make adjustments. The pictures and video show an early version with six pins, but [Paul] added two more pins on the recent batch to increase the grip of the breadboard.

Continue reading “Breadboards Go To Pot”

Literal Breadboard Hack Forces It To Accept Dual Pin Headers

Usually when there is a clear demand for something, some entrepreneur will fill that demand. Unfortunately, no one seems to think there’s a need for a solderless breadboard product that can handle boards that have a dual row header. These devices have 0.1″ spacing in both directions, so while they will fit in a standard breadboard, the contacts will short out the adjacent pins on the device, which makes it worthless.

[Baz] needed to connect an RF24L01 module to a breadboard. Instead of connecting leads to the device or devising a breakout board, [Baz] actually hacked his breadboard. To make an area to plug in a dual row device, he took the breadboard apart, pulled the spring contacts, cut them, and then put them back in.

Of course, you have to make sure the cut is wide enough that the two parts of the spring won’t touch. It looks like [Baz] used a small screwdriver to help the springs keep their shape and cut them with simple diagonal cutters.

Continue reading “Literal Breadboard Hack Forces It To Accept Dual Pin Headers”