Super-Simple VGA Adapter Sports Low-Res Output With Only Four TTL Chips

Here at Hackaday we cast a wary eye at tips that come in with superlative claims. Generally, if we post something that claims to be the fastest or the smallest of all time, we immediately get slapped down in the comments by someone who has done it faster or smaller. So we present the simplest TTL video card ever knowing the same thing will happen, but eager to see how anyone might scale things down.

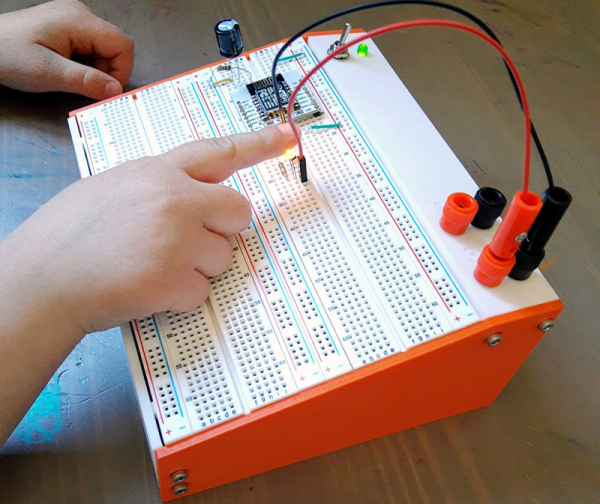
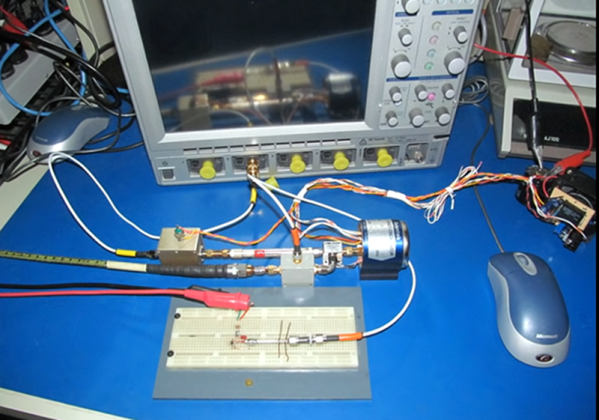
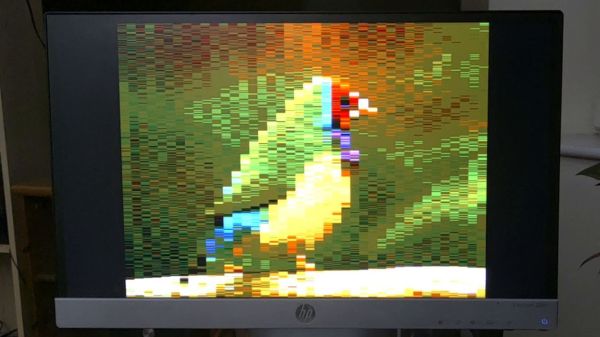
To be fair, [George Foot] does qualify his claim to the simplest usable VGA adapter, and he does note that it descends from [Ben Eater]’s “world’s worst video card”, which he uses for his 6502 breadboard computer. But where [Ben]’s VGA adapter uses about 20 TTL chips and an EEPROM, [George] has managed to decrease the BOM to just four TTL chips along with the memory and a crystal oscillator. This required a fair number of compromises, of course; the color depth is fairly low, as is the resolution. Each pixel appears as a thin horizontal bar rather than a small square, leading the images to be smeared out across the screen. They’re still surprisingly viewable, though, which probably says more about the quality of the pattern-recognition wetware between our ears than anything about the quality of the adapter. [George] gives a tour of the circuit in the brief video below.

It looks like [George] has posted a few improvements to the project since we first spotted it, so we’re looking forward to seeing how much the parts count went up. We’re also keen to see if anyone can outdo the simplicity of this effort — be sure to let us know if you give it a shot.

Continue reading “Super-Simple VGA Adapter Sports Low-Res Output With Only Four TTL Chips”

SMD Breadboard Adaptors Skip Schematic, Goes Straight To PCB

If you need to add one or two SMT chips to your breadboarded prototype, [Travis Hein] has you covered. He designed a set of small SMD adaptor boards for various SOIC, SOT23, and DPAC patterns using KiCad.  He has released them as open source, so you can feel free to use them or modify them as needed.

Normally we don’t see people bypassing the schematics when designing a PCB. But we can agree that [Travis] has found a situation where going direct to PCB makes more sense. He just plops down the package in Pcbnew, adds some pin headers and wires everything up directly on the PCB. (But don’t worry, some of you may remember [Travis] from his earlier SSR mains switching project, which demonstrates that he can indeed draw proper schematics.) We know there are more people out there who prefer to go straight to PCB layout… [mikeselectricstuff] comes to mind. If you could yourself among this tribe, let use know your reasoning in the comments below.

We wrote about a similar universal breakout boards for SMD parts back in 2016, which is a single breakout board for two- and three-pin jelly-bean components. If you paired some of those boards with [Travis]’s breakout boards, it would make a great combination to keep in your prototyping gadgets bin. Consider this project the next time your favorite PCB shop has a sale.

A Breadboard Block For 8-Bit CPUs

Breadboard CPUs are a fantastic learning experience and require serious dedication and patience. Occasionally, CPU builders eschew their breadboards and fab their design onto a PCB. But this takes away the flexibility and some of the opportunity for learning that breadboard CPUs offer. [c0pperdragon] was doing the same sort of repetitive wiring from project to project as most 8-bit breadboard CPUs use memory, a bus, an IO controller, ROM, and a few other passive components.

Taking a compromise approach, [c0pperdragon] built a PCB that can be used as a building block in his custom CPUs which they have titled “ByteMachine”. A single row of 34 pins offer power, clock, reset, 19 address bus lines, 8 data bus lines, and a ROM selector. This means that the CPUs can fit on a single breadboard and can run faster as the impedance of the breadboard has less effect on the circuit. With 512 KB of RAM and 512 KB of ROM, in a ZIF socket for easy reprogramming, ByteMachine has plenty of space.

One drawback is the lack of IO. There is no dedicated address space as this would require decoding logic between the RAM and the CPU. [C0pperdragon] added a simple 8-bit output register provided by a 74-series logic IC. The data is displayed on 8 red LEDs and can be accessed via pins. Input is accomplished in a similar way with just 8 bits of digital input provided.

[C0pperdragon] has built the 65C02, 65C816Z84C00, and the i8088 with the ByteMachine. Each was documented with incredible schematics, pictures, and test programs on GitHub. Next time you’re looking to build a CPU on a breadboard, maybe start with a ByteMachine. In some ways, it might improve your learning experience as it makes the incredible mass of wires we’ve seen on other projects a tad more manageable.

Thanks [Reinhard Grafl] for sending this one in!

Developing An Open Source Electronics Trainer

It’s a safe bet that most Hackaday reader’s interest in electronics started at a young age, and that their early forays into the world of hardware hacking likely involved some form of “playground” kit. As long as you didn’t lose any of the components, these kits promised the user that hundreds of possible projects were just a few jumper wires away. Extra points awarded for when you decide to toss away the manual and fly solo.

While there’s still no shortage of such products on the market, [Josh Kittle] felt the concept could do with a freshening up. His open hardware “Microcontroller Trainer” harkens back to those old multi-kits, but adds in the sort of high-tech gadgetry that makes the modern DIY world go round.

It’s still got the traditional layout: a center mounted breadboard surrounded by an array of LEDs, a handful of buttons, and a pair of potentiometers. But there’s also sockets for the Raspberry Pi, ESP8266, ESP32, and Arduino. Plus a few of their most popular friends to keep them company: a .96″ OLED, 2.4″ Touch TFT, and a BC05 Bluetooth module.

Originally [Josh] created this design to help clean up his own workspace, figuring he could just put his most used components on a single compact board. But as you might expect, others expressed interest in the concept. Now he’s producing them as kits, and even working his way towards a third hardware revision that adds features such as an integrated 18650 battery for portable use.

While electronics kits that have you build a functional device are a great way to learn the ropes, we’re always glad to see fresh takes on the classic electronic “playground” concept.

Fewer Millimeters Make A Useful ESP32 Devboard

Sometimes the most useful hacks aren’t the flashiest, they’re the ones that improve an already great tool and make something better. Through hole components are still the fastest and perhaps most satisfying way to prototype a new electronics project so it’s extra frustrating when the happy hacker discovers their new devboard is too wide to fit in a standard breadboard. [Tobias] had the same thought and redesigned the standard ESP32 “NodeMCU” style devboard to be almost exactly the same, but narrower.

Interactive BOMs make assembly a snap

Not to trivialize, but that’s pretty much it. And we love it! The new design retains the great support of the original devboard but adds a few nice tweaks. Obviously there’s the small size change that allows it to fit on a standard 5×5 breadboard leaving sockets available on either side for interfacing. Even in this smaller size [Tobias] managed to retain the boot mode and reset buttons though the overall pinout has changed slightly. And for easier connections ye olde micro USB socket has been swapped for sleek modern USB-C. You have cables for that common standard now, right?

How do you get one? As far as we know [Tobias] isn’t selling these but the design is completely open source and the design, fab, and BOM files are all in the github repository. [Tobias] even went so far as to include the extremely handy interactive BOM to speed up hand assembly. The real trick here is that the board is designed to facilitate the extremely inexpensive turnkey assembly now available from our favorite fab houses, with an example cost of $8/piece for a run of five. The repo includes a properly formatted BOM and fab files to make ordering them a snap. See the bottom of the README for details about what to order.

Breadboarding Console Has The Power

It is hard to remember how expensive an electronic hobby used to be. It wasn’t long ago, for example, that a solderless breadboard was reasonably expensive and was likely to have some sort of baseboard. The nicer ones even had a power supply or some simple test instruments. While you can still buy that sort of thing today, the low cost of bare breadboards have made them much more common. [Sebastian] decided to use his 3D printer to give those cheap breadboards a nice home.

The design looks great, and frankly isn’t much of a technical triumph, but it is useful and clean looking. The build uses some banana jacks, a switch, an LED, a 9V battery, and a common small power supply module. Of course, you also need a few breadboards.

Continue reading “Breadboarding Console Has The Power”

Breadboard Breaks The Speed Barrier

It is common wisdom that solderless breadboards are only good for low frequencies. But how fast can they really go? There’s been a contest going on to see who can make the fastest breadboard-mounted oscillator and [Joe Smith] has been trying to keep his leading position. He’s already managed 6 GHz and now he’s shooting for 20 GHz, as you can see in the video below.

One of the biggest challenges at these frequencies is just measuring your output. You may have a scope, but how does it do at 20 GHz? So half of the story is how [Joe] managed to monitor his output.

Continue reading “Breadboard Breaks The Speed Barrier”