The least pleasant space in most houses is likely to be the space below it. Basements tend to be dank, dusty, and full of too many things that have too many legs. And even worse than the full basement is the dreaded crawlspace, which adds claustrophobia to the long list of unpleasantries that lie below. Sadly, though, a crawlspace might be a handy place to run wires, and if you’re hesitant to delve too deeply, this FPV cable-laying rig might be something to keep in mind.
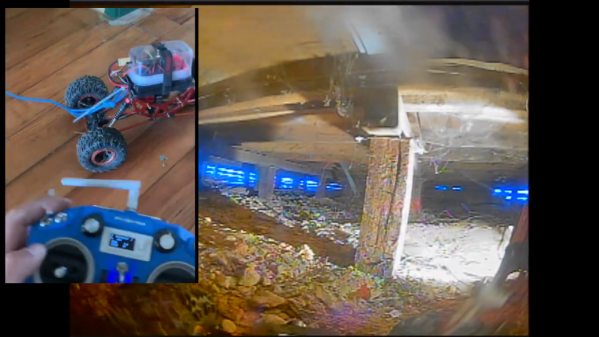
This one comes to us from [Old Alaska] with very little detail other than what’s in the brief video below. The setup is clear enough — a need to run an Ethernet cable from one side of the house to the other, and a crawlspace to do it in. Also in the toolkit was an RC rock crawler with a field-expedient FPV camera. With Breaking Bad-style access to the crawlspace through a few floorboards, [Old Alaska] was able to deploy the crawler dragging a Cat 5 cable behind it. The terrain under the house made the rock crawler a good choice, with four-wheel-drive, locking differentials, and an articulating frame. The bot’s-eye view also makes it clear that actually crawling in this rubble-strewn crawlspace would be a painful affair.
With very little drama, [Old Alaska] was able to navigate the crawler across the crawlspace to the outer wall of the house, where he could fish the wire out and complete the connection — no fuss, no muss, no bloody knees. The only quibble we’d have is not running an extra length of pull rope with the wire. You never know when it’ll come in handy.
The whole thing reminds us of a more tactical version of [Cliff Stoll]’s subterranean inventory management bot.
Continue reading “Send This FPV Bot Into The Crawlspace To Do Your Dirty Work”