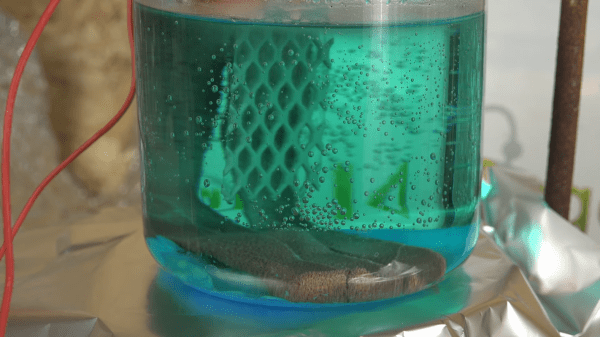
Jan Czochralski And The Silicon Revolution

If you were to travel back in time to the turn of the previous century and try to convince the average person that the grains of sand on just about any beach would be the basis of an industry worth hundreds of billions of dollars within 100 years, they’d probably have thought you were crazy. Aside from being coarse, rough, and irritating, sand is everywhere, and convincing anyone of its value would be a hard sell, unless your interlocutor was a real estate visionary with an appreciation of the future value of seaside property and a lot of patience.

Fast forward to our time, and we all know the value of the material that comes from common quartz sand: silicon, specifically the ultra-purified crystals of silicon that end up as the wafers we depend on to build the circuitry of life. The trip from beach to chip foundry is a long and non-obvious one which would not have been possible without the insights of an undistinguished Polish student and one-time druggist who discovered the process that made the Information Age possible: Jan Czochralski.

Continue reading “Jan Czochralski And The Silicon Revolution”

Compile A Hydroponics System From Source

Tending to a garden is usually a rewarding endeavor, as long as there is good soil to work with. If there isn’t, it can either get frustrating quickly having to deal with soils like sand or hard clay, or it can get expensive by having to truck in compost each year. Alternatively, it’s possible to set up systems of growing plants that don’t need any soil at all, although this requires an automated system otherwise known as hydroponics to manage water and nutrients sent to the plants.

This setup by [Kyle] is unique in that it uses his own open-source software which he calls Mycodo to control the hydroponic system. It is loaded onto a Raspberry Pi 4 (which he notes can now be booted from a USB drive instead of an SD card) which controls all of the peripherals needed for making sure that the water has the correct amount of nutrients and chemical composition.

The build is much more than just a software control panel, though. [Kyle] walks through every part of setting up a small hydroponic system capable of effectively growing 15-20 plants indoors. He grows varieties of lettuce and basil, but this system can work for many more types of plants as well. With just slight variations, a similar system can not only grow plants like these, but fish as well.

Continue reading “Compile A Hydroponics System From Source”

DIY Closed-Cell Silicone Foam

Most of us have a junk drawer, full of spare parts yanked from various places, but also likely stocked with materials we bought for a project but didn’t use completely. Half a gallon of wood glue, a pile of random, scattered resistors, or in [Ken]’s case, closed-cell silicone foam. Wanting to avoid this situation he set about trying to make his own silicone foam and had a great degree of success.

Commercial systems typically rely on a compressed gas of some sort to generate the foam. Ken also wanted to avoid this and kept his process simple by using basic (pun intended) chemistry to generate the bubbles. A mixture of vinegar and baking soda created the gas. After a healthy amount of trial and error using silicone caulk and some thinner to get the mixture correct, he was able to generate a small amount of silicone foam. While there only was a bit of foam, it was plenty for his needs. All without having a stockpile of extra foam or needing to buy any specialized equipment.

We appreciate this project for the ingenuity of taking something relatively simple (an acid-base reaction) and putting it to use in a way we’ve never seen before. While [Ken] doesn’t say directly on the project page what he uses the foam for, perhaps it or a similar type of foam could be used for building walk-along gliders.

Photo via Wikimedia Commons

Making Aerogel, It’s Not For The Faint-Hearted

Aerogel — that mixture of air and silica — is one of those materials that seems like a miracle. It is almost not there since the material is 99% air. [NileRed] wanted to make his own and he documented his work in a recent video you can see below.

If you decide to replicate his result, be careful with the tetramethyl orthosilicate. Here’s what he says about it:

And the best part is, that when it’s in your eyes, it gets under the surface, and the particles are way too small to remove. For this reason, you could go permanently blind.

It can also mess up your lungs, so you probably need a vent hood to really work with this. It isn’t cheap, either. The other things you need are easier to handle: methanol, distilled water, and ammonia.

Continue reading “Making Aerogel, It’s Not For The Faint-Hearted”

Using Additives For Better Performing Epoxy

Epoxy resins are an important material in many fields. Used on their own as an adhesive, used as a coating, or used in concert with fiber materials to make composites, their high strength and light weight makes them useful in many applications. [Tech Ingredients] decided to explore how combining basic epoxy resin with various additives can make it perform better in different roles.

The video primarily concerns itself with explaining different common additives to epoxy resin mixtures, and how they impact its performance. Adding wood flour is a great way to thicken epoxy, allowing it to form a bead when joining two surfaces. Microbeads are great to add if you’re looking to create a sandable filler. Other additive like metal powders lend the mixture resistance to degradation from UV light, while adding dendritic copper creates a final product with high thermal conductivity.

The video does a great job of not only explaining the additives and their applications, but also shares a few handy tips on best workshop practices. Things like triple-gloving and observing proper mixing order can make a big difference to your workflow and lead to better results.

We’ve seen practical applications of epoxy mixes before – with epoxy granite being a particularly popular material. Video after the break.

Continue reading “Using Additives For Better Performing Epoxy”

Bullet-proofing Your Car With An Affordable Composite Armor

Remember those actions movies like The Fast and the Furious where cars are constantly getting smashed by fast flying bullets? What would it have taken to protect the vehicles from AK-47s? In [PrepTech]’s three-part DIY composite vehicle armor tutorial, he shows how he was able to make his own bulletproof armor from scratch. Even if you think the whole complete-collapse-of-civilization thing is a little far-fetched, you’ve got to admit that’s pretty cool.

The first part deals with actually building the composite. He uses layers of stainless steel, ceramic mosaic tiles, and fiberglass, as well as epoxy resin in order to build the composite. The resin was chosen for its high three-dimensional cross-linked density, while the fiberglass happened to be the most affordable composite fabric. Given the nature of the tiny shards produced from cutting fiberglass, extreme care must be taken so that the shards don’t end up in your clothes or face afterwards. Wearing a respirator and gloves, as well as a protective outer layer, can help.

After laminating the fabric, it hardens to the point where individual strands become stiff. The next layer – the hard ceramic – works to deform and slow down projectiles, causing it to lose around 40% of its kinetic energy upon impact. He pipes silicone between the tiles to increase the flexibility. Rather than using one large tile, which can only stand one impact, [PrepTech] uses a mosaic of tiles, allowing multiple tiles to be hit without affecting the integrity of surrounding tiles. While industrial armor uses boron or silicon carbide, ceramic is significantly lower cost.

The stainless steel is sourced from a scrap junkyard and cut to fit the dimensions of the other tiles before being epoxied to the rest of the composite. The final result is allowed to sit for a week to allow the epoxy to fully harden before being subject to ballistics tests. The plate was penetrated by a survived shots from a Glock, Škorpion vz. 61, and AK-47, but was penetrated by the Dragunov sniper rifle. Increasing the depth of the stainless steel to at least a centimeter of ballistic grade steel may have helped protect the plate from higher calibers, but [PrepTech] explained that he wasn’t able to obtain the material in his country.

Nevertheless, the lower calibers were still unable to puncture even the steel, so unless you plan on testing out the plate on high caliber weapons, it’s certainly a success for low-cost defense tools.

Continue reading “Bullet-proofing Your Car With An Affordable Composite Armor”

Tracking Wasted Time With A Ferrofluid Clock

We know this project is supposed to be about developing a fine-looking ferrofluid clock, and not about the value of procrastination. But after watching the video below, see if you don’t think that procrastination has taken these two students further than expected.

We first ran into [Simen] and [Amund] several months ago when they launched their ferrofluid project in a fit of “There’s got to be more to life than studying.” It seemed then that building a good-looking, functional ferrofluid display would be a temporary distraction, but the problems posed proved to be far deeper and thornier than either of the electrical engineering students expected. The idea is simple: contain a magnetic fluid between two transparent panels and create pixels using an array of electromagnets to move dots of the fluid around. The implementation, however, was another matter, with the ferrofluid itself proved to be the biggest obstacle. All the formulas they tried seemed to coagulate or degrade over time and tended to stain the glass. While the degradation was never fully sorted, they managed to work around the staining by careful cleaning of the glass and using a saturated brine solution to fill the container.

Backed by 252 electromagnets and drivers on ten custom PCBs, the video below shows the (mostly) finished panel in action as a clock. We’re impressed by the smoothness of the movements of each pixel, even if there’s a bit of drooping at the bottom thanks to gravity. As for the future of the project, that’s unclear since [Simen] is headed off for a NASA internship. We’re not sure if that was despite or because of this procrastination-driven project, but we congratulate him either way and look forward to hearing more from both of them in the future.

Continue reading “Tracking Wasted Time With A Ferrofluid Clock”