Binary Advent Calendar Does More With Fewer Doors

[John] sent this one in to us a little bit after Christmas, but we’ll give him a pass because it’s so beautiful. Think of it this way: now you have almost a full year to make a binary advent calendar of your own before December 1st rolls around again.

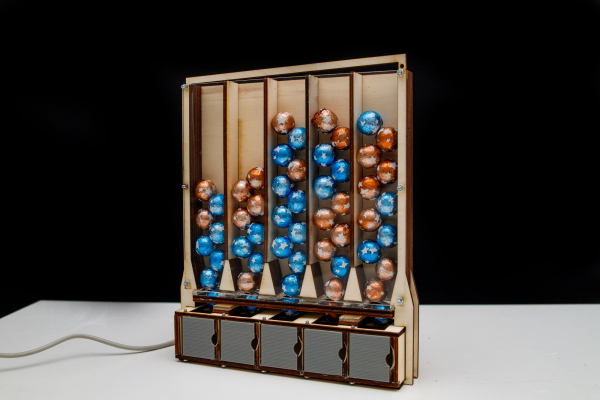
Normal advent calendars are pretty cool, especially when there is chocolate behind all 24 doors. But is it really a representational ramp-up if you never get more than one chocolate each day? [John] doesn’t think so. The economics of his binary advent calendar are a bit magical, much like the holiday season itself. Most days you’ll get two pieces of chocolate instead of one, and many days you’ll get three. That is, as long as you opened the right doors.

A momentary switch hidden behind the hinge of each door tells the Arduino clone when it’s been opened. The Arduino checks your binary counting abilities, and if you’re right, a servo moves a gate forward and dispenses one chocolate ball per opened door. We love the simplicity of the dispensing mechanism — the doors are designed with a ceiling that keeps non-qualifying chocolates in their channels until their flag comes up.

[John] is working out the kinks before he releases this into the wild. For now, you can get a taste in the demo video featuring a bite-sized explanation. If you don’t like chocolate, maybe this blinky advent calendar will light you up inside.

Continue reading “Binary Advent Calendar Does More With Fewer Doors”

Watch This LEGO Pantograph Carve Chocolate Messages

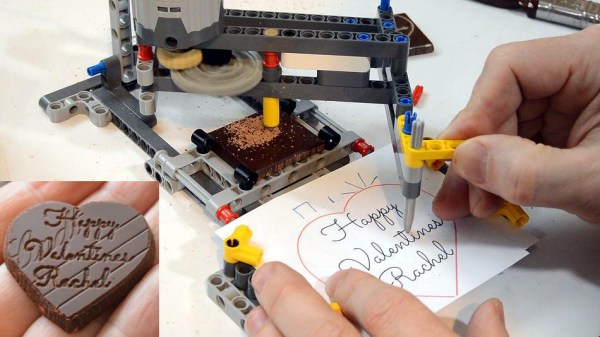
[Matthias Wandel] is best known for his deeply interesting woodworking projects, so you might be forgiven for not expecting this lovely chocolate-engraving pantograph made from LEGO. With it, he carves a delightful valentine’s message into a square of chocolate, but doesn’t stop there. He goes the extra mile to cut the chocolate carefully into a heart, and a quick hit with a heat gun takes the rough edges off for a crisp and polished end result.

The cutting end is a small blade stuck inside a LEGO piece, but that’s the only non-LEGO part in the whole assembly. A key to getting a good carve was to cool the chocolate before engraving, and you can see the whole process in the video embedded below.

Continue reading “Watch This LEGO Pantograph Carve Chocolate Messages”

Maker Faire NY: Cocoa Press Chocolate Printer

If you haven’t figured it out by now, the hype over desktop filament printers is pretty much over. But that doesn’t mean there aren’t new avenues worth exploring that use the basic FDM printer technology. If anything, the low cost and high availability of 3D printer parts and kits makes it easier to branch off into new territory. For example, experimenting with other materials which lend themselves to being “printed” layer by layer like a thermoplastic. Materials such as cement, clay, or even chocolate.
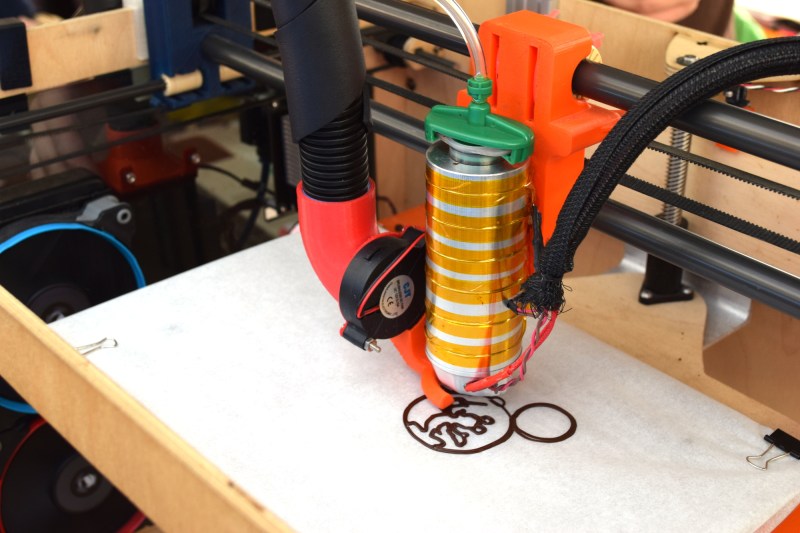
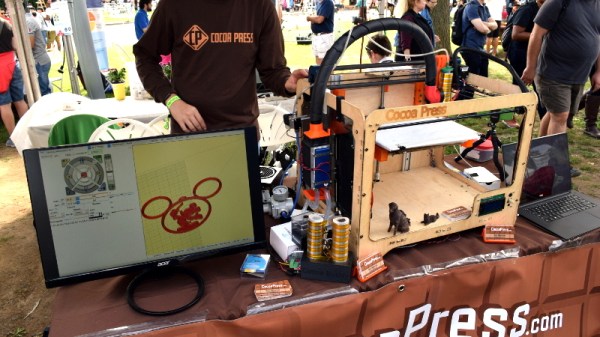
[Ellie Weinstein] brought her Cocoa Press printer to the 2018 World Maker Faire in New York, and we have to say it’s a pretty impressive piece of engineering. Hackers have been known to throw a syringe-based paste extruder onto a regular 3D printer and try their luck with squirting out an edible object from time to time, but the Cocoa Press is truly a purpose built culinary machine.

Outwardly it features the plywood case and vaguely Makerbot-looking layout that we’ve seen plenty of times before in DIY 3D printers. It even uses the same RAMPS controller running Marlin that powers your average homebrew printer. But beyond these surface similarities, the Cocoa Press has a number of purpose-built components that make it uniquely qualified to handle the challenges of building with molten chocolate.

For one, beyond the nozzle and the walls of the syringe, nothing physically comes into contact with the chocolate to be printed; keeping the mess and chance of contamination to a minimum. The leadscrew actuated plunger used in common paste extruders is removed in favor of a purely air powered system: a compressor pumps up a small reservoir tank with filtered and dried air, and the Marlin commands which would normally rotate the extruder stepper motor are intercepted and used to trigger an air valve. These bursts of pressurized air fill the empty area above the chocolate and force it out of the 0.8 mm nozzle.
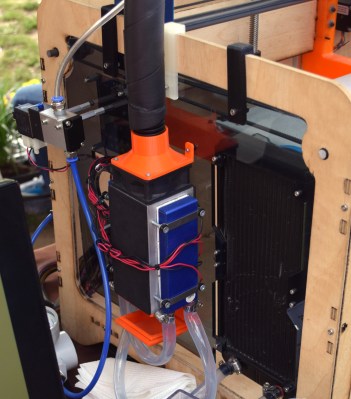
In a normal 3D printer, the “melt zone” is tiny, which allows for the heater itself to be relatively small. But that won’t work here; the entire chocolate load has to be liquefied. It’s a bit like having to keep a whole roll of PLA melted during the entire print. Accordingly, the heater on the Cocoa Press is huge, and [Ellie] even had a couple spare heaters loaded up with chocolate syringes next to the printer to keep them warm until they’re ready to get loaded up.

Of course, getting your working material hot in a 3D printer is only half the battle, you also need to rapidly cool it back down if you want it to hold its shape as new layers are placed on top of it. A normal 3D printer can generally get away with a little fan hanging next to the nozzle, but [Ellie] found the chocolate needed a bit of a chill to really solidify.

So she came up with a cooling system that makes use of water-cooled Peltier units. The cold side of the Peltier array is inside a box through which air is forced, which makes its way through an insulated hose up to the extruder, where a centrifugal fan and 3D printed manifold direct it towards the just-printed chocolate. She reports this system works well under normal circumstances, but unusually high ambient temperatures can overwhelm the cooler.

While “the man” prevented show goers from actually eating any of the machine’s creations (to give out food in New York, you must first register with the city), they certainly looked fantastic, and we’re interested in seeing where the project goes from here.

Delicious Optics, A Chocolate Diffraction Grating

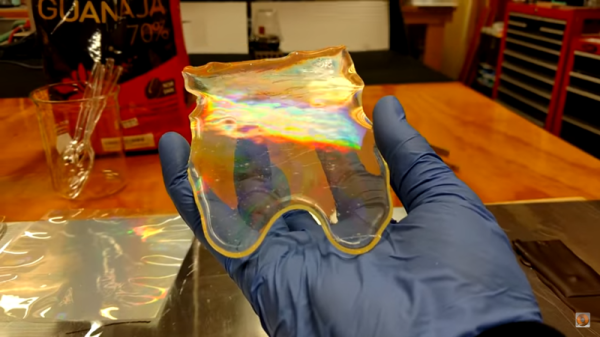
Diffraction gratings are curious things. Score a series of equally spaced tiny lines in a surface, and it will cause reflected or transmitted light to bend and separate into its component wavelengths. This ability gives them all manner of important applications in the field of optics, but they’re also fun to play with. [Tech Ingredients] has done the hard work to find out how to make them out of candy!

The video starts with a basic discussion on the principles of diffraction gratings. The basis of the work is a commonly available diffraction grating, readily available online. It’s a plastic sheet with thousands of microscopic ridges scored into the surface. The overarching method to create a candy version of this is simple — coat the ridged surface in liquid chocolate or sugar syrup, to transfer the impression on to the candy surface when it solidifies. However, the video goes further, explaining every step required to produce a successful end result. The attention to detail is on the level of an industrial process, and shows a mastery of both science and candy processing techniques. If you’ve ever wondered how to properly crystallize chocolate, this video has the knowledge you need.

It’s not often we see candy optics, but we like it — and if you fail, you can always eat your mistakes and try again. If you’re wondering what you can do with a diffraction grating, check out this DIY USB spectrometer.

Chocolate Factory Simulation Makes Bars With LEGO

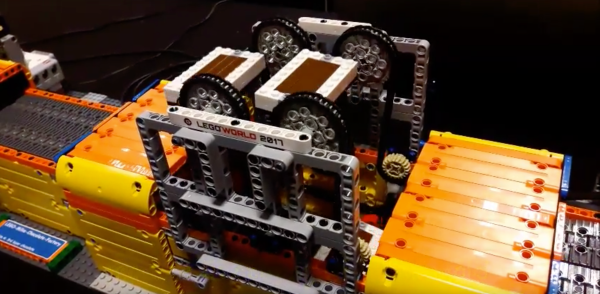
[Michael Brandl] got to visit the Milka chocolate factory in Bludenz, Austria and was inspired to build this simulation of the production process for the LEGO world 2017 event in Copenhagen.

The process begins with the empty mold riding on a double row of tank treads. Subsequent modules seem to fill the mold with LEGO ingredients, cool the bars, and remove them from the mold. The last two steps rock: [Michael] built a dispenser that drops a tiny cardboard box onto the line, sized to hold 3 LEGO bars. The box rolls to the end of the line and is picked up by a pneumatic gripper that picks up the box and places it on a pallet.

While more whimsical than the LEGO liquid handler we featured recently, there are a lot of interesting robotic techniques to be learned here. On the reverse angle video you can see more of what’s going on with the wiring of the various motors and sensors. There are six EV3 bricks scattered along the length of the assembly line. The bricks control 15 small motors, 2 large motors, 7 touch sensors, and 3 light sensors. [Michael] added some nice touches, like the combo of two color sensors, seen around 1:45 of the reverse angle video, possibly used to keep the factory operations synced.

Check out [Michael’s] Mindstorms sendup of [Anouk Wipprecht’s] drink bot dress. The LEGO version was built for Robotexotica. In addition, he has a lot of projects featured on his site.

Continue reading “Chocolate Factory Simulation Makes Bars With LEGO”

Pancake-ROM: Eat-only Memory?

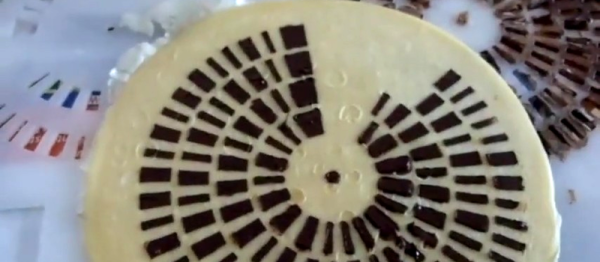
You can store arbitrary data encoded in binary as a pattern of zeros and ones. What you do to get those zeros and ones is up to you. If you’re in a particularly strange mood, you could even store them as strips of chocolate on Swedish pancakes.

Oddly enough, the possibility of the pancake as digital storage medium was what originally prompted [Michael Kohn] to undertake his similar 2013 project where he encoded his name on a paper wheel. Perhaps wisely, he prototyped on a simpler medium. With that perfected, four years later, it was time to step up to Modified Swedish Pancake Technology (MSPT).

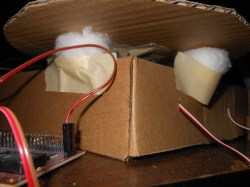
pancake_rom_bottomHighlights of the build include trying to optimize the brightness difference between chocolate and pancake. Reducing the amount of sugar in the recipe helps increase contrast by reducing caramelization, naturally. And cotton balls placed under the spinning cardboard platform can help stabilize the spinning breakfast / storage product.

Even so, [Michael] reports that it took multiple tries to get the sixteen bytes (bites?) of success in the video below. The data is stenciled onto the pancake and to our eye is quite distinct. Improvement seems to be more of an issue with better edge detection for the reflectance sensor.

Continue reading “Pancake-ROM: Eat-only Memory?”

Choctopus Chocolate Printer X8

Valentine’s Day is about a month away, long enough for everyone to butcher upgrade their 3D printers to squirt out chocolate. Food printing was a hot item at this year’s CES, but it is hardly new. Before many of you were born [Hans] left his job at the Council for Scientific and Industrial Research to produce chocolate out of his garage in South Africa. This one prints 8 at a time!

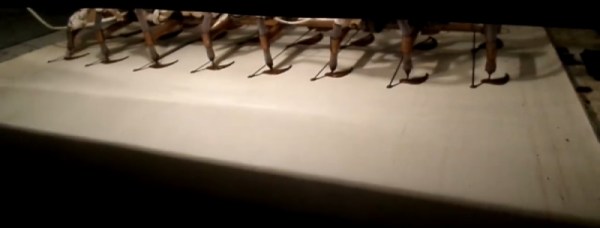
HAD - Choctopus1Many years before he was extruding lawnmowers from raw pellets, [Hans] built the 8-tentacled Choctopus. He gets away with using only one chocolate pump – from some experience, by far the most challenging component – by simply splitting the ooze pipe with three tiers of T intersections. The whole design is actually patented and revolutionary for 19 years ago but to our readers probably unremarkable.

HAD - Choctopus4There is a business lesson here too. Once upon a time the Choctopus was a  3D printer but economic constraints have led to him downgrading to 2D. Any 3D requirements are served from an alternate RepRap. The purpose of an 8-armed printer is to mass produce, but for the price, most clients were only interested in a one-off. The products that pay the bills are the much more affordable 2d extrusions in bulk.

Any of our readers looking to impress their date make lots of money next month, consider this the kick in your pants to get started.

Check out these videos of the Choctopus churning out delicious delicatessens.

Continue reading “Choctopus Chocolate Printer X8”