A Classy USB Knob For The Discerning Computerist

The keyboard and mouse are great, we’re big fans. But for some tasks, such as seeking around in audio and video files, a rotary encoder is a more intuitive way to get the job done. [VincentMakes] liked the idea of having a knob he could turn to adjust his system volume or move forward and backwards through a stream in VLC, but he also wanted to be able to repeatedly enter keyboard commands with it; something commercial offerings apparently weren’t able to do.

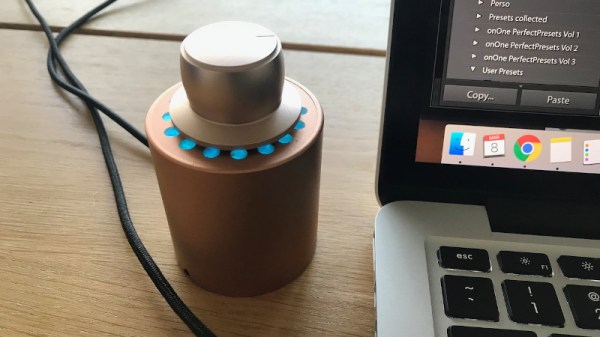
So he decided to build his own USB knob that not only looks fantastic, but offers the features he couldn’t find anywhere else. It’s another project which proves that DIY projects don’t have to look DIY. In fact, they can often give their commercial counterparts a run for their money. But this “Infinity USB Knob” isn’t just a pretty face, it allows the user to do some very interesting things such as quickly undo and redo changes to see how they compare.

As you might imagine, the electronics for this project aren’t terribly complex. The main components are the Adafruit Trinket M0 microcontroller and the EC11 rotary encoder itself. To provide nice visual feedback he added in a NeoPixel ring, but that’s not strictly necessary if you’re trying to rig this up yourself. Though we have to say the lighting effects are a big part of what makes this build look so good.

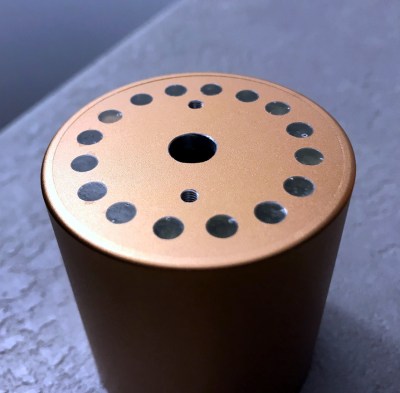
Though certainly not the only part. The aluminum enclosure, combined with the home theater style knob on the encoder, really give the finished product a professional look. We especially like his method of drilling out the top of the case and filling in the holes with epoxy to create easy and durable LED diffusers. Something to keep in mind for your next control panel build, perhaps.

[VincentMakes] has done an excellent job of documenting the hardware and software sides of this build on Hackaday.io, and gives the reader enough information that replicating this project should be pretty straightforward for anyone who’s interested. While we’ve seen several rotary encoder peripherals for the computer in the past, we have to admit this is one of the most compelling yet from a visual and usability standpoint. If this build doesn’t make you consider adding a USB knob to your arsenal, nothing will.

Continue reading “A Classy USB Knob For The Discerning Computerist”

Fueled By Jealousy, This Smart Lamp Really Shines

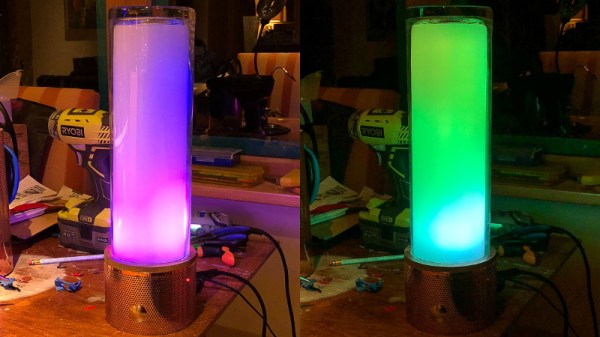
As a lover of lava lamps, [Julian Butler] knew when he saw a coworker’s modern LED incarnation of the classic piece of illuminated decor that he had to have one for himself. The only problem was that the Kickstarter for it had long since ended, and they were no longer available. So he did what any good hacker would do: he studied it closely, took a bunch of notes, and built his own version that ended up being even better than the original.

In the three part series on his blog, [Julian] takes us through the design and construction of his take on the Ion Mood Light, which raised over $72,000 back in 2014. The details in the Kickstarter campaign plus his own first-hand observations of the device were enough to give him the high-level summary: the device has a core of RGB LEDs behind a diffuser, and uses some software trickery to pulse out some pleasing effects and patterns. He wasn’t concerned about the Bluetooth or the smartphone application, so all he really needed to do was put some NeoPixel LEDs inside a glass cylinder and he’d be done. Of course, it always sounds easy…

The actual journey to get there, as you might have guessed from the three part series, took awhile. Sourcing the LEDs was easy enough, and using a Fadecandy controller made getting the LEDs to blink out some cool patterns fairly straightforward. But it took [Julian] a bit of experimentation and a few trips to the crafts store before he found a material which would diffuse the LEDs enough for his tastes. Though in the end, he thinks the multiple layers of acrylic he ended up going with actually do a better job of blending the light from the individual LEDs than in the original Ion.

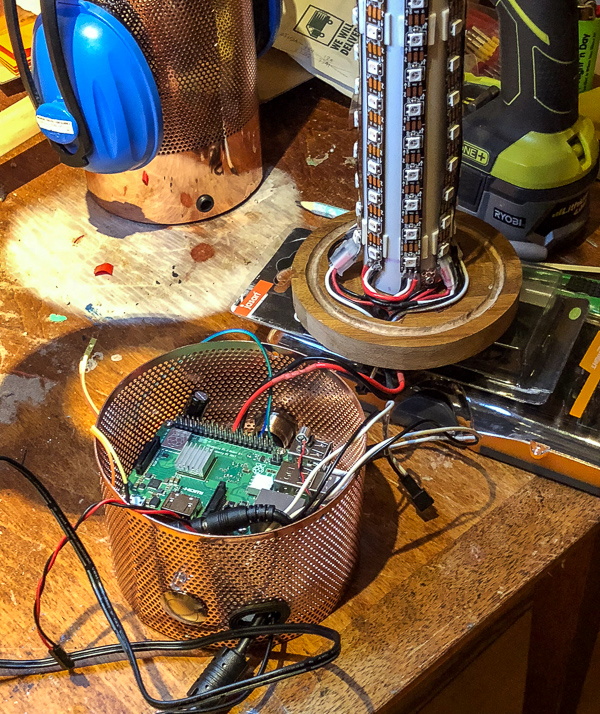
Using the Fadecandy made it easy to drive the LEDs, but he still needed something to provide it with the commands. To that end, he added a decorative base to his LED column that hides a Raspberry Pi and all the lamp’s associated electronics. This includes a microphone which gives his lamp the same sort of sound reactive features that made the Ion so popular. The base does make his lamp a bit bulkier than the original version, but the metallic mesh construction is attractive enough the overall look works.

Of course, you might be wondering how [Julian] got the LEDs to react to sound, or do any of the other gorgeous effects shown off in the video after the break. The software which makes this possible makes up the third and final post in the series, and is really a whole project in itself. The short version of the story is that he used Python and Processing to do real-time computational fluid dynamics, but not before making the necessary adjustments to speed up the simulation on ARM hardware. You know, normal lamp stuff.

This isn’t the first time we’ve seen projects using the Fadecandy board. From creating a Tron inspired desk to building the 5,760 LED “Space Tunnel”, it looks like a great choice if you’ve got a problem that can be solved by the application of a ridiculous number of LEDS.

Continue reading “Fueled By Jealousy, This Smart Lamp Really Shines”

3D Printed Diffusers Make More Natural Light

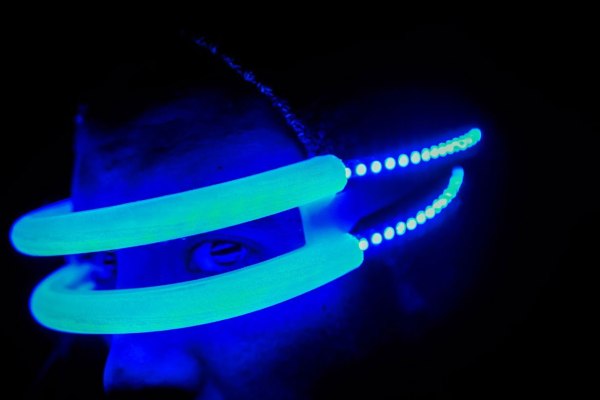
A strip of LEDs may be a simple and flexible way to add light to a project, but they don’t always look natural.  There is an easy way to make them look better, though: add a diffuser. That’s what [Nate Damen] did using a 3D printer. He created a diffuser using PETG giving a standard string of LEDs a softer and more natural look that makes them look more like older light sources such as fluorescent strips or EL wire, but with the flexible colors of LEDs. The PETG material he used has a naturally somewhat cloudy look, so it acts as a diffuser without needing any extra treatment.

Continue reading “3D Printed Diffusers Make More Natural Light”

Watch The Honeycomb Clock Gently Track Time

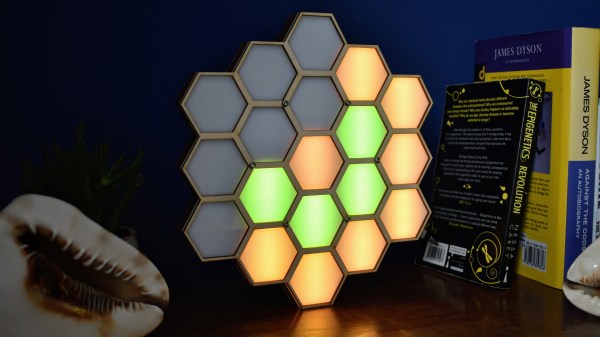
We love clocks here at Hackaday, and so does [John Whittington]. Last year he created this hexagonal honey clock (or “Honock”) by combining some RGB LEDs with a laser-cut frame to create a smooth time display that uses color and placement to display time with a simple and attractive system.

The outer ring of twelve hexagons is essentially the hour hand, similar to analog clock faces: twelve is up, three is directly to the right, six is straight down, and nine is to the left. The inner ring represents ten minutes per hex. Each time the inner ring fills, the next hex (hour) on the outer ring lights up. The whole display is flooded with a minute-long rainbow at noon and midnight. Watch it in action in the video, embedded below.

Continue reading “Watch The Honeycomb Clock Gently Track Time”

Let There Be Light Rings!

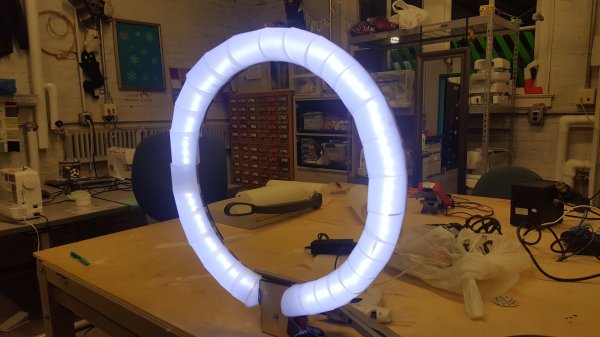
[Brandon Rice] is at it again — this time to level-up your photography and video production skills with a diffused light ring.

Inspired into creating more video content, he wanted to forgo the price tag associated with consumer lighting rigs. A 19″ diameter ring fit his requirements, but since the only laser cutter he had access to was limited to 12″x14″, he was forced to assemble it in pieces. As he screwed it together, he hid the M6 screws by pointing them ‘forwards,’ to be hidden underneath the diffusing vellum material. Liberal application of hot glue has kept the arched vellum and the LED strips in place with only a nominal number of burned fingers.

Continue reading “Let There Be Light Rings!”

This Big, Bright Seven-Segment Display Is 3D-Printable

Seven-segment LED displays have been around forever, it seems, and the design is pretty optimized by now. Off-the-shelf units are readily available in all sorts of sizes and colors, but if you want a really big display, you might have to roll your own. Scaling up the size doesn’t necessarily mean you have to scale up the complexity, though, if this light-pipeless jumbo seven-segment LED display is any indication.

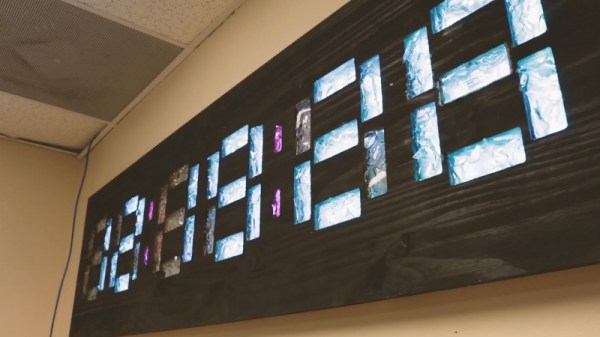
It’s clear that [Fran Blanche] has a thing for collecting and building oddball numeric displays, like this cathode ray tube Nixie knockoff or her Apollo DSKY electroluminescent display. Her plus-size seven-segment display is far less complicated than either of those, and that’s by design; [Fran] wanted something that was 3D-printable as a single part, rather than an assembly with light pipes and diffusers. To that end, the display is just a pair of X-shaped dividers stacked on top of each other behind the display’s face. They dividers form six triangular compartments and a diamond shaped one, with each compartment opening into a segment-shaped window. One LED goes in each triangular compartment, while the double-sized diamond space gets two. That’s it — the LEDs light up the inside of each compartment to turn on the appropriate segments. Watch it in action below.

The display still needs some tweaking, but it’s big and bright and has a large acceptance angle. What’s more, it’s scalable — imagine a display the size of a sheet of plywood using LED light bulbs. We’re looking forward to [Fran]’s improvements and her next display project, which appears to use hot glue as a light pipe.

Continue reading “This Big, Bright Seven-Segment Display Is 3D-Printable”

Lamp Analysis Tells Sad Truth Behind The Marketing Hype

Here in the northern hemisphere, winter has wrapped us in her monochromatic prison. A solid deck of gray clouds means you need a clock to tell the difference between night and day, and by about the first week of February, it gets to feeling like you’ll never see a blue sky again. It’s depressing, to be honest, and the lack of sunlight can even lead to a mood disorder known as SAD, or seasonal affective disorder.

SAD therapy is deceptively simple — bright full-spectrum light, and lots of it, to simulate the sun and stimulate the lizard brain within us. Not surprisingly, such lights are available commercially, but when [Justin Lam] bought one to help with his Vancouver blues, he decided to analyze the lamp’s output to determine whether the $70 he spent paid for therapy or marketing.

The initial teardown was not encouraging, with what appeared to be a standard CFL “curly fry” light with a proprietary base in a fancy plastic enclosure. With access to a spectrometer, [Justin] confirmed that not only does the SAD light have exactly the same spectrum as a regular CFL, the diffuser touted to provide “full UV protection” does so simply by attenuating the entire spectrum evenly so that the UV exposure falls below the standards. In short, he found that the lamp was $70 worth of marketing wrapped around a $1.50 CFL. Caveat emptor.

Hats off to [Justin] for revealing the truth behind the hype, and here’s hoping he finds a way to ameliorate his current SAD situation. Perhaps one of these DIY lamps will be effective without the gouging.