Folks who refurbish and rebuild vans into off-grid campers (especially with the ability to work in them remotely) put a fantastic amount of planning and work into their projects. [Rob] meticulously documented his finished van conversion and while he does a ton of clever work, we especially liked how he shows modern tools like photogrammetry can improve the process.
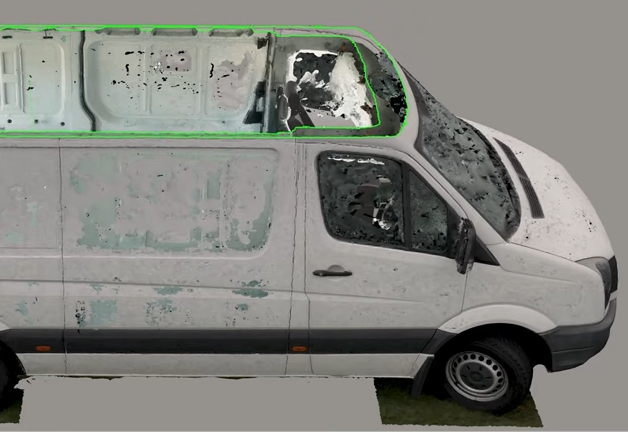
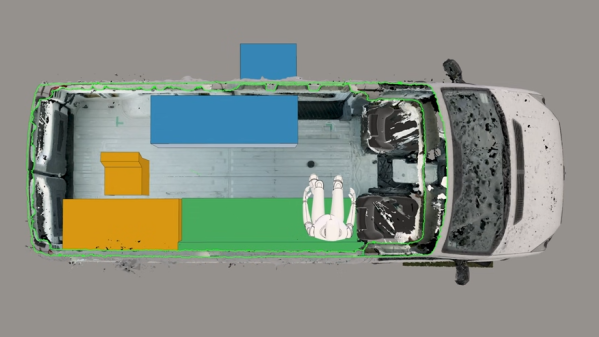
[Rob] used a camera and photogrammetry software to 3D scan the van inside and out. The resulting model means that CAD tools can better assist with the layout and design phase. This is an immense help, because as [Rob] points out, an empty van is anything but a hollow box on wheels. Every surface is curved, none of the sides are identical, and there frankly isn’t a right angle to be found anywhere. When every little scrap of space counts, it’s important to have an accurate reference.
Of course, mapping the work are was just the beginning. It took six months, but he turned a Volkswagen Crafter cargo van into a slick off-grid camper capable of remote work. The full series of videos is on his site, but you can also watch the video highlights, embedded below.
The photogrammetry was done with Meshroom, and if you’d like to know more, we’ve previously explained different 3D scanning methods and how they can help with design work like this.
Continue reading “Off-Grid Van Build Uses 3D Scanning For Smarter Planning”