For those of us who don’t do it every day, handling sheet metal can be a nerve-wracking affair. Sheet metal is thin, heavy, and sharp, and one wrong move while handling it can have much the same result as other such objects, like guillotine blades. If only there was a way to lessen the danger.
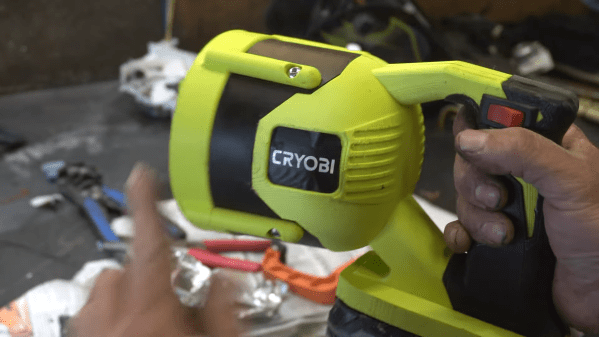
Perhaps something like this electromagnetic sheet metal handler by [Lucas] over at “Cranktown City” would be useful in keeping one’s fingers and toes attached. Like many interesting builds, this one starts with the dismemberment of a couple of old microwave ovens, to liberate their transformers. Further dissection resulted in open-frame electromagnets, which when energized with a battery from a Ryobi cordless tool do a fine job sticking to stuff.
[Lucas] then harvested the battery connector from the cheapest possible Ryobi tool — an electric fan — and built a prototype, which worked well enough to proceed to a more polished version two. This one had the same guts in a nicely designed case, 3D-printed from lime green filament for that OEM look. The video below shows the design and build, as well as field testing. We have to say this gave us a bit of pause, especially when the battery popped out of one of the handlers and sent the sheet on a near-miss of [Lucas]’ toes. Close call there.
If you’re thinking that you’ve seen MOTs repurposed as electromagnets before, you’re right. Whether climbing like [Spider-Man], lifting heavy steel beams, or walking upside down, microwave oven transformers are the key.
Continue reading “Handle Sheet Metal With The Power Of Microwave Oven Electromagnets”