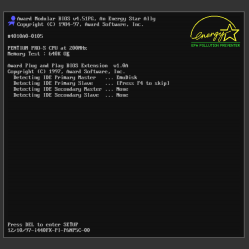
A NABU PC opened up and powered on

NABU PC Gets CPU Upgrade, Emulates A TRS-80

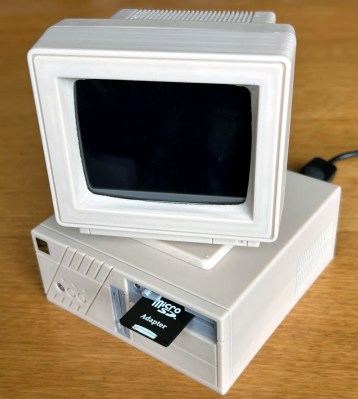
The NABU PC caused a bit of a buzz in the retrocomputing community a couple weeks back. After all, it doesn’t happen often that a huge batch of brand-new computers from the 1980s suddenly becomes available on eBay. Out of the box, the computer itself isn’t that useful: with no internal storage, or any application software whatsoever, it can really only serve as a bare-bones development platform. But since its hardware is quite similar to that of other contemporary home computers, emulating one of those shouldn’t be too difficult, which is exactly what [Ted Fried] did: he managed to turn his NABU into a TRS-80 clone by using his MCLZ8 CPU emulator.

The MCLZ8 is basically an 800 MHz Teensy CPU with an adapter board that allows it to be plugged into a Z80 socket. It emulates the Z80 CPU in real-time, but it also holds the TRS-80 ROM and performs real-time translation between peripherals. On the input side, it reads out the ASCII characters coming in from the NABU’s 8251A UART and stores them in the virtual TRS-80’s keyboard buffer. On the output side, it transfers the TRS-80’s video data to the NABU’s TMS9918 video chip.

The motherboard of a NABU PC with a Teensy-based CPU upgradeOne problem [Ted] ran into was a difference in screen resolution: the NABU has a 40×24 character display, while the TRS-80 generates a 64×16 character image. [Ted] solved the vertical difference by simply keeping the NABU logo on the screen at all times, and decided to just ignore the 24 characters that drop off the right side – it’s not a big issue for a typical BASIC program anyway.

The repurposed NABU might not be a perfect TRS-80 clone, but that’s not the point: it shows how easily the NABU’s hardware can be reprogrammed to do other things. For example, [Ted] has already started work on a new project that doesn’t emulate the Z80, but instead runs code directly on the Teensy’s ARM A9 processor. As you might imagine, this gives the NABU several orders of magnitude more processing power, although the practical use of this is limited because the CPU still has to wait for the NABU’s slow data bus and display chip. [Ted] explains the setup and runs a few impressive demos in the video embedded below.

[Ted]’s NABU experiments are a great example of the Teensy board’s flexibility: we’ve already seen how it can emulate a Z80 as well as an 8088. We’re also curious to see what others will develop with the NABU’s hardwareif they can still buy it, of course.

Continue reading “NABU PC Gets CPU Upgrade, Emulates A TRS-80”

a Pi Pico on a breadboard, running a 7-segment counter gateware, with a 7-segment digit and a pushbutton next to the Pico

Want To Play With FPGAs? Use Your Pico!

Ever want to play with an FPGA, but don’t have the hardware? Now, if you have one of those ever-abundant Pi Picos, you can start playing with Verilog without getting an FPGA board. The FakePGA project by [tvlad1234], based on the Verilator toolkit, provides you with a way to compile Verilog into C++ for the RP2040. FakePGA even integrates RP2040 GPIOs so that they work as digital pins for the simulated GPIOs, making it a significant step up from computer-aided FPGA code simulation

[tvlad1234] provides instructions for setting this up with Linux – Windows, though untested, could theoretically run this through WSL. Maximum clock speed is 5KHz – not much, but way better than not having any hardware to test with. Everything you’d want is in the GitHub repo – setup instructions, Verilog code requirements, and a few configuration caveats to keep in mind.

We cover a lot of projects where FPGAs are used to emulate hardware of various kinds, from ISA cards to an entire Game BoyCPU emulation on FPGAs is basically the norm — it’s just something easy to do with the kind of power that an FPGA provides. Having emulation in the opposite direction is unusual,  though, we’ve seen FPGAs being emulated with FPGAs, so perhaps it was inevitable after all. Of course, if you have neither a Pico nor an FPGA, there’s always browser based emulators.

Continue reading “Want To Play With FPGAs? Use Your Pico!”

Blinky Project Is 6502s All The Way Down

Virtually any platform you might find yourself programming on has some simple method of running a delay. [Joey Shepard] got rather creative on a recent project, though, relying on a rather silly nesting method that we’re calling 6502s All The Way Down.

The project in question was a simple PCB that was shaped like a robot, with blinking LED eyes. Typically, you’d simply reach for the usual sleep() or delay() function to control the blink rate, but [Joey] went off-piste for this one. Instead, the PIC32 on the board runs a 6502 emulator written in MIPS assembly. This emulated 6502 is then charged with running a further 6502 emulator coded in 6502 assembly, and so on, until there’s 6502 emulators running six-deep on the humble microcontroller. The innermost emulator runs a simple program that blinks the LED eyes in a simple loop. With the overhead of running six emulators, though, the eyes only blink at a rate of roughly once every two seconds.

It’s an amusing and complicated way to write a blink program, and we applaud [Joey] for going to all that trouble. We imagine it was a great way to learn about programming the PIC32 as well as emulation in general. Meanwhile, if you’re working on your own emulator feats, be sure to let us know!

A 386 motherboard with a custom ISA card plugged in

Emulate Any ISA Card With A Raspberry Pi And An FPGA

One of the reasons the IBM PC platform became the dominant standard for desktop PCs back in the mid-1980s was its open hardware design, based around what would later be called the ISA bus. Any manufacturer could design plug-in cards or even entire computers that were hardware and software compatible with the IBM PC. Although ISA has been obsolete for most purposes since the late 1990s, some ISA cards such as high-quality sound cards have become so popular among retrocomputing enthusiasts that they now fetch hundreds of dollars on eBay.

So what can you do if your favorite ISA card is not easily available? One option is to head over to [eigenco]’s GitHub page and check out his FrankenPiFPGA project. It contains a design for a simple ISA plug-in card that hooks up to a Cyclone IV FPGA and a Raspberry Pi. The FPGA connects to the ISA bus and implements its bus architecture, while the Pi communicates with the FPGA through its GPIO ports and emulates any card you want in software. [eigenco]’s current repository contains code for several sound cards as well as a hard drive and a serial mouse. The Pi’s multi-core architecture allows it to run several of these tasks at once while still keeping up the reasonably high data rate required by the ISA bus.

In the videos embedded below you can see [eigenco] demonstrating the system on a 386 motherboard that only has a VGA card to hook up a monitor. By emulating a hard drive and sound card on the Pi he is able to run a variety of classic DOS games with full sound effects and music. The sound cards currently supported include AdLib, 8-bit SoundBlaster, Gravis Ultrasound and Roland MT-32, but any card that’s documented well enough could be emulated.

This approach could also come in handy to replace other unobtanium hardware, like rare CD-ROM interfaces. Of course, you could take the concept to its logical extreme and simply implement an entire PC in an FPGA.

Continue reading “Emulate Any ISA Card With A Raspberry Pi And An FPGA”

Putting A Little More Juice In Your Emulation Station

After you’ve built a snazzy Raspberry Pi-powered retro gaming console, you might be wondering if you could have just a wee bit more power and run some of those other games you might remember, such as Xbox, Wii, or PS3. Perhaps in the future, a later revision of an RPi could handle it but currently, to emulate the 6th/7th generation of consoles, you need something a little beefier. Luckily, [Zac] got his hands on an old gaming laptop and turned it into his own game console.

The first step was to take the laptop apart and discard the parts not needed. [Zac] stripped away the battery, Bluray drive, and spinning hard disk. That left him with a much smaller PCB that could fit into a small case. The power button was integrated into the keyboard but came into the motherboard by the flat cable keyboard connection. So by bridging a few pins, he could power up the laptop. Next, he upgraded the RAM, wifi card, an NVMe drive, and redid all the thermal paste and putty to try and keep things cool while overclocking the GPU.

The case for the machine heavily used his CNC as it was walnut with a mid-section made of plywood. The top has a gorgeous cast acrylic window to see inside. The part the [Zac] was dreading with the fine pitch soldering. Ultimately he got both wires connected with good connections and no bridging. Because it’s just a PC at its heart, almost every game is on the table. Emulation, some more moderate PC games, streaming from his office PC, and cloud gaming services allow him to access most games made. We love the concept and the idea.

We love the aesthetic of the build but if you prefer to keep your consoles looking a little more faithful, why not put your mini PC inside of an actual N64 case? Video after the break.

Continue reading “Putting A Little More Juice In Your Emulation Station”

The Little Lightgun That Could: Sinden Makes Good

Back in 2018, we covered the work being done by [Andrew Sinden] to create a lightgun that could work on modern televisions. The project was looking for funding via Kickstarter, but due at least in part to skepticism about the technology involved, the campaign fell well short of its goal. It seemed, at the time, like the story would end there.

But we were recently pointed to a fascinating interview with [Andrew] that ran in The Guardian a couple months back that not only tells the rest of the story, but concludes with a happy ending — after years of hard work, the Sinden Lightgun is now available for purchase. It’s not exactly the turn-key product that some would like, as there’s a fair number of hoops one must jump through just to bag some eponymous waterfowl in Duck Hunt, but nothing that would scare off the average Hackaday reader.

Limited technical details about the 2018 prototype may have kept backers away.

The final version of the hardware ditches the realistic firearm aesthetic inherited from the Wii gun accessory it was designed to fit into, and now features a brightly-colored pistol enclosure that wouldn’t look out of place tethered to a Virtua Cop machine. It’s also gained an optional recoil solenoid for force feedback, though it tacks on another $60 to the already hefty $100 price tag for the base model.

We’re glad to see that [Andrew] recognized the importance of getting Linux support for the software side of things, as it enabled the development of a pre-configured Retropie image for the Raspberry Pi 4. Though you aren’t forced to emulate on the Pi, for those who would like to blast the occasional zombie on their desktop, Windows and x86 Linux are also supported.

Often times, when we cover a project here on Hackaday it’s a one-shot deal: somebody had a particular need or desire, built a gadget to fulfill it, and moved on. There’s nothing wrong with that, but there’s a certain feeling of pride when we see a project from this community develop into something more. While not every hacked together piece of hardware we feature has the potential to be the next Arduboy or Sinden Lightgun, we like to think that we’ve already covered the next big project-turned-product success story and just don’t know it yet.

Continue reading “The Little Lightgun That Could: Sinden Makes Good”

A modern Tamagotchi PCB design and built-up prototype

Classic Tamagotchi Is Reincarnated In Modern Hardware

If you thought that Tamagotchis were a late ’90s fad that has faded from most people’s memory by now, you’d be wrong: the franchise is still alive and well today, with new models being released regularly. But even the original model from 1996, known as Tamagotchi P1, is being kept alive by a small group of enthusiasts. When ROM dumps of the original hardware began floating around the internet a couple of years ago, even those without the real thing could run these virtual pets in an emulator.

But the whole idea of the Tamagotchi hardware was that it was portable enough to carry around anywhere. If you’re among those who missed that part of the Tamagotchi experience, you’ll be pleased to know that [JC] designed OpenTama: a portable hardware platform that runs an emulated version of the original Tamagotchi P1 software. It’s about as close as it gets to those first-generation virtual pets, but with several additions that make your life easier.

The software platform is [JC]’s TamaLib which we featured last year; in effect it’s an open-source emulator that allows the Tamagotchi ROM to run on a variety of modern hardware platforms. It also contains several additional options like the ability to save and restore your progress or to select customized ROMs. The OpenTama hardware, meanwhile, is a proper 21st-century reimplementation of the original: a small, egg-sized PCB sporting an STM32 microcontroller driving an LCD or OLED display, powered by a 100 mAh battery that can be recharged through a USB-C port.

OpenTama is not limited to the TamaLib software, either: as an open-source general-purpose platform, it can also be used as a learning tool for embedded programming, so if you’ve always wanted to program your own virtual pet, or are simply looking to build a fancy egg timer, OpenTama’s GitHub page is the way to go. We’ve seen quite a few neat Tamagotchi-like projects recently: this 3D-printed one comes with a nice retro LCD screen, while this one’s giant size ensures you don’t forget to feed it.

Continue reading “Classic Tamagotchi Is Reincarnated In Modern Hardware”