Encrypt Data On The Fly On A Pi With Cryptopuck

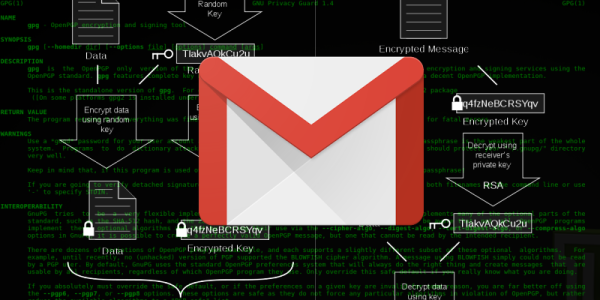
There was a time that encryption was almost a dirty word; a concept that really only applied to people with something to hide. If you said you wanted to encrypt your hard drive, it may as well have been an admission to a crime. But now more than ever it’s clear that encryption, whether it’s on our personal devices or on the web, is a basic necessity in a digital society. The age of Big Data is upon us, and unless you’re particularly fond of being a row in a database, you need to do everything you can to limit the amount of plaintext data you have.

Of course, it’s sometimes easier said than done. Not everyone has the time or desire to learn how the different cryptographic packages work, others may be working on systems that simply don’t have the capability. What do you do when you want to encrypt some files, but the traditional methods are out of reach?

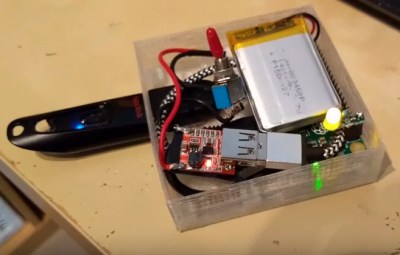
Enter the latest project from [Dimitris Platis]: Cryptopuck. By combining the ever-versatile Raspberry Pi Zero, some clever Python programs, and a few odds and ends in a 3D printed case, he has created a completely self-contained encryption device that anyone can use. Stick a USB flash drive in, wait for the LED to stop blinking, and all your files are now securely encrypted and only accessible by those who have the private key. [Dimitris] envisions a device like this could be invaluable for reporters and photographers on the front lines, protesters, or really anyone who needs a discreet way of quickly securing data but may not have access to a computer.

The hardware side is really just the Pi, a switch, a single LED for notifications, and a battery. The real magic comes from the software, where [Dimitris] has leveraged PyCrypto to perform the AES-256 encryption, and a combination of pyinotify and udiskie to detect new mounted volumes and act on them. The various Python scripts that make up the Cryptopuck suite are all available on the project’s GitHub page, but [Dimitris] makes it very clear the software is to be considered a proof of concept, and has not undergone any sort of security audit.

For some background information on how the software used by the Cryptopuck works you may want to check out this excellent primer from a few years back; though if you’d like to read up on why encryption is so important, you don’t need to go nearly as far back in time.

Continue reading “Encrypt Data On The Fly On A Pi With Cryptopuck”

Practical IoT Cryptography On The Espressif ESP8266

The Espressif ESP8266 chipset makes three-dollar ‘Internet of Things’ development boards an economic reality. According to the popular automatic firmware-building site nodeMCU-builds, in the last 60 days there have been 13,341 custom firmware builds for that platform. Of those, only 19% have SSL support, and 10% include the cryptography module.

We’re often critical of the lack of security in the IoT sector, and frequently cover botnets and other attacks, but will we hold our projects to the same standards we demand? Will we stop at identifying the problem, or can we be part of the solution?

This article will focus on applying AES encryption and hash authorization functions to the MQTT protocol using the popular ESP8266 chip running NodeMCU firmware. Our purpose is not to provide a copy/paste panacea, but to go through the process step by step, identifying challenges and solutions along the way. The result is a system that’s end-to-end encrypted and authenticated, preventing eavesdropping along the way, and spoofing of valid data, without relying on SSL.

We’re aware that there are also more powerful platforms that can easily support SSL (e.g. Raspberry Pi, Orange Pi, FriendlyARM), but let’s start with the cheapest hardware most of us have lying around, and a protocol suitable for many of our projects. AES is something you could implement on an AVR if you needed to.

Continue reading “Practical IoT Cryptography On The Espressif ESP8266”

How A Hacker Remembers A PIN

If you have more than a few bank cards, door-entry keycodes, or other small numeric passwords to remember, it eventually gets to be a hassle. The worst, for me, is a bank card for a business account that I use once in a blue moon. I probably used it eight times in five years, and then they gave me a new card with a new PIN. Sigh.

Quick, What’s My PIN?

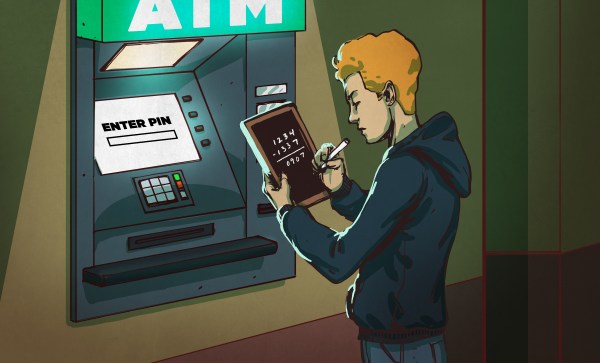
How would a normal person cope with a proliferation of PINs? They’d write down the numbers on a piece of paper and keep it in their wallet. We all know how that ends, right? A lost wallet and multiple empty bank accounts. How would a hacker handle it? Write each number down on the card itself, but encrypted, naturally, with the only unbreakable encryption scheme there is out there: the one-time pad (OTP).

The OTP is an odd duck among encryption methods. They’re meant to be decrypted in your head, but as long as the secret key remains safe, they’re rock solid. If you’ve ever tried to code up the s-boxes and all that adding, shifting, and mixing that goes on with a normal encryption method, OTPs are refreshingly simple. The tradeoff is a “long” key, but an OTP is absolutely perfect for encrypting your PINs.

The first part of this article appears to be the friendly “life-hack” pablum that you’ll get elsewhere, but don’t despair, it’s also a back-door introduction to the OTP. The second half dives into the one-time pad with some deep crypto intuition, some friendly math, and hopefully a convincing argument that writing down your encrypted PINs is the right thing to do. Along the way, I list the three things you can do wrong when implementing an OTP. (And none of them will shock you!) But in the end, my PIN encryption solution will break one of the three, and remain nonetheless sound. Curious yet? Read on.

Continue reading “How A Hacker Remembers A PIN”

Chris Conlon: Device Security 101

We all wring our hands over the security (or lack thereof!) of our myriad smart devices. If you haven’t had your home network hacked through your toaster, or baby cam, you’re missing out on the zeitgeist. But it doesn’t have to be this way — smart devices can be designed with security in mind, and [Chris Conlon] came to Pasadena to give us a talk on the basics.

He starts off the talk with three broad conceptual realms of data security: data in transit, data at rest on the device, and the firmware and how it’s updated. A common thread underlying all of this is cryptography, and he devotes the last section of his  talk to getting that right. So if you’d like a whirlwind tour of device security, watch on!

Continue reading “Chris Conlon: Device Security 101”

Reverse Engineering An ST-Link Programmer

We’re not sure why [lujji] would want to hack ST’s ST-Link programmer firmware, but it’s definitely cool that he did, and his writeup is a great primer in hacking embedded devices in two parts: first he unpacks and decrypts the factory firmware and verifies that he can then upload his own encrypted firmware through the bootloader, and then he dumps the bootloader, figures out where it’s locking the firmware image, and sidesteps the protection.

[lujji]’s project was greatly helped out by having the firmware’s encryption keys from previous work by [Taylor Killian]. Once able to run his own code on an intact device, [lujji] wrote a quick routine that dumped the entire flash ROM contents out over the serial port. This gave him the bootloader binary, the missing piece in the two-part puzzle.

If you’ve ever broken copy protection of the mid-1990’s, you won’t be surprised what happened next. [lujji] located the routine where the bootloader adds in the read protection, and NOPped it out. After uploading firmware with this altered bootloader, [lujji] found that it wasn’t read-protected anymore. Game over!

We glossed over a couple useful tips and tricks along the way, so if you’re into reversing firmware, give [lujji]’s blog a look. If you just want a nice ARM programmer with UART capabilities, however, there’s no reason to go to these extremes. The Black Magic Probe project gives you equal functionality and it’s open source. Or given that the official ST-Link programmers are given away nearly free with every Nucleo board, just buying one is clearly the path of least resistance. But a nice hack like this is its own reward for those who want to take that path. Thanks, [lujji] for writing it up.

Crack Mike Tyson’s Punch Out Bang Bang Passwords

[Bisqwit] has feelings about games that use exclamation points in his idiosyncratic walkthrough of all the nuances of the passwords in the famous Punch Out Bang Bang.

As he states in his deeply weird (though in no way wrong) channel intro, when he’s not driving a bus or teaching Israeli dance, he works hard to understand the things around him. Naturally, a mysterious phone number shaped set of digits in a favorite game was a secret worth extracting.

The digits can represent every possible state in the game.  It uses a pretty simple decoding and encoding scheme, which he walks through. As he says, it all becomes clear when you can see the source code.

After working through all the quirks he is able to arbitrarily generate any state in the game and handle the exceptions (such as Nintendo USA’s phone number). You can see all his code here and try it out for yourself. Video after the break.

We’ve grown to respect [Bisqwit] as the explainer of all things console games. You will like his explanation of how to write a code emulator for an NES CPU.

Continue reading “Crack Mike Tyson’s Punch Out Bang Bang Passwords”

Taking A U2F Hardware Key From Design To Production

Building a circuit from prototyping to printed circuit board assembly is within the reach of pretty much anyone with the will to get the job done. If that turns out to be something that everyone else wants, though, the job gets suddenly much more complex. This is what happened to [Conor], who started with an idea to create two-factor authentication tokens and ended up manufacturing an selling them on Amazon. He documented his trials and tribulations along the way, it’s both an interesting and perhaps cautionary tale.

[Conor]’s tokens themselves are interesting in their simplicity: they use an Atmel ATECC508A specifically designed for P-256 signatures and keys, a the cheapest USB-enabled microcontroller he could find: a Silicon Labs EFM8UB1. His original idea was to solder all of the tokens over the course of one night, which is of course overly optimistic. Instead, he had the tokens fabricated and assembled before being shipped to him for programming.

Normally the programming step would be straightforward, but using identical pieces of software for every token would compromise their security. He wrote a script based on the Atmel chip and creates a unique attestation certificate for each one. He was able to cut a significant amount of time off of the programming step by using the computed values with a programming jig he built to flash three units concurrently. This follows the same testing and programming path that [Bob Baddeley] advocated for in his Tools of the Trade series.

From there [Conor] just needed to get set up with Amazon. This was a process worthy of its own novel, with Amazon requiring an interesting amount of paperwork from [Conor] before he was able to proceed. Then there was an issue of an import tariff, but all-in-all everything seems to have gone pretty smoothly.

Creating a product from scratch like this can be an involved process. In this case it sounds like [Conor] extracted value from having gone through the entire process himself. But he also talks about a best-case-scenario margin of about 43%. That’s a tough bottom line but a good lesson anyone looking at building low-cost electronics.