Tiny Laser Cutter Puts Micro Steppers To Work

The influx of cheap laser cutters from China has been a boon to the maker movement, if at the cost of a lot of tinkering to just get the thing to work. So some people just prefer to roll their own, figuring that starting from scratch means you get exactly what you want. And apparently what [Mike Rankin] wanted was a really, really small laser cutter.

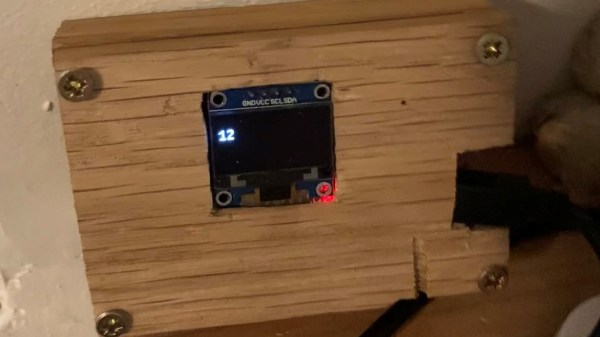
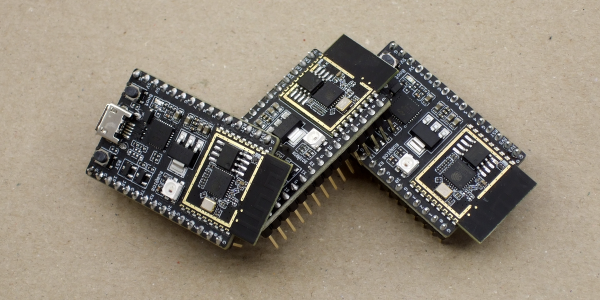
The ESP32 Burninator, as [Mike] lovingly calls his creation, is small enough to be in danger of being misplaced accidentally. The stage relies on tiny stepper-actuated linear drives, available on the cheap from AliExpress. The entire mechanical structure is two PCBs — a vertical piece that holds the ESP32, an OLED display, the X-axis motor, and the driver for the laser, which comes from an old DVD burner; a smaller bottom board holds the Y-axis and the stage. “Stage” is actually a rather grand term for the postage-stamp-sized working area of this cutter, but the video below shows that it does indeed cut black paper.

The cuts are a bit wonky, but this is surely to be expected given the running gear, and we like it regardless. It sort of reminds us of that resin 3D-printer small enough to fit in a Christmas ornament that [Sean Hodgins] did a while back. We’d suggest not trying to hang this on a tree, though.

Continue reading “Tiny Laser Cutter Puts Micro Steppers To Work”

Rolling Your Own LED Matrix Driver, With Copper Foil Tape To The Rescue

It all started when [Damien Walsh] got his hands on some surplus LED boards. Each panel contained 100 mini-PCBs hosting a single bright LED that were meant to be to be snapped apart as needed. [Damien] had a much better idea: leave them in their 20×5 array and design a driver allowing each LED to be controlled over WiFi. He was successful (a brief demo video is embedded down below after the break) and had a few interesting tips to share about the process of making it from scratch.

The first hurdle he ran into was something most of us can relate to; it’s difficult to research something when one doesn’t know the correct terms. In [Damien]’s case, his searches led him to a cornucopia of LED drivers intended to be used for room lighting or backlights. These devices make a large array of smaller LEDs act like a single larger light source, but he wanted to be able to individually address each LED.

Eventually he came across the IS32FL3738 6×8 Dot Matrix LED Driver IC from ISSI which hit all the right bases. Three of these would be enough to control the 100-LED panel; it offered I2C control and even had the ability to synchronize the PWM of the LEDs across multiple chips, so there would be no mismatched flicker between LEDs on different drivers. As for micontroller and WiFi connectivity, we all have our favorites and [Damien] is a big fan of Espressif’s ESP32 series, and used the ESP32-WROOM to head it all up.

LED pads bridged to copper tape, with Kapton (polyimide) tape insulating any crossovers.

The other issue that needed attention was wiring. Each of the LEDs is on its own little PCB with handy exposed soldering pads, but soldering up 100 LEDs is the kind of job where a little planning goes a long way. [Damien] settled on a clever system of using strips of copper tape, insulated by Kapton (a super handy material with a sadly tragic history.) One tip [Damien] has for soldering to copper tape: make sure to have a fume extractor fan running because it’s a much smokier process than soldering to wires.

A 3D-printed baffle using tracing paper to diffuse the light rounds out the device, yielding a 20 x 5 matrix of individually-controlled rectangles that light up smoothly and evenly. The end result looks fantastic, and you can see it in action in the short video embedded below.

Continue reading “Rolling Your Own LED Matrix Driver, With Copper Foil Tape To The Rescue”

Is That An ESP32 On Your Wrist?

What could you do with a dual-core 240 MHz ESP32 that supports Arduino-style programming, with 16 MB of flash, 8 MB of PSRAM, and 520 k of RAM? Oh, let’s throw in a touchscreen, an accelerometer, Wifi, and Bluetooth. Besides that, it fits on your wrist and can show the time? That’s the proposition behind Lilygo T Watch 2020. If it sounds like a smartwatch, it is. At around $25 –and you can snag the hardware from a few different places — it is not only cheaper than the latest flagship smartwatch, but it is also infinitely more hackable.

OK, so the screen is only 1.54″, but then again, it is a watch. If Arduino isn’t your thing, you can use anything else that supports the ESP32 like Micropython or even Scratch. There are variants that have LoRA and GPS, at slightly higher prices. You can also find ones with heart rate monitors and other features.

Continue reading “Is That An ESP32 On Your Wrist?”

ESP32 Trail Camera Goes The Distance On AA Batteries

There’s no shortage of things to like about the ESP8266 and ESP32, but if we had to make a list of the best features these WiFi-enabled microcontrollers have to offer, their power management capabilities would certainly be near the top. Which is how we assumed [Mark] was able to take a whopping 23,475 pictures on his ESP32 camera while powered by nothing more exotic than four AA batteries from the grocery store.

But as it turns out, the full story is quite a bit more interesting. As far as we can tell, [Mark] isn’t bothering with the ESP32’s sleep modes all. In fact, it looks like you could pull this trick off with whatever chip you wanted, which certainly makes it worth mentally filing away for the future; even if it depends on a fairly specific use case.

In the most simplistic of terms, [Mark] is cutting power to the ESP32 completely when it’s not actively taking pictures. The clever circuit he’s come up with only turns on the microcontroller when a PIR sensor detects something moving around in front of the camera. Once the chip is powered up and running code, it brings one of its GPIO pins high which in turn triggers a 4N37 optoisolator connected to the gate on the circuit’s MOSFET. As long as the pin remains high, the circuit won’t cut power to the ESP32. This gives the chip time to take the requested number of pictures and get everything in order before bringing the pin low and allowing the circuit to pull the plug.

If you’re looking to maximize runtime without wrangling any MOSFETs, we’ve seen some excellent examples of how the low power modes on the ESP8266 and ESP32 can be put to impressive use.

[Thanks to Jason for the tip.]

Laundry Monitor Won’t Generate Static With Roommates

Laundry. It’s one of life’s inescapable cycles, but at least we have machines now. The downside of this innovation is that since we no longer monitor every step — the rock-beating, the river-rinsing, the line-hanging and -retrieving — the pain of laundry has evolved into the monotony of monitoring the robots’ work.

[Adam] shares his wash-bots with roommates, and they aren’t close enough to combine their lights and darks and turn it into a group activity. They needed an easy way to tell when the machines are done running, and whose stuff is even in there in the first place, so [Adam] built a laundry machine monitor that uses current sensing to detect when the machines are done running and sends a text to the appropriate person.

Each machine has a little Hall effect-sensing module that’s carefully zip-tied around its power cable. The signal from these three-wire boards goes high when the machine is running and low when it’s not. At the beginning of the load, the launderer simply presses their assigned button on the control box, and the ESP32 inside takes care of the rest.

Getting a text when your drawers are clean is about as private as it gets. Clean underwear, don’t care? Put it on a scrolling marquee.

ESP32-S2 Hack Chat With Adafruit

Join us on Wednesday, May 6 at noon Pacific for the ESP32-S2 Hack Chat with Limor “Ladyada” Fried and Scott Shawcroft!

When Espressif released the ESP8266 microcontroller back in 2014, nobody could have predicted how successful the chip was to become. While it was aimed squarely at the nascent IoT market and found its way into hundreds of consumer devices like smart light bulbs, hackers latched onto the chip and the development boards it begat with gusto, thanks to its powerful microcontroller, WiFi, and lots of GPIO.

The ESP8266 was not without its problems, though, and security was always one of them. The ESP32, released in 2016, addressed some of these concerns. The new chip added another CPU core, a co-processor, Bluetooth support, more GPIO, Ethernet, CAN, more and better ADCs, a pair of DACs, and a host of other features that made it the darling of the hacker world.

Now, after being announced in September of 2019, the ESP32-S2 is finally making it into hobbyist’s hands. On the face of it, the S2 seems less capable, with a single core and neither Bluetooth nor Ethernet. But with a much faster CPU, scads more GPIO, more ADCs, a RISC-V co-processor, native USB, and the promise of very low current draw, it could be that the ESP32-S2 proves to be even more popular with hobbyists as it becomes established.

To talk us through the new chip’s potential, Limor “Ladyada” Fried and Scott Shawcroft, both of Adafruit Industries, will join us on the Hack Chat. Come along and learn everything you need to know about the ESP32-S2, and how to put it to work for you.

join-hack-chatOur Hack Chats are live community events in the Hackaday.io Hack Chat group messaging. This week we’ll be sitting down on Wednesday, May 6 at 12:00 PM Pacific time. If time zones have got you down, we have a handy time zone converter.

Click that speech bubble to the right, and you’ll be taken directly to the Hack Chat group on Hackaday.io. You don’t have to wait until Wednesday; join whenever you want and you can see what the community is talking about.
Continue reading “ESP32-S2 Hack Chat With Adafruit”

Chat Cat Waves On Slack @

Isolated as we are by national lockdowns and statewide stay-at-home orders, many coworkers are more connected than ever before through oddly-named productivity/chat programs such as Slack. But those notifications flying in from the sidebar all the time are are oh-so-annoying and anti-productive. Ignoring requests for your attention will only make them multiply. So how do you make the notifications bearable?

[Mr. Tom] wrote in to tell us about his solution, which involves a maneki-neko — one of those good luck cats that wave slowly and constantly thanks to a solar-powered electromagnetic pendulum. Now whenever [Mr. Tom] has an incoming message, the cat starts waving gently over on the corner of his desk. It’s enough movement to be noticeable, but not annoying.

An ESP32 inside the kitty looks at incoming messages and watches for [Mr. Tom]’s user ID, prioritizing messages where he has been mentioned directly. This kitty is smart, too. As soon as the message is dealt with, the data pin goes low again, and the cat can take a nap for a while.

The natural state of the maneki-neko is pretty interesting, as we saw in this teardown a few years back.