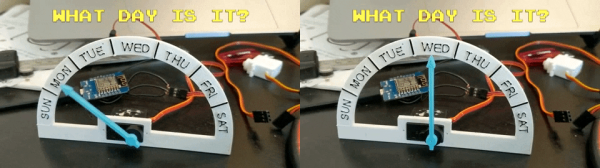
With much of the world staying at home at the moment, keeping track of our sanity and the day of the week is a bit of a challenge, especially without the normal daily routine to hold onto. To help with one of these problems, [phreakmonkey] has built a Day Clock. As the name suggests, it’s only purpose is to show what day of the week it is.
Avery simple device, the two main components are a servo and a Wemos D1 Mini, the popular ESP8266-based dev board. Using the NTPtimeESP library, it gets day of the week from the internet, and moves the servo to indicate the current day on a 3D printed face. Most readers should be able to whip one up in an hour or two, which can help keep sane in these interesting times.
For another Corona clock, check out [Elliot Williams]’ version that helps with keeping domestic peace. If you want to do something to combat the spread of the current epidemic, you can build a few face shields, make your idle computer available for Folding@Home or sew a few masks. Every bit helps.
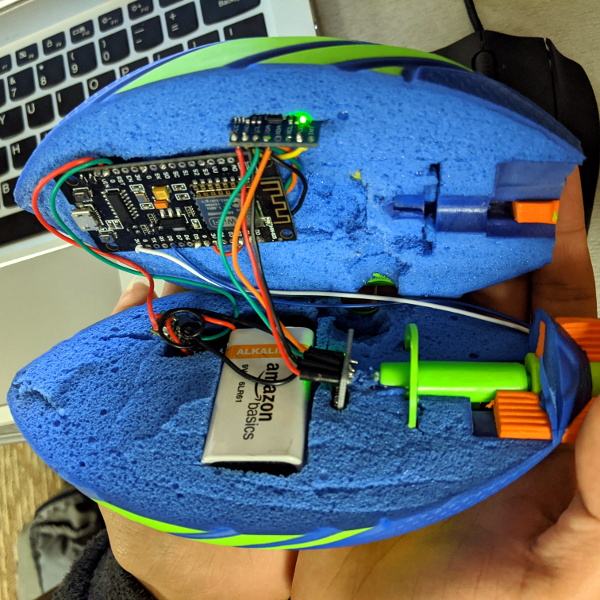
For his final project in UCLA’s Physics 4AL program, [Timothy Kanarsky] used a NodeMCU to smarten up a carefully dissected NERF football. With the addition to dual MPU6050 digital accelerometers and some math, the ball can calculate things like the distance traveled and angular velocity. With a 9 V alkaline battery and a voltage regulator board along for the ride it seems like a lot of weight to toss around; but of course nobody on the Hackaday payroll has thrown a ball in quite some time, so we’re probably not the best judge of such things.
Even if you’re not particularly interested in refining your throw, there’s a lot of fascinating science going on in this project; complete with fancy-looking equations to make you remember just how poorly you did back in math class.
As [Timothy] explains in the write-up, the math used to find velocity and distance traveled with just two accelerometers is not unlike the sort of dead-reckoning used in intercontinental ballistic missiles (ICBMs). Since we’ve already seen model rockets with their own silos, seems all the pieces are falling into place.
The NodeMCU polls the accelerometers every 5 milliseconds, and displays the data on web page complete with scrolling graphs of acceleration and angular velocity. When the button on the rear of the ball is pressed, the data is instead saved to basic Comma Separated Values (CSV) file that’s served up to clients with a minimal FTP server. We might not know much about sportsball, but we definitely like the idea of a file server we can throw at people.
This project started, as many do, with a simple idea. [Ben Hoad] just wanted to take a static LEGO Hogwarts Express train kit and make it motorized. It was compatible with standard LEGO track pieces, so all he should have to do was figure out how to shoehorn a motor in there and be done with it. Right?
Well, you already know how things like this go. It started with adding the motor, which ended up being relatively straightforward once [Ben] used some community LEGO CAD tools to figure out which kits had the specific parts he needed to redesign the train in such a way that he’d have enough space inside for the motor without ruining the way it looked. But then the feature creep kicked in, and he found himself falling down that familiar rabbit hole.
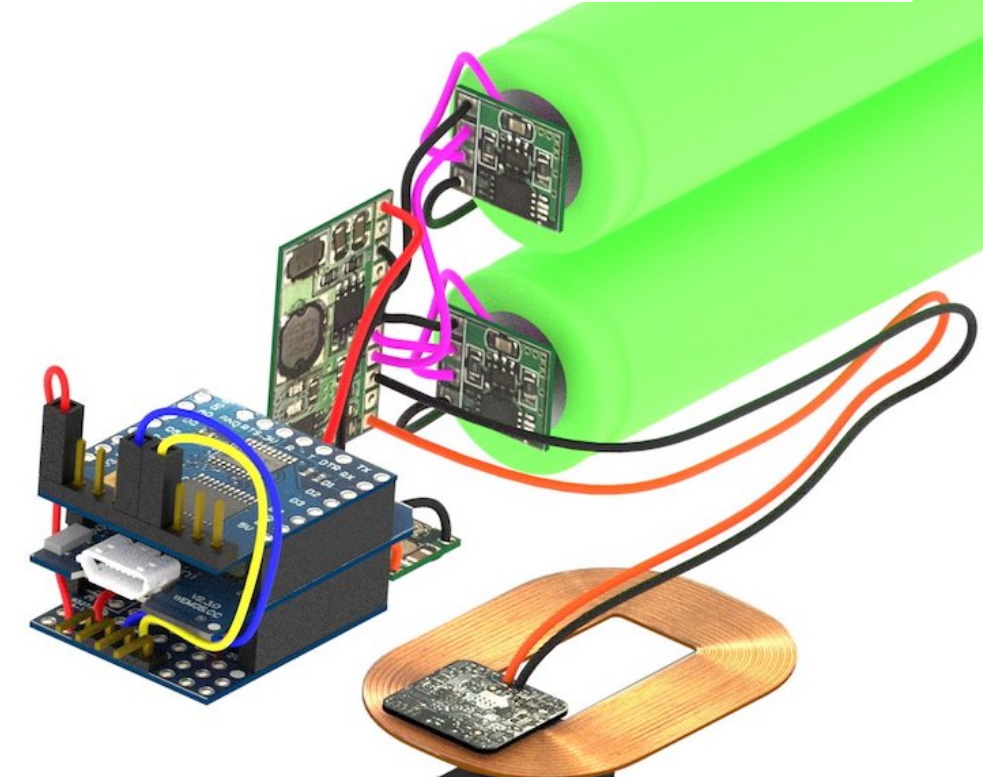
A 3D representation of the train’s internal components.
The first problem was how to reliably power the train. It turns out the rear car was more or less empty already, so that became home for two 18650 batteries (the project details say “16850” but we believe that is merely a typo). [Ben] didn’t want to have to take the thing apart every time it ran down, so he wondered if it would be possible to add wireless charging.
A Qi coil in the bottom of the train car and one in a specially designed section of track got the power flowing, but getting them lined up proved a bit finicky. So he added a Hall effect sensor to the car and a strong magnet to the track, so the train would know when the coils were lined up and automatically pump the brakes.
So now he had a motorized train that could recharge itself, but how should he turn it on and off? Well, with an ESP8266 along for the ride, he figured it would be easy to add WiFi control. With a bit of code and the Homebridge project, he was able to get the train to appear as a smart switch to Apple’s HomeKit. That allows him to start and stop the train from his smartphone, complete with a routine that returns the train to the charging station once it’s finished making the rounds. [Ben] says the next steps are to put some sanity checks in, such as shutting the motors down if the train hasn’t passed the charging station in a few minutes; a sure sign that it’s not actually moving.
Those who have been suddenly introduced to the wonderful world of working from home over the last couple of weeks may have experienced a bit of culture shock. Even with today’s open floorplan workspaces and less-formal expectations, work isn’t home. That’s especially true with young children in the house, who’ll probably respond to seeing mommy or daddy working from home much differently than [Bob] from accounting would at the office.
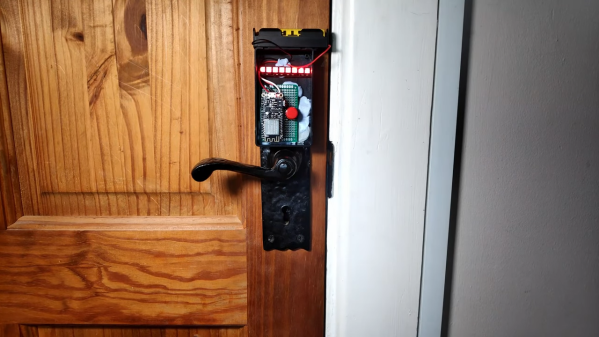
To smooth out the rough spots of transitioning to a full-time work-from-home setup, [Brian Lough] threw together this web-enabled “do not disturb” beacon for his office door. The original idea was to simply provide a red light and a green light to let the rest of the family know when [Brian] would be in a meeting, but in an example of scope creep that turned out to be useful, [Mrs. Lough] rewrote the spec to include a button on the family-facing side so that she could alert him that his presence is requested.
[Brian] went through a couple of prototype using both an ESP32 and an ESP8266. We were rooting for the ESP32, which [Brian] was leveraging for its built-in capacitive touch input. That would have eliminated a physical button, but alas, the ESP8266 made it into the final build, along with lots and lots of Blu-Tack. The video below details the build and the code, and features an adorable Irish lesson as a bonus.
Yes, a simple text message would probably have satisfied the specs, but where’s the sport in that? Then again, as [Brian] points out, this build seemed oddly familiar for a good reason.
Schools are closed here in Germany until after Easter vacation, and that means that our almost-six-year-old son Max is staying at home with us. The good news is that my wife and I work from home anyway, so it’s not too stressful as long as he can look after himself for eight hours per day. The bad news is that there’s no way a kindergarten kid can take care of himself for such long stretches, and we don’t want to just park him in front of the boob tube. At least there’s two of us.
The new stay-at-home life has required some adjustment, but for at least the first five days (and counting) it’s working out pretty darn well. One trick: my wife came up with the idea of a visual schedule to help Max divide his day up into kindergarten-sized chunks, and then we added an LED strip behind it to turn it into a linear clock of sorts. And we did it with stuff we had lying around the house.
Granted, it’s not a super deep hacky-hack, and some of you out there could probably get it done with a handful of 555 timers. But it was quick, gets the job done, and heck, with NTP sync, it’s the most accurate kiddie clock in the world! So those of you out there who are stuck like we are, trying to balance childcare and working from home, here’s a quick project that can increase familial harmony while giving you an excuse to order more LED strips.
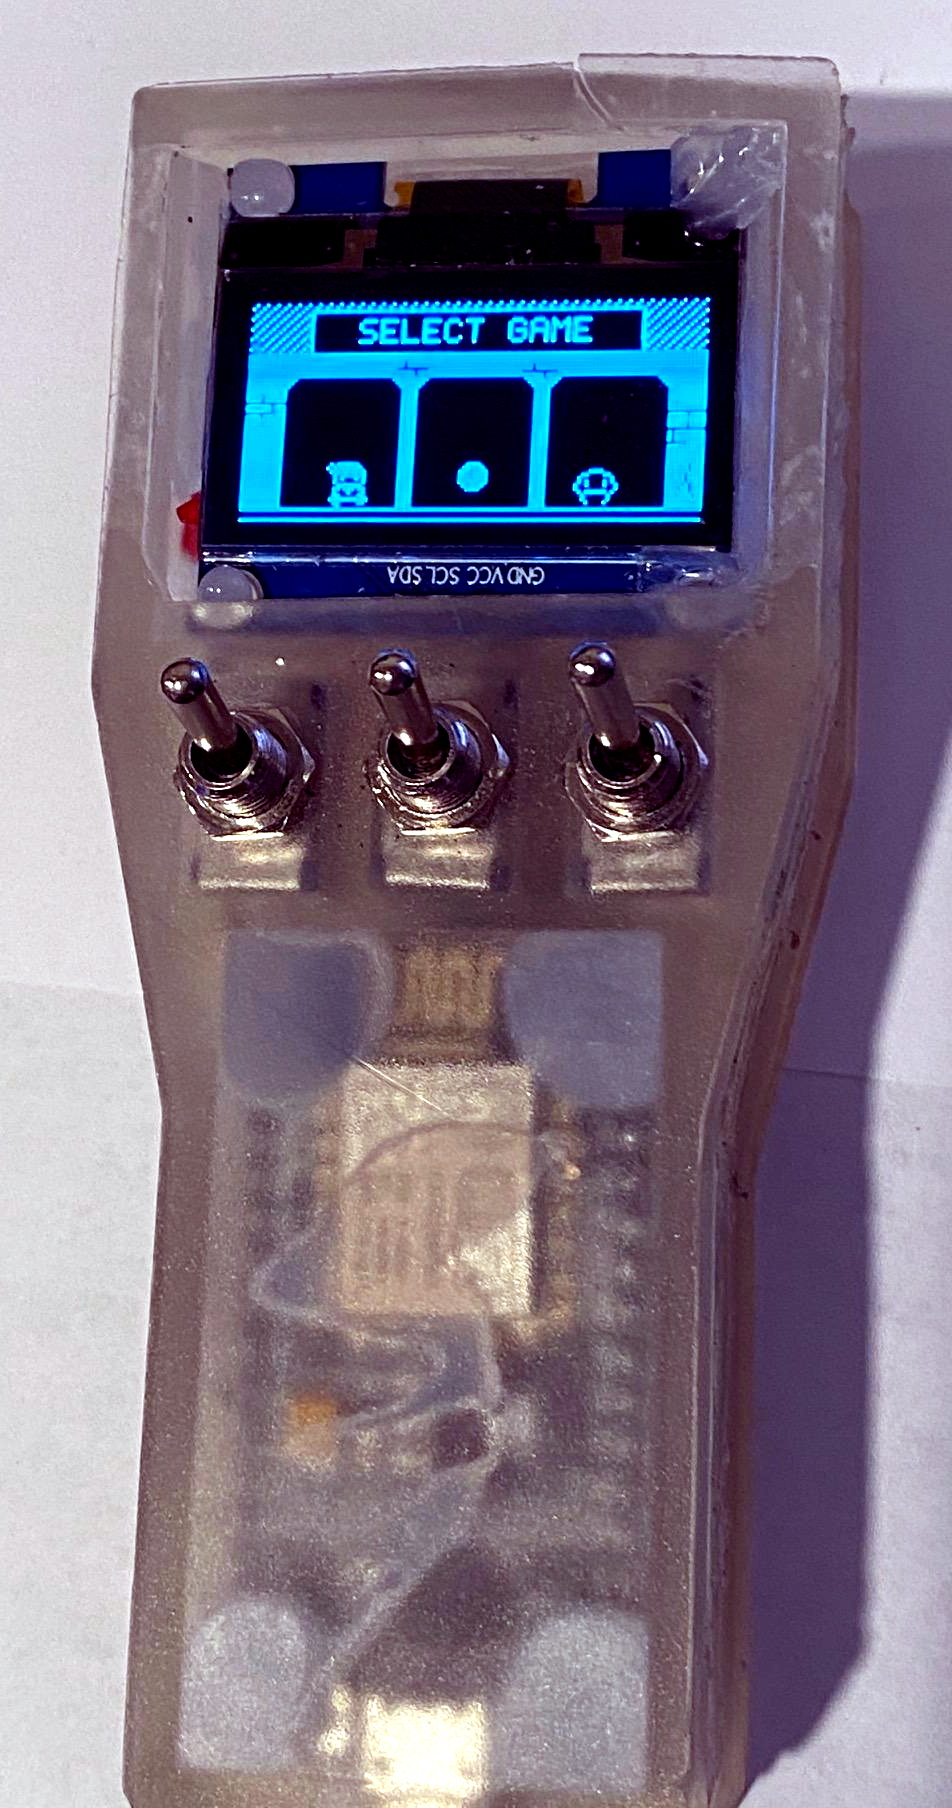
Teacher says that every time a toggle switch clunks, a hacker gets their wings. Or something like that. All we know is that there are few things the hardware tinkerer likes more than the satisfying action of a nice flip. Which by extension means this handheld game built by [Roman Revzin] and controlled by nothing more than three toggle switches will likely be a big hit at the hackerspace.
The parts list for this game, which [Roman] calls the ToggleBoss, is about as short as it gets. There’s a NodeMCU ESP8266 development board, a common SH1106 OLED display, and a trio of suitably clunky toggle switches. Add a bit of wire, toss it all into a 3D printed enclosure, and you’re halfway to thumb flicking nirvana.
Naturally, you might be wondering about the sort of games that can be played with three latching digital inputs; after all, it’s not exactly the most conventional controller layout. But there is where ToggleBoss really shines. Instead of trying to shoehorn traditional games into an exceptionally unconventional system, [Roman] has come up with several games which really embrace the limited input offered to the user.
In a platforming game not unlike the classic Mario Bros, the positions of the physical switches are mapped to virtual walls that are raised and lowered to control a character’s movement through the level. Another game shows the player three dots which correspond to the intended switch states, which they have to match as quickly and as accurately as possible. [Roman] has released the source code to his current lineup of games, which hopefully will inspire others to try their hand at creating software for this fascinating little system.
With the availability of cheap OLED displays and powerful microcontrollers, we’ve started to see more of these bespoke gaming systems. While some will undoubtedly prefer a pocket full of Nintendo’s classics, we think there’s something special about a game system that you can truly call your own.
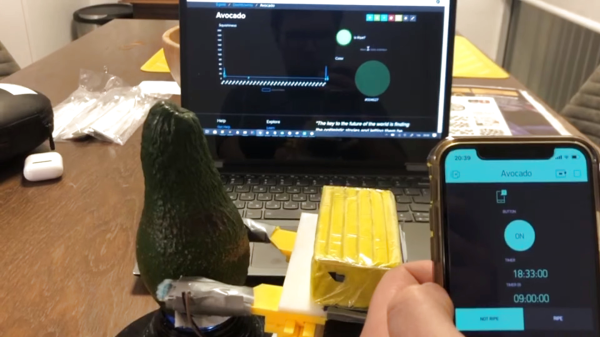
You don’t have to be an extinct mammal or a Millennial to enjoy the smooth, buttery taste of an avocado. Being psychic on the other hand is definitely an advantage to catch that small, perfect window between raw and rotten of this divaesque fruit. But don’t worry, as modern problems require modern solutions, [Eden Bar-Tov] and [Elad Goldberg] built the AvoRipe, a device to notify you when your next avocado has reached that window.
Taking both the firmness and color of an avocado as indicators of its ripeness into account, the team built a dome holding a TCS3200 color sensor as stand for the avocado itself, and 3D printed a servo-controlled gripper with a force sensor attached to it. Closing the gripper’s arms step by step and reading the force sensor’s value will determine the softness the avocado has reached. Using an ESP8266 as centerpiece, the AvoRipe is turned into a full-blown IoT device, reporting the sensor readings to a smartphone app, and collecting the avocado’s data history on an Adafruit.IO dashboard.
There is unfortunately one big drawback: to calibrate the sensors, a set of nicely, ripe avocados are required, turning the device into somewhat of a chicken and egg situation. Nevertheless, it’s a nice showcase of tying together different platforms available for widescale hobbyist projects. Sure, it doesn’t hurt to know how to do each part from scratch on your own, but on the other hand, why not use the shortcuts that are at our disposal to remove some obstacles — which sometimes might include programming itself.