Hackerspacing: Making A Temperature Logger

The folks at Swindon Makerspace took possession of a new space a few months ago after a long time in temporary accommodation. They’ve made impressive progress making it their own, and are the envy of their neighbours.

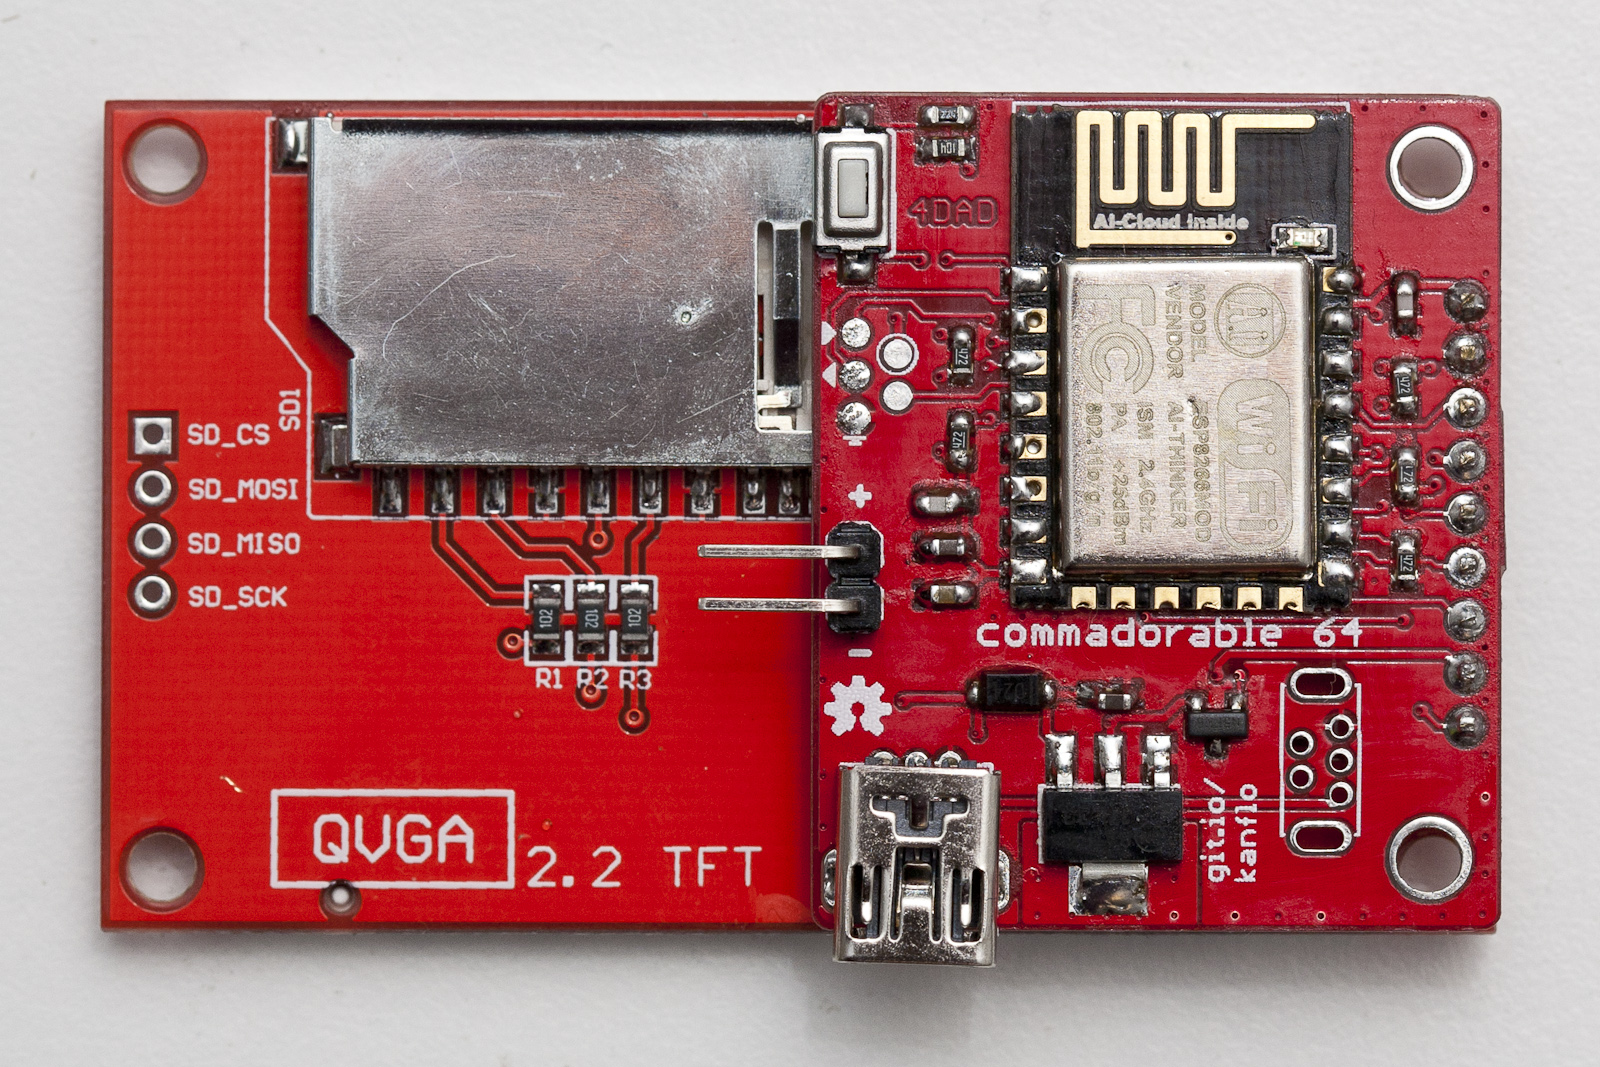
A small part of the new space is a temperature logger, and it’s one whose construction they’ve detailed on their website. It’s a simple piece of hardware based around a Dallas DS18B20 1-wire temperature sensor and an ESP8266 module, powered by 3 AA batteries and passing its data to data.sparkfun.com. The PCB was created using the space’s CNC router, and the surface-mount components were hand-soldered. The whole thing is dwarfed by its battery box, and will eventually be housed in its own 3D printed case. Sadly they’ve not posted the files, though it’s a simple enough circuit that’s widely used, it looks similar to this one with the addition of a voltage regulator.

The device itself isn’t really the point here though, instead it serves here to highlight the role of a typical small hackspace in bringing simple custom electronic and other prototyping services to the grass roots of our community. Large city hackspaces with hundreds of members will have had the resources to create the space program of a small country for years, but makers in provincial towns like Swindon – even with their strong engineering heritage – have faced an uphill struggle to accumulate the members and resources to get under way.

So to the wider world it’s a simple temperature logger but it really represents more than that — another town now has a thriving and sustainable makerspace. Could your town do the same?

If you’ve never used a Dallas 1-wire temperature sensor like the one the Swindon folks have in their logger, we suggest you read our primer on the parts and their protocol.

We’re Fans Of Dave’s Fans

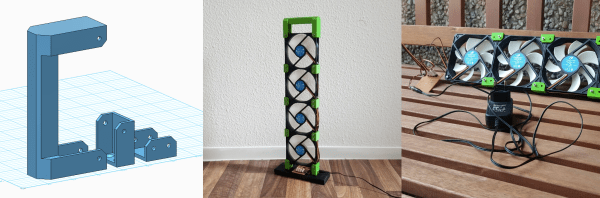
Hackaday.io contributor extraordinaire [davedarko] gets hot in the summer. We all do. But what separates him from the casual hacker is that he beat the heat by ordering four 120 mm case fans. He then 3D printed a minimalistic tower frame for the fans, and tied them all together with a ULN2004 and an ESP8266. The whole thing is controlled over the network via MQTT. That’s dedication to staying cool.

We really like the aesthetics of this design. A fan made up of fans! But from personal experience, we also know that these large case fans can push a lot of air fairly quietly. That’s important if you’re going to stand something like this up on your desk. While we’re not sure that a desk fan really needs networked individual PWM speed control, we can see the temptation.

Now that they’re individually controlled, nothing stops [davedarko] from turning this into a musical instrument, or even using the fans to transmit data. The only thing we wouldn’t do, despite the temptation to stick our fingers in the blades, is to complicate the design visually. Maybe that would finally teach the cat not to walk around on our desk.

DIY Smartwatch Based On ESP8266 Needs Classification

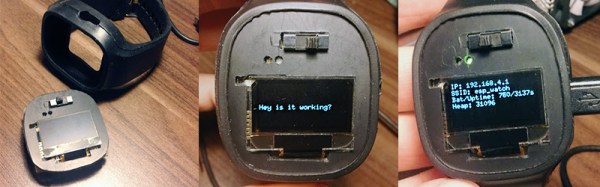
Building your own smartwatch is a fun challenge for the DIY hobbyist. You need to downsize your electronics, work with SMD components, etch your own PCBs and eventually squeeze it all into a cool enclosure. [Igor] has built his own ESP8266-based smartwatch, and even though he calls it a wrist display – we think the result totally sells as a smartwatch.

His design is based on a PCB for a wireless display notifier he designed earlier this year. The design uses the ESP-12E module and features an OLED display, LEDs, tactile switches and an FT232R USB/UART interface. Our beloved TP4056 charging regulator takes care of the Lithium-ion cell and a voltage divider lets the ESP8266’s ADC read back the battery voltage. [Igor] makes his own PCBs using the toner transfer method, and he’s getting impressive results from his hacked laminator.

Together with a hand-made plastic front, everything fits perfectly into the rubber enclosure from a Jelly Watch. A few bits of Lua later, the watch happily connects to a WiFi network and displays its IP configuration. Why wouldn’t this be a watch? Well, it lacks the mandatory RTC, although that’s easy to make up for by polling an NTP time server once in a while. How would our readers classify this well-done DIY build? Let us know in the comments!

[CNLohr], ESP8266, USB…

“Round up the usual suspects…”

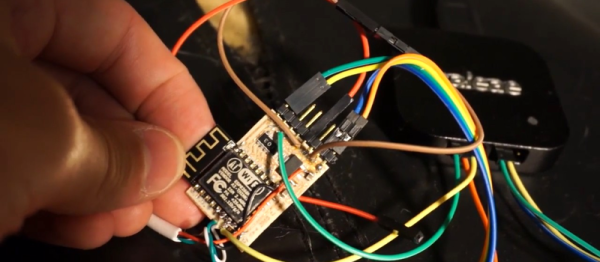
[CNLohr] just can’t get enough of the ESP8266 these days — now he’s working on getting a version of V-USB software low-speed USB device emulation working on the thing. (GitHub link here, video also embedded below.) That’s not likely to be an afternoon project, and we should warn you that it’s still a project in progress, but he’s made some in-progress material available, and if you’re interested either in USB or the way the mind of [CNLohr] works, it’s worth a watch.

In this video, he leans heavily on the logic analyzer. He’s not a USB expert, and couldn’t find the right resources online to implement a USB driver, so he taught himself by looking at the signals coming across as he wiggled a mouse on his desk. Using the ever-popular Wireshark helped him out a lot with this task as well. Then it was time to dig into Xtensa assembly language, because timing was critical.

Speaking of timing, one of the first things that he did was write some profiling routines so that he could figure out how long everything was taking. And did we mention that [CNLohr] didn’t know Xtensa assembly? So he wrote routines in C, compiled them using the Xtensa GCC compiler, and backed out the assembly. The end result is a mix of the two: assembly when speed counts, and C when it’s more comfortable.

Continue reading “[CNLohr], ESP8266, USB…”

Hackaday Prize Entry: A WiFi Swiss Army Knife

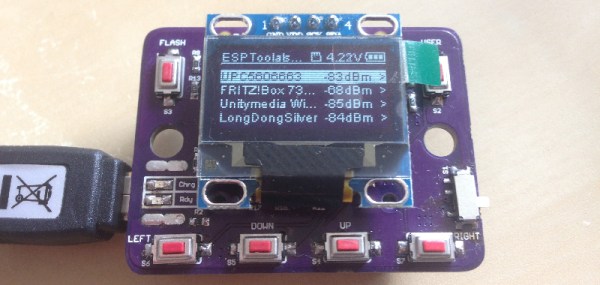
WiFi is all around us, but if you want to work with this ubiquitous networking protocol, you’ll need to pull out a laptop or smartphone like a caveman. [Daniel] has a better idea. It’ s a simple, compact tool for cracking WiFi passwords or sending deauth packets to everyone at the local Starbucks. It’s an ESP Swiss Army Knife, and a great entry for the Hackaday Prize.

As you would expect, this WiFI Swiss Army Knife is powered by the ESP8266 and features a tiny OLED display and a bunch of buttons for the UI. With this, [Daniel] is able to perform a deauth attack on a network, kicking anyone off the network, provided this device already has the MAC address of the victim.

This tiny wireless tool also has an SD card, making it possible to collect authentication frames for later decryption on a device that actually has the power to crack a network. With a LiPo charge controller and a sufficiently large battery, this tiny device could be left in the corner of an office collecting authentication packets for days until it’s later retrieved, opening up the network to anyone with a sufficiently fast computer. It’s a great build and very useful, making this a great entry for The Hackaday Prize.

Hackaday Prize Entry: Smart USB Hub And IoT Power Meter

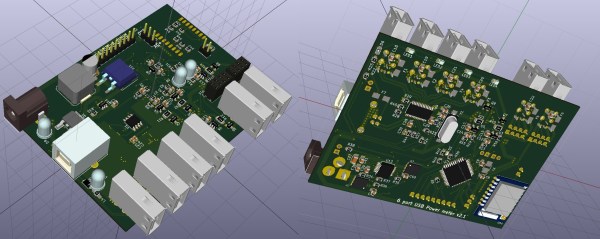
[Aleksejs Mirnijs] needed a tool to accurately measure the power consumption of his Raspberry Pi and Arduino projects, which is an important parameter for dimensioning adequate power supplies and battery packs. Since most SBC projects require a USB hub anyway, he designed a smart, WiFi-enabled 4-port USB hub that is also a power meter – his entry for this year’s Hackaday Prize.

[Aleksejs’s] design is based on the FE1.1s 4-port USB 2.0 hub controller, with two additional ports for charging. Each port features an LT6106 current sensor and a power MOSFET to individually switch devices on and off as required. An Atmega32L monitors the bus voltage and current draw, switches the ports and talks to an ESP8266 module for WiFi connectivity. The supercharged hub also features a display, which lets you read the measured current and power consumption at a glance.

Unlike most cheap hubs out there, [Aleksejs’s] hub has a properly designed power path. If an external power supply is present, an onboard buck converter actively regulates the bus voltage while a power path controller safely disconnects the host’s power line. Although the first prototype is are already up and running, this project is still under heavy development. We’re curious to see the announced updates, which include a 2.2″ touchscreen and a 3D-printable enclosure.

Your Laundry Is Done!

Have you ever put a load of dirty clothing in the washing machine and set the cycle running, only to forget all about it and discover a mouldering congealed mass in the machine a few days later? [Xose Pérez] has more than once, and to stop it happening again he’s got a project that monitors the machine in his basement and notifies him when his wash is done.

At the centre of his washing machine monitor is an ITead Sonoff IoT mains on-off switch. This device contains a 10A mains relay, an ESP8266 chip to control it, and a small mains switch-mode power supply. The Sonoff doesn’t use the ESP’s ADC pins, so he’s broken one of them out on a lead to a current transformer which captures the power level being consumed by the washing machine. The Sonoff is one of those IoT devices that relies on a proprietary cloud service and doesn’t have its own API, so [Xose] has created his own firmware for it incorporating an ESP port of an Arduino current sensing library. To round off the project and because he could, he’s added an ambient humidity sensor to the device.

The resulting boxed-up unit returns minute-by-minute current readings for the entire wash cycle. To spot when the cycle has finished, he waits for a moment when it has been using no power for more than five minutes, at which point his Node-RED system sends him a notification via Pushover.

This project is a very neatly executed hack on an extremely cheap piece of hardware whose capabilities would ordinarily be somewhat curtailed due to its proprietary interface. Surprisingly it’s not the first laundry monitor we’ve seen here at Hackaday, we’ve had this apartment laundry monitor using an accelerometer and a Raspberry Pi, and a notifier for a finicky dryer that insisted on stopping mid-cycle.