Some SPI Flash Chip Nuances Worth Learning

Some hackers have the skills to help us find noteworthy lessons in even the most basic of repairs. For instance, is your computer failing to boot? Guess what, it could just be a flash chip that’s to blame — and, there’s more you should know about such a failure mode. [Manawyrm] and [tSYS] over at the Kittenlabs blog show us a server motherboard fix involving a SPI flash chip replacement, and tell us every single detail we should know if we ever encounter such a case.

They got some Gigabyte MJ11-EC1 boards for cheap, and indeed, one of the BIOS chips simply failed — they show you how to figure that one out. Lesson one: after flashing a SPI chip, remember to read back the image and compare it to the one you just flashed into it! Now, you might be tempted to take any flash chip as a replacement, after all, many are command-compatible. Indeed, the duo crew harvested a SPI chip from an ESP32 board, the size matched, and surely, that’d suffice.

That’s another factor you should watch out for. Lesson two is to compare the SPI flash commands being used on the two chips you’re working with. In this case, the motherboard would read the BIOS alright and boot just fine, but wasn’t able to save the BIOS settings. Nothing you couldn’t fix by buying the exact chip needed and waiting for it to arrive, of course! SPI flash command sets are fun and worth learning about — after all, they could be the key to hacking your “smart” kettle. Need a 1.8 V level shifter while flashing? Remember, some resistors and a NPN transistor is more than enough.

Hackaday Links Column Banner

Hackaday Links: May 14, 2023

It’s been a while since we heard from Dmitry Rogozin, the always-entertaining former director of Roscosmos, the Russian space agency. Not content with sending mixed messages about the future of the ISS amid the ongoing war in Ukraine, or attempting to hack a mothballed German space telescope back into action, Rogozin is now spouting off that the Apollo moon landings never happened. His doubts about NASA’s seminal accomplishment apparently started while he was still head of Roscosmos when he tasked a group with looking into the Apollo landings. Rogozin’s conclusion from the data his team came back with isn’t especially creative; whereas some Apollo deniers go to great lengths to find “scientific proof” that we were never there, Rogozin just concluded that because NASA hasn’t ever repeated the feat, it must never have happened.

Continue reading “Hackaday Links: May 14, 2023”

Bringing The NES Cartridge Into The USB Age

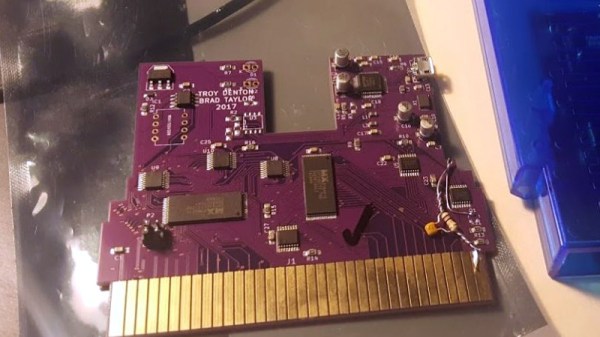
An NES cartridge in its most basic form is a surprisingly simple device, it contains two ROMs hosting all the code and assets of its game, and a Nintendo code chip that provided what was a state-of-the-art consumer DRM system for the 1980s. Decades later its inner workings have been extensively reverse-engineered, and there have been quite a few custom and reprogrammable cartridge designs produced.

This hasn’t stopped [Troy Denton] and [Brad Taylor] making a cartridge of their own though, and the result of their labours is a fully USB reprogrammable cartridge for the Nintendo Entertainment System. It provides nonvolatile storage and is a simpler design than you might expect, using a pair of 1 megabit Flash chips and emulating Nintendo’s DRM with an ATtiny microcontroller.

In itself it’s an interesting enough design, but what makes the write-up stand out is the description of having the boards manufactured by a PCBA service, and their subsequent debugging. A surface-mount micro USB socket that shorted out the USB power required a bit of rework to place Kapton tape beneath it, while another clever patch uses the NES clock signal to provide a read-only line for the memory. It’s also interesting to hear about their manual “crowdfunding” approach which was to ask around if anyone else wanted one so they could bring unit cost down by producing more cartridges.

If you’re interested in the NES DRM system, it’s a subject we’ve touched on in the past.

Trouble Flashing Your ESP8266? Meet DIO And QIO

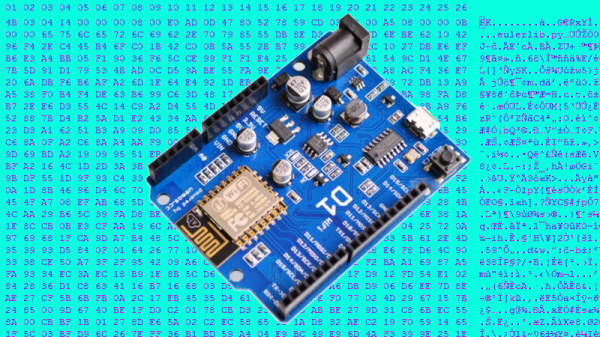
[Pete] was building a hot tub controller, using a WEMOS board based on the venerable ESP8266. After assembly, the board was plugged into USB and [Pete] hit the flash button. No dice. Investigation with some terminal software indicated a checksum error.

Assuming the board was dead, [Pete] grabbed another — and suffered the same problem.  The WEMOS boards wouldn’t program, but other boards had no issues. Sensing that something may be amiss, further research was in order. A forum post turned up discussing different programming modes for the ESP8266.

It turns out that there are different types of flash used with the ESP8266, and the correct programming mode must be selected for a given hardware setup. These modes are known as DIO and QIO, meaning “dual IO” and “quad IO” respectively. This refers to the number of IO line used to talk to the flash memory. There are also further modes, known as DOUT and QOUT. It’s important to identify the modes supported by the flash chip on board, by looking at the datasheet. Obviously this can be difficult on some pre-built modules, so experimentation is the key here.

With the wrong mode selected, writes to the flash will fail, and reading back will turn up a checksum error. It’s a simple matter of changing a line in the make file and trying different modes, to see which one works. This forum post has a more in-depth coverage of the issue. 

By choosing different flash memory parts and selecting the DIO or DOUT modes, it’s actually possible to free up more GPIO pins as well. This knowledge is handy when optimizing ESP8266 designs for memory speed or maximum IO flexibility. It’s a good lesson that it always pays to look at the datasheet to get the best out of your parts.

Recover Your Broken SD Card Selfies By Your Selfie

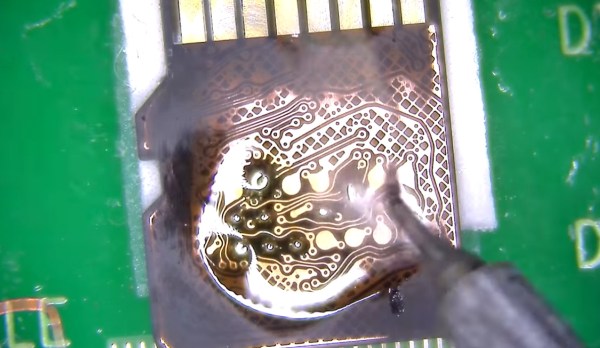
You may still have some luck getting those selfies off of your SD card, even if it will no longer mount on your computer. [HDD Recovery Services] shows us a process to directly access the NAND memory of a faulty micro SD card to recover those precious files you thought about backing up but never got around to.

On a Micro SD card you may have noticed there are two slightly longer pins than the rest. These are VSS and VCC pins. As long as they are not a dead short between the two the SD card controller isn’t completely trashed and we can go ahead and get into that little sucker. With a bit of know how — along with sandpaper, enameled wire, and a NAND reader — an image of your lost data can be recovered with a bit of patience and some good soldering skills.

Working your way down from a relatively high grit sand paper, slowly sand away the plastic on the underside of the SD card until you can clearly see the copper traces hidden away inside. Then solder your enameled wire onto the small solder pads to hook it up to a NAND reader and you should be able to read the data that was previously unreachable via conventional means. Of course you’re still going to need to make sense out of the NAND dump. That’s a topic for a different article.

If you ever find yourself in need of an SD card recovery tool you could always roll your own DIY NAND reader. We will likely give this process a try just to play round with the concept. Hopefully we’ll never need to do SD card recovery!

Continue reading “Recover Your Broken SD Card Selfies By Your Selfie”

Save ESP8266 RAM With PROGMEM

When [sticilface] started using the Arduino IDE to program an ESP8266, he found he was running out of RAM quickly. The culprit? Strings. That’s not surprising. Strings can be long and many strings like prompts and the like don’t ever change. There is a way to tell the compiler you’d like to store data that won’t change in program storage instead of RAM. They still eat up memory, of course, but you have a lot more program storage than you do RAM on a typical device. He posted his results on a Gist.

On the face of it, it is simple enough to define a memory allocation with the PROGMEM keyword. There’s also macros that make things easier and a host of functions for dealing with strings in program space (basically, the standard C library calls with a _P suffix).

Continue reading “Save ESP8266 RAM With PROGMEM”

Overhauling The ESP8266’s Flash Memory Handling

If you’ve ever corrupted a flash memory on a power failure, you’ll be glad to hear that the ESP8266 SDK implements a very secure and almost infallible read/write management for its flash memory. The catch: It’s also very wasteful. For a single memory block of stored data, three memory blocks of physical flash memory are occupied. [Peter Scargill] enlightens us with a better solution.

Continue reading “Overhauling The ESP8266’s Flash Memory Handling”