A Review That Asks: Do You Need A Thermal Camera?

[Maker’s Fun Duck] has a recent video review of a cheap thermal camera from a company called Kaiweets, which you can see below. It checked all of his boxes: It was standalone, handheld, cheap, and not too cheap. The question is: does it work well for the kinds of things we would do with such a camera?

That’s a tricky question, of course, because everyone’s uses are different. Considering a soldering iron. A tiny one is great for working on PCBs, but lousy for soldering large coax connectors. A soldering gun works well for that purpose, but is too much for the PCB. The same goes for thermal cameras. Some are great for, for example, finding leaky parts of houses, but might not be so great at locating defective components on a PCB.

Continue reading “A Review That Asks: Do You Need A Thermal Camera?”

Pocket-Sized Thermal Imager

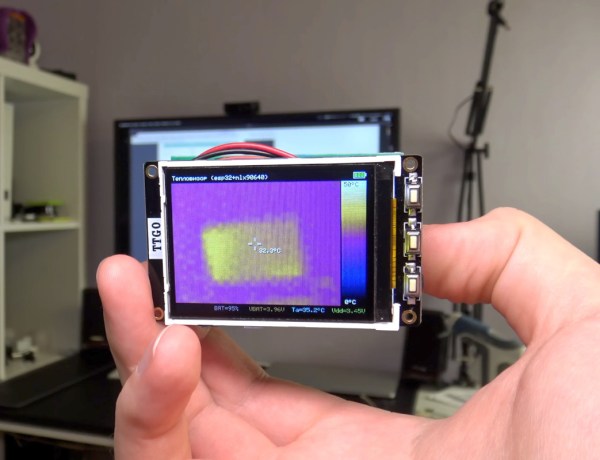
Just as the gold standard for multimeters and other instrumentation likely comes in a yellow package of some sort, there is a similar household name for thermal imaging. But, if they’re known for anything other than the highest quality thermal cameras, it’s excessively high price. There are other options around but if you want to make sure that the finished product has some sort of quality control you might want to consider building your own thermal imaging device like [Ruslan] has done here.

The pocket-sized thermal camera is built around a MLX90640 sensor from Melexis which can be obtained on its own, but can also be paired with an STM32F446 board with a USB connection in order to easily connect it to a computer. For that, [Ruslan] paired it with an ESP32 board with a companion screen, so that the entire package could be assembled together with a battery and still maintain its sleek shape. The data coming from the thermal imagining sensor does need some post-processing in order to display useful images, but this is well within the capabilities of the STM32 and ESP32.

With an operating time on battery of over eight hours and a weight under 100 grams, this could be just the thing for someone looking for a thermal camera who doesn’t want to give up an arm and a leg to one of the industry giants. If you’re looking for something even simpler, we’ve seen a thermal camera based on a Raspberry Pi that delivers its images over the network instead of on its own screen.

A working, partially disassembled thermal camera

Cheap Display Fix Brings Thermal Camera Back To Life

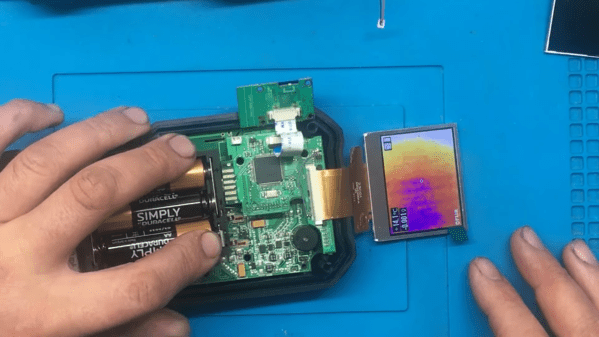
When it comes to repairability of electronic devices, much depends on how helpful the original manufacturer is. Some make repairs very easy by publishing detailed service manuals and selling spare parts. Others keep everything under wraps to protect their intellectual property, turning even a supposedly simple fix into a reverse engineering ordeal. When [BuyItFixIt] got his hands on a FLIR multimeter-thermal camera combination instrument with a broken display, he quickly found that FLIR was firmly in the “all our designs are top secret” camp and wouldn’t even tell him what kind of display they had used.

Not to be deterred, [BuyItFixIt] took the meter apart and tried to find out what was going wrong. The signals from the microprocessor seemed to reach the display OK, so the fault was somewhere in the screen itself. The display’s part number didn’t return any useful results online, but AliExpress did have a very similar-looking display available with a slightly different part number. This display seemed to work at first, but the instrument then got caught in a boot loop.

Unlike FLIR, the supplier of the replacement display was happy to supply datasheets, and even had one available for the original FLIR part. With this new information [BuyItFixIt] was able to deduce that the new screen didn’t output one signal that the processor expected to see, causing it to reset itself. A simple workaround was to connect the corresponding pin to a PWM signal from the backlight controller, which fooled the CPU into thinking the proper display was connected.

In this case, a $12 display and a single piece of wire were enough to bring an expensive instrument back to life, but things are not always that simple. More complex machines can take weeks to debug, even if parts are available. If not, you might even need to design your own. Continue reading “Cheap Display Fix Brings Thermal Camera Back To Life”

A FLIR One Pro Sees Again, Thanks To Some Nifty Soldering

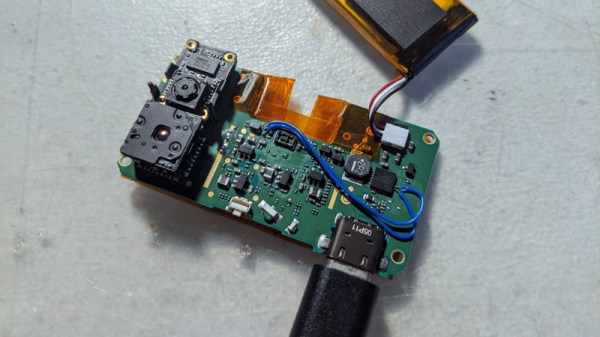
The Flir One Pro is a thermal camera that attaches to a mobile phone with a USB-C plug. [Gigawatts] has one, and unfortunately managed to drop it, breaking the USB-C plug and rendering the device useless. The plug is separate from the main PCB, an assembly of its own with a flexible cable, but FLIR are not interested in supplying spares. What was the answer? Wire data lines into the device’s charging port, of course!

The One Pro has its own battery, and to avoid draining the phone it is charged through another USB connection, this time a socket. The data lines aren’t connected, which necessitated some very careful soldering of wire-wrap wire to an SMD package to fix. When completed and secured with glue the resulting camera works with a USB-C cable, and there are plans to mount a tripod thread receptacle in the space left by the USB-C plug.

It’s disappointing that Flir choose not to supply replacements for the USB-C plug assembly, seemingly they see the device as a throwaway piece of consumer electronics rather than the expensive instrument that it is. This modification should at lease allow some unfortunate One Pro owners to revive their dead cameras.

If you’re curious about the Flir One series of cameras, perhaps you’d like to read our review.

Turning A Tiny FLIR Into An Action Cam With FPGAs

FLIR are making some really great miniature thermal cameras these days, designed for applications such as self-driving cars, and tools that help keep firefighters safe. That’s great and all, but these thermal cameras are so cool, you really just want to play with one. That’s what [greg] was thinking when he designed a PCB backpack that captures thermal images from a FLIR Boson and stores it on an SD card. It’s a thermal action cam, and an impressive bit of FPGA development, too.

The FLIR product in question is a Boson 640, an impressive little camera that records in 640×512 resolution, with a 60 Hz update rate. This one’s got the 95° field of view, giving it a very good specification in a very small footprint. This is a huge improvement over FLIR’s Tau camera, for which [greg] built a breakout board with Ethernet and DDR memory a few years ago. Once he found out about the Boson, he figured a backpack PCB for this camera would be possible and a great excuse to teach himself FPGAs with a hands-on project.

With an impressive ability to find the perfect part, [greg] sourced a Lattice iCE40 FPGA in an 8×8 mm package along with an 8 Mbit HyperRAM in a 6×8 package. This combination allows for all the chips to fit behind the Boson camera. Add in an microSD card slot and a few connectors and this breakout board is very close to being a commercial product, for whatever forward looking infrared needs you might have.

Hot Camera Contest: Build A Battery Powered Thermal Camera

Here’s a challenge for all you hardware hackers out there. Peter Jansen has opened up the Hot Camera Contest on Hackaday.io to use a thermal imaging camera in a battery-powered project.

The challenge here is simple. Use a Flir Lepton thermal imaging camera module in a battery-powered configuration. There’s a catch, though: this is a project to use the Lepton in radiometric mode, where the camera spits out an actual temperature value for each pixel. Yes, this is a documented feature in the Flir Lepton module, but so far very few people are using it, and no one has done it with a small, battery-powered device.

The rules for this challenge are to use the Flir Lepton 2.5 in radiometric mode using either the Raspberry Pi Zero W or ESP32. Any software in this challenge must spit out absolute temperature values in a text format, and there must be a demonstration of putting the Flir Lepton into low-power mode. There are two challenges here, one for the Raspi and one for the ESP32; and winner will be named for each.

Getting More from a Fascinating Sensor

The Flir Lepton is a tiny little thermal camera that’s been available to the Maker community for some time now, first through GroupGets and now through Sparkfun. For a pair of Benjamins, the specs are very impressive: the Lepton has a resolution of 60×80 pixels and everything is can be read over an SPI port. The Lepton gives any project thermal imaging, and the PureThermal board turns the Lepton into a USB device.

Peter Jansen is the creator of the Open Source Science Tricorder (yes, it’s a tricorder) which took Fourth Prize in the 2014 Hackaday Prize. You can understand how he became interested in portable, and we’re sure whatever project he has in mind for this battery-powered Flir will be awesome.

This really is a great example of what the Hackaday.io community is capable of. The goal here is to create useful Open Source drivers for some very interesting hardware, and there’s some prizes to sweeten the pot. Peter has a $125 Sparkfun gift card on offer for each of the two winners. And the challenge of solving a tricky problem and making designs easier for others is a powerful motivator. Who doesn’t like a challenge?

Thermal Camera Diagnoses Thermal Issue On A Sonoff Switch

No matter what your experience level with troubleshooting, there’s always at least a little apprehension when you have to start poking through a mains powered device. A little fear is a good thing; it keeps you focused. For some, though, the aversion to playing with high voltage is too much, which can cause problems when something fails. So what do you do when you’re reluctant to even open the case? Easy — diagnose the problem with an infrared camera.

[Bald Engineer]’s electrophobia started early, with some ill-advised experiments in transcutaneous conduction. So when his new Sonoff WiFi switch failed soon after deploying it to control a lamp in his studio, popping the top while it was powered up was out of the question. The piquant aroma of hot plastic was his first clue to the problem, so he whipped out his Flir One Thermal Camera and watched the device as it powered up. The GIF nearby shows that there was clearly a problem, with a bloom of heat quickly spreading out from the center of the unit. A few IR images of the top and bottom gave him some clues as to the culprits, but probing the board in those areas once power was removed revealed no obviously damaged components.

[Bald Engineer] hasn’t yet gotten to the bottom of this, but his current thinking is that the NCP1117 regulator might be bad, since it rapidly spikes to 115°C. Still, we think this is a nifty diagnostic technique to add to our toolkit, and a great excuse to buy an IR camera. Or, we could go with an open-source thermal camera instead.

[via Dangerous Prototypes]