Radial Vector Reducer Rotates At Really Relaxed Velocity

When [Michael Rechtin] learned about Radial Vector Reducers, the underlying research math made his head spin, albeit very slowly. Realizing that it’s essentially a cycloidal drive meshed with a planetary gear set, he got to work in CAD and, in seemingly no time, had a design to test. You can see the full results of his experiment in the video below the break. Or head on out to Thingiverse to download the model directly.

[Michael] explains that while there are elements of a cycloidal drive, itself a wonderfully clever gear reduction mechanism, the radial vector reducer actually has more bearing surfaces, and should be more durable as a result. Two cycloidal disks are driven by a planetary gear reduction for an even greater reduction, but they don’t even spin, they just cycle in a way that drives the outer shell, setting them further apart from standard cycloidal drives.

How would this 3D printed contraption hold up? To test this, [Michael] built a test jig with a NEMA 23 stepper providing the torque, and an absurd monster truck/front loader wheel — also printed — to provide traction in the grass and leaves of his back yard. He let it drive around its tether for nearly two weeks before disassembling it to check for wear. How’d it look? You’ll have to check the video to find out.

If you aren’t familiar with cycloidal drives, check out this fantastic explanation we featured. As for planetary drives, what better way to demonstrate it than by an ornamental planetary gear clock!

Continue reading “Radial Vector Reducer Rotates At Really Relaxed Velocity”

Simple CNC Gear Production With Arduino

We’ve seen plenty of people 3D printing custom gears over the years, but [Mr Innovative] decided against an additive process for his bespoke component. He ended up using a simple CNC machine that makes use of several components that were either salvaged from a 3D printer or produced on one. Using a small saw blade, the machine cuts gear teeth into some plastic material and — presumably — could cut gears into anything the saw blade was able to slice into, especially if you added a little lubrication, cooling, and dust removal.

If you’ve built a 3D printer, you’ll see a lot of familiar parts. Stepper motors, aluminum extrusion, straight rods, bearing blocks, and rod holders are all used in the build. There’s also a lead screw and the associated components you usually see in a printer’s Z-axis. Naturally, an Arduino drives the whole affair.

The saw blade was custom-made from a washer, grinding an edge and using a 3D printed template to cut teeth in it. We might have been more inclined to use a cut-off wheel from a rotary tool, but this certainly did the trick. An LCD accepts the gear diameter and number of teeth. The stepper rotates the correct number of degrees and another stepper lowers the cutting head which is spinning with a common DC motor.

As impressive as this machine is, the fact remains that a 3D printer can produce more complex designs. For example, a herringbone pattern can help with alignment issues. It has been done many times. You can even use a resin printer, although you might prefer to stick with FDM.

Continue reading “Simple CNC Gear Production With Arduino”

New Gear Saves Old Printer

As the digital photographic revolution took off, and everyone bought a shiny new film-less camera, there was a brief fad for photo printers. The idea was you’d have the same prints you’d always had from film, but the media for these printers would invariably cost a fortune so consumers moved on pretty quickly.

Now the pop up in second-hand stores and the like, which is how [Amen] acquired a Canon Selphy 740. It didn’t work, and on investigation it was found that a particularly tiny plastic gear had failed. Most people would have tossed the printer in the trash, but they instead opted to CNC-machine a new gear. It’s not everyday you tackle a job this small, so it makes for an interesting tale.

While the first instinct might be to reach reach for a CAD package, [Amen] instead wrote a script to create the raw GCode. The machining is done with a 0.2 mm bit ground to the desired profile. The result: a gear that gets the printer working again. It’s a dye-sublimation printer that leaves a negative image in the cartridge, allowing negative prints to be made with a bit of cartridge rewinding. And for those who might have ended up with a Selphy of their own, there’s a further post about using cheaper aftermarket cartridges.

Continue reading “New Gear Saves Old Printer”

3D-Printed Gear Press Can Squash Stuff, Kinda

A press is a useful thing to have, whether you like destroying stuff or you simply want to properly install some bearings. [Retsetman] decided to build one from scratch, eschewing the typical hydraulic method for a geared design instead.

The benefit of going with a gear press design is that [Retsetman] was able to 3D print the required gears himself. The design uses a series of herringbone gears to step down the output of two brushed DC motors. This is then turned into linear motion via a rack and pinion setup. Naturally, the strength of the gears and rack is key to the performance of the press. As you might expect, a fair few of the printed gears suffered failures during the development process.

The final press is demonstrated by smooshing various objects, in true YouTube style. It’s not really able to destroy stuff like a proper hydraulic press, but it can kind of crush a can and amusingly squash a teddy bear. If you’re really keen on making a gear press, though, you’re probably best served by going with a metal geartrain. Video after the break.

Continue reading “3D-Printed Gear Press Can Squash Stuff, Kinda”

Printable Fix For Time Card Clock Has Owner Seeing Red Again

When [Morley Kert] laid eyes on a working time card-punching clock, he knew he had to have it for a still-secret upcoming project. The clock seemed to work fine, except that after a dozen or so test punches, the ink was rapidly fading away into illegibility. After a brief teardown and inspection, [Morley] determined that the ribbon simply wasn’t advancing as it should.

This clock uses a ribbon cassette akin to a modern typewriter, except that instead of a feed spool and a take-up spool, it has a short length of ribbon that goes around and around, getting re-inked once per revolution.

When a card is inserted, a number of things happen: a new hole is punched on the left side, and an arm pushes the card against the ribbon, which is in turn pushed against the mechanical digit dials of the clock to stamp the card.

Finally, the ribbon gets advanced. Or it’s supposed to, anyway. [Morley] could easily see the shadow of a piece that was no longer there, a round piece with teeth with a protrusion on both faces for engaging both the time clock itself and the ribbon cassette. A simple little gear.

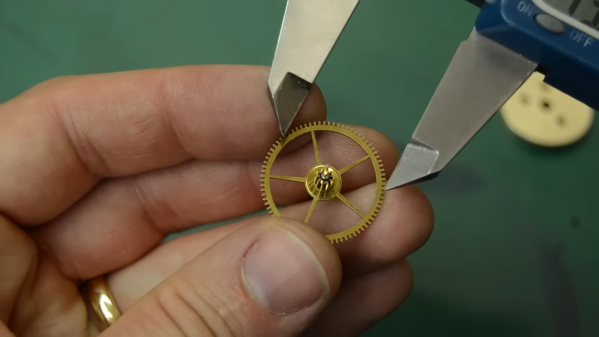
After emailing the company, it turns out they want $95 + tax to replace the part. [Morley] just laughed and fired up Fusion 360, having only caliper measurements and three seconds of a teardown video showing the missing part to go on. But he pulled it off, and pretty quickly, too. Version one had its problems, but 2.0 was a perfect fit, and the clock is punching evenly again. Be sure to check it out after the break.

Okay, so maybe you don’t have a time card clock to fix. But surely you’ve had to throw out an otherwise perfectly good coat because the zipper broke?

Continue reading “Printable Fix For Time Card Clock Has Owner Seeing Red Again”

Resin-Printed Gears Versus PLA: Which Is Tougher?

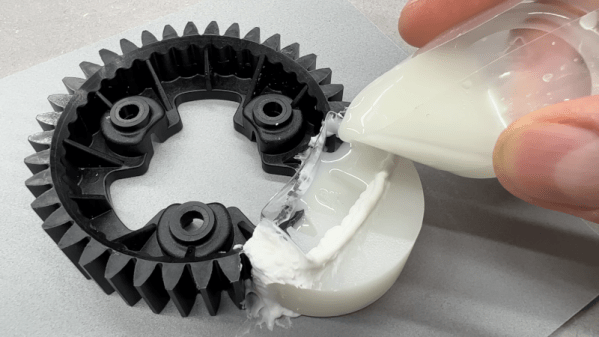
When it comes to making gearboxes, 3D printing has the benefit that it lets you whip up whatever strange gears you might need without a whole lot of hunting around at obscure gear suppliers. This is particularly good for those outside the limited radius served by McMaster Carr. When it came to 3D printed gears though, [Michael Rechtin] wondered whether PLA or resin-printed gears performed better, and decided to investigate.

The subject of the test is a 3D-printed compound planetary gearbox, designed for a NEMA-17 motor with an 80:1 reduction. The FDM printer was a Creality CR10S, while the Creality LD02-H was on resin duty.

The assembled gearboxes were tested by using a 100 mm arm to press against a 20 kg load cell so that their performance could be measured accurately. By multiplying the force applied to the load cell by the  length of the arm, the torque output from the gearbox can be calculated. A rig was set up with each gearbox pushing on the load cell in turn, with a closed-loop controller ensuring the gearbox is loaded up to the stall torque of the stepper motor before letting the other motor take over.

Continue reading “Resin-Printed Gears Versus PLA: Which Is Tougher?”

Do You Need A Cycloidal Drive?

A cycloidal gear drive is one of the most mesmerizing reduction gears to watch when it is running, but it’s not all just eye-candy. Cycloidals give decent gearing, are relatively compact and back-drivable, and have low backlash and high efficiency. You probably want one in the shoulder of your robot arm, for instance.

But designing and building one isn’t exactly straightforward. Thanks, then, to [How To Mechatronics] for the lovely explanation of how it works in detail, and a nice walkthrough of designing and building a cycloidal gear reducer out of 3D printed parts and a ton of bearings. If you just want to watch it go, check out the video embedded below.

The video is partly an ad for SolidWorks, and spends a lot of time on the mechanics of designing the parts for 3D printing using that software. Still, if you’re using any other graphical CAD tool, you should be able to translate what you learned.

It’s amazing that 3D printing has made sophisticated gearbox designs like this possible to fabricate at home. This stuff used to be confined to the high-end machine shops of fancy robotics firms, and now you can make one yourself this weekend. Not exotic or unreliable enough for you? Well, then, buy yourself some flexible filament and step on up to the strain wave, aka “harmonic drive”, gearbox.

Thanks to serial tipster [Keith] for the tip!

Continue reading “Do You Need A Cycloidal Drive?”