Interfacing Old Burglar Alarm Sensors Into HomeAssistant

The annoying thing about commercial smart home gear is its lack of interoperability. HomeAssistant is very flexible though, and it’s easy to use all kinds of gear—even stuff you bodge together yourself. [Jeff Sandberg] demonstrates that ably with his project to use ancient 1990s burglar alarm sensors in his modern smarthome setup.

The sensors in question are from an old GM Interlogix security system. The sensors themselves sit on doors or windows. They use magnets and a reed switch to sense if the door or window is opened. If so, they send out a radio message saying as much. All [Jeff] had to do was catch those messages and translate them for HomeAssistant.

To listen in on the sensors, [Jeff] employed a Nooelec NESDR—a software defined radio that could pick up the 319.5 MHz signals. The NESDR runs a tool called RTL_433, which can decode the sensor signals, and spit out MQTT messages to interface with HomeAssistant.

Much of the hard work was done already for [Jeff]—he just had to lace together the components. This is just a testament to the hard work by people in the HomeAssistant and SDR communities for figuring all this out and putting the tools online.

We’ve seen some neat HomeAssistant builds before, like this neat home control terminal. If you’re cooking up your own smarthome hacks, don’t hesitate to let us know!

Read Utility Meters Via SDR To Fill Out Smart Home Stats

[Jeff Sandberg] has put a fair bit of effort into adding solar and battery storage with associated smarts to his home, but his energy usage statistics were incomplete. His solution was to read data from the utility meter using RTL-SDR to fill in the blanks. The results are good so far, and there’s no reason similar readings for gas and water can’t also be done.

[Jeff] uses the open source home automation software Home Assistant which integrates nicely with his solar and battery backup system, but due to the way his house is wired, it’s only aware of about half of the energy usage in the house. For example, [Jeff]’s heavy appliances get their power directly from the power company and are not part of the solar and battery systems. This means that Home Assistant’s energy statistics are incomplete.

Fortunately, in the USA most smart meters broadcast their data in a manner that an economical software-defined radio like RTL-SDR can access. That provided [Jeff] with the data he needed to get a much more complete picture of his energy usage.

While getting data from utility meters is conceptually straightforward, actually implementing things in a way that integrated with his system took a bit more work. If you’re finding yourself in the same boat, be sure to look at [Jeff]’s documentation to get some ideas.

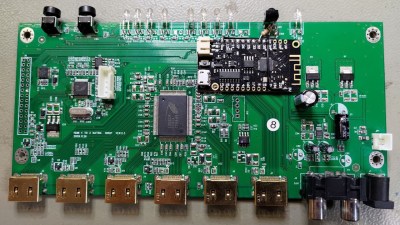
Close-up of the mod installed into the HDMI switch, tapping the IR receiver

Interfacing A Cheap HDMI Switch With Home Assistant

You know the feeling of having just created a perfect setup for your hacker lab? Sometimes, there’s just this missing piece in the puzzle that requires you to do a small hack, and those are the most tempting. [maxime borges] has such a perfect setup that involves a HDMI 4:2 switch, and he brings us a write-up on integrating that HDMI switch into Home Assistant through emulating an infrared receiver’s signals.

overview picture of the HDMI switch, with the mod installed

The HDMI switch is equipped with an infrared sensor as the only means of controlling it, so naturally, that was the path chosen for interfacing the ESP32 put inside the switch. Fortunately, Home Assistant provides the means to both receive and output IR signals, so after capturing all the codes produced by the IR remote, parsing their meaning, then turning them into a Home Assistant configuration, [maxime] got HDMI input switching to happen from the comfort of his phone.

We get the Home Assistant config snippets right there in the blog post — if you’ve been looking for a HDMI switch for your hacker lair, now you have one model to look out for in particular. Of course, you could roll your own HDMI switch, and if you’re looking for references, we’ve covered a good few hacks doing that as part of building a KVM.

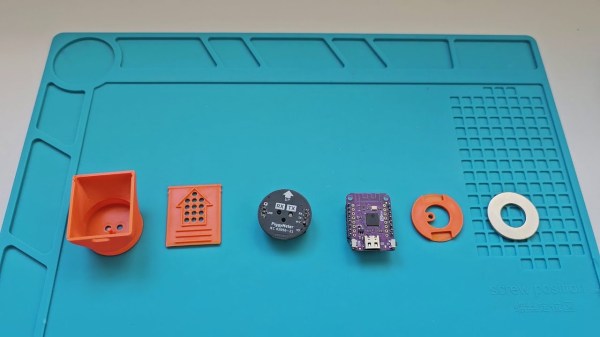
All the components of the Piggymeter interface laid out on a silicon mat

Simple Optical Meter Sets New Standards For Documentation

PiggyMeter is a wonderful example of a device that you never knew you needed – simple, elegant, easy to build, and accompanied by amazing documentation. It’s a snap-on interface for electric meters, dubbed so because its 3D printable shell looks like a pig nose, and it works with IEC62056-21 compliant meters. If you want to learn about your home’s power consumption in real time and your meter happens to fit the bill, look into building a PiggyMeter, it’s the kind of DIY project that a hacker was destined to design at some point.

All you need is a printed shell, a Wemos-compatible development board with an ESP32 MCU, an optical interface board, and a few small parts like a ring magnet. The optical interface board is not open source, but there’s drawings available, and the design is pretty simple, so it should be trivial to recreate. Plus, it’s also reasonably inexpensive if you don’t want to build your own board. Got parts? Simply put them all together, flash the firmware, and you have a meter adapter added to your smart home device family.

This device works with HomeAssistant, and it’s incredibly easy to set up, in part because of just how clearly everything is outlined in the blog post. Seriously, the documentation is written with love, and it shows. If you’re looking to learn how to document a device in a helpful way, take notes from the PiggyMeter. And, if you’d like to learn more about optically coupled power meter interfaces, here’s a different open source project we’ve covered before!

Bringing The Voice Assistant Home

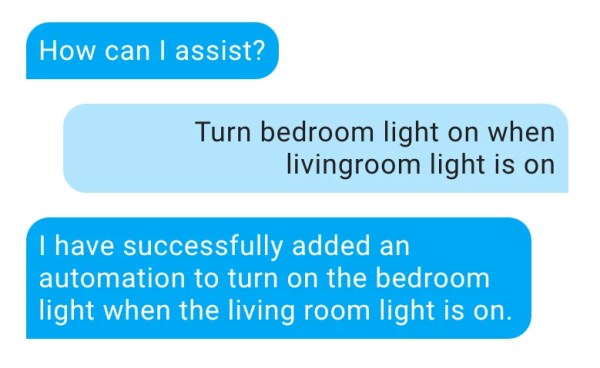
For many, the voice assistants are helpful listeners. Just shout to the void, and a timer will be set, or Led Zepplin will start playing. For some, the lack of flexibility and reliance on cloud services is a severe drawback. [John Karabudak] is one of those people, and he runs his own voice assistant with an LLM (large language model) brain.

In the mid-2010’s, it seemed like voice assistants would take over the world, and all interfaces were going to NLP (natural language processing). Cracks started to show as these assistants ran into the limits of what NLP could reasonably handle. However, LLMs have breathed some new life into the idea as they can easily handle much more complex ideas and commands. However, running one locally is easier said than done.

A firewall with some muscle (Protectli Vault VP2420) runs a VLAN and NIPS to expose the service to the wider internet. For actually running the LLM, two RTX 4060 Ti cards provide the large VRAM needed to load a decent-sized model at a cheap price point. The AI engine (vLLM) supports dozens of models, but [John] chose a quantized version of Mixtral to fit in the 32GB of VRAM he had available.

Continue reading “Bringing The Voice Assistant Home”

Image of the presenter on the podium, in front of the projector screen with graphs shown on it

Supercon 2022: [Alex Whittemore] On Treating Your Sensor Data Well

If you build your own devices or hack on devices that someone else has built, you know the feeling of opening a serial terminal and seeing a stream of sensor data coming from your device. However, looking at scrolling numbers gets old fast, and you will soon want to visualize them and store them – which is why experienced makers tend to have a few graph-drawing and data-collecting tools handy, ready to be plugged in and launched at a moment’s notice. Well, if you don’t yet have such a tool in your arsenal, listen to this 16-minute talk by [Alex Whittemore] to learn about a whole bunch of options you might not even know you had!

For a start, there’s the Arduino Serial Plotter that you get for free with your Arduino IDE install, but [Alex] also reminds us of the Mu editor’s serial plotter – about the same in terms of features, but indisputably an upgrade in terms of UX. It’s not the only plotter in town, either – Better Serial Plotter is a wonderful standalone option, with a few features that supercharge it, as [Alex] demonstrates! You don’t have to stop here, however – we can’t always be tethered to our devices’ debugging ports, after all. Continue reading “Supercon 2022: [Alex Whittemore] On Treating Your Sensor Data Well”

the PCB without the case on, showing the screen, battery, and removable sensor

2023 Hackaday Prize: A Reusable Plant Monitor

[Ovidiu] cares for their house plants, trying to dial in the perfect soil humidity and light levels. However, many cheap monitors tend to rust after a few weeks of sitting in a damp, slightly acidic environment. By creating a custom plant monitor with a removable probe, not only can [Ovidiu] integrate better with their Home Assistant setup, but it will also be less wasteful.

The build starts with an ESP32-S3, a TP4056 charging circuit, a small e-ink display, and an AHT20 IC for air humidity and temperature. The ESP32 reads the probe using the capacitance measuring devices for touchpads built into the chip. Or course, a 450mAh battery provides a battery life of about 11 days. The probe is just a bare PCB with a connector at the top, making them cheap and easy to swap. They included pads on the probe for a thermistor for reading soil temperature, but this is optional. A handsome 3D-printed case wraps it all up nicely.

Continue reading “2023 Hackaday Prize: A Reusable Plant Monitor”