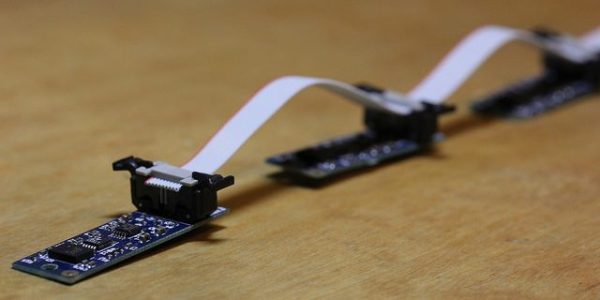
Power Glove Takes Over Quadcopter Controls

Gerrit and I were scoping out the Intel booth at Bay Area Maker Faire and we ran into Nolan Moore who was showing of his work to mash together a Nintendo Power Glove with an AR Drone quadcopter. Not only did it work, but the booth had a netted cage which Nolan had all to himself to show off his work. Check the video clip below for that.

The control scheme is pretty sweet, hold your hand flat (palm toward the ground) to hover, make a fist and tilt it in any direction to affect pitch and roll, point a finger up or down to affect altitude, and point straight and twist your hand for yaw control. We were talking with Nolan about these controls it sounded sketchy, but the demo proves it’s quite responsive.

The guts of the Power Glove have been completely removed (that’s a fun project log to browse through too!) and two new boards designed and fabbed to replace them. He started off in Eagle but ended up switching to KiCAD before sending the designs out for fabrication. I really enjoy the footprints he made to use the stock buttons from the wrist portion of the glove.

A Teensy LC pulls everything together, reading from an IMU on the board installed over the back of the hand, as well as from the flex sensors to measure what your fingers are up to. It parses these gestures and passes appropriate commands to an ESP8266 module. The AR Drone 2.0 is WiFi controlled, letting the ESP8266 act as the controller.

Autonomous Truck Teaches Itself To Powerslide

When you’re a teenager new to the sensations of driving, it seems counterintuitive to “turn into the skid”, but once you’ve got a few winters of driving under your belt, you’re drifting like a pro. We learn by experience, and as it turns out, so does this fully autonomous power-sliding rally truck.

Figuring out how to handle friction-optional roadways is entirely the point of the AutoRally project at Georgia Tech, which puts a seriously teched-up 1/5 scale rally truck through its paces on an outdoor dirt track. Equipped with high-precision IMU, high-resolution GPS, dual front-facing cameras, and Hall-effect sensors on each wheel sampled at 70 Hz, the on-board Quad-core i7 knows exactly where the vehicle is and what the relationship between it and the track is at all times. There’s no external sensing or computing – everything needed to run the track is in the 21 kg truck. The video below shows how the truck navigates the oval track on its own with one simple goal – keep the target speed as close to 8 meters per second as possible. The truck handles the red Georgia clay like a boss, dealing not only with differing surface conditions but also with bright-to-dark lighting transitions. So far the truck only appears to handle an oval track, but our bet is that a more complex track is the next step for the platform.

While we really like the ride-on scale of this autonomous chase vehicle, other than that there haven’t been too many non-corporate self-driving vehicle hacks around here lately. Let’s hope that AutoRally is an indication that the hackers haven’t ceded the field to Google entirely. Why let them have all the fun?

Continue reading “Autonomous Truck Teaches Itself To Powerslide”

Raspberry Pi Levels With You

It is easy to imagine how early man started using rocks and then eventually developed better and better tools until they created the hammer. Some simple tools took a little longer to invent. The spirit level, for example, didn’t exist until sometime in the last half of the 1600’s.

The idea is simple. A clear tube holds a liquid and a bubble. When the bubble is in the center of the tube, the device is level in the direction of the tube. [Mark Williams] has a slightly more involved approach. He took an internal measurement unit (IMU) and a Raspberry Pi to create a modern take on the spirit level.

Continue reading “Raspberry Pi Levels With You”

Eddie The Balance Bot

Eddie is a surprisingly capable tiny balancing robot based around the Intel Edison from which it takes its name.

Eddie’s frame is 3D printed and comes in camera and top hat editions. The camera edition provides space for a webcam to be mounted, since the Edison has enough go power to do basic vision. The top hat edition just lets you 3D print a tiny top hat for the robot.

The electronics are based around the Edison board and Sparkfun’s set of, “Blocks” designed for it. This project needs the battery block, the H-Bridge block, the GPIO block, and the USB block along with a 9DOF block for balancing. It’s, somewhat unfortunately, not a cheap robot. The motors are Pololu all-metal gearmotors with hall-effect sensors acting as encoders.

We’re really impressed with [diabetemonster]’s design and documentation on the robot. Full source code is provided along with a very nice build guide to get the platform going fast.

There are a few videos of it in action, available after the break. They show it handling situation such as a load being placed on the robot and slopes as well as bonus features like dancing and remote control.

Continue reading “Eddie The Balance Bot”

Amazing IMU-based Motion Capture Suit Turns You Into A Cartoon

[Alvaro Ferrán Cifuentes] has built the coolest motion capture suit that we’ve seen outside of Hollywood. It’s based on tying a bunch of inertial measurement units (IMUs) to his body, sending the data to a computer, and doing some reasonably serious math. It’s nothing short of amazing, and entirely doable on a DIY budget. Check out the video below the break, and be amazed.

Cellphones all use IMUs to provide such useful functions as tap detection and screen rotation information. This means that they’ve become cheap. The ability to measure nine degrees of freedom on a tiny chip, for chicken scratch, pretty much made this development inevitable, as we suggested back in 2013 after seeing a one-armed proof-of-concept.

But [Alvaro] has gone above and beyond. Everything is open source and documented on his GitHun. An Arduino reads the sensor boards (over multiplexed I2C lines) that are strapped to his limbs, and send the data over Bluetooth to his computer. There, a Python script takes over and passes the data off to Blender which renders a 3D model to match, in real time.

All of this means that you could replicate this incredible project at home right now, on the cheap. We have no idea where this is heading, but it’s going to be cool.

Continue reading “Amazing IMU-based Motion Capture Suit Turns You Into A Cartoon”

A Very, Very Small IMU

The reason we’re playing with quadcopters, flight controllers, motion controlled toys, and hundreds of other doodads is the MEMS revolution. A lot is possible with tiny accelerometers and gyroscopes, and this is looking like the smallest IMU yet. It’s an 18mm diameter IMU, with RF networking, C/C++ libraries, and a 48MHz ARM microcontroller – perfect for the smallest, most capable quadcopter we’ve ever seen.

The build started off as an extension of the IMUduino, an extremely small rectangular board that’s based on the ATMega32u4. While the IMUduino would be great for tracking position and orientation over Bluetooth, it’s still 4cm small. The Femtoduino cuts this down to an 18mm circle, just about the right size to stuff in a model rocket or plane.

Right now, femtoIO is running a very reasonable Kickstarter for the beta editions of these boards with a $500 goal. The boards themselves are a little pricey, but that’s what you get with 9-DOF IMUs and altimeter/temperature sensors.

Create An Inclinometer Using A Raspberry Pi

The latest gizmo that you can make using the cheap and easy Raspberry Pi is here courtesy of [Mark Williams]. He has hooked up an inertial measurement unit (IMU) to the Pi and built an inclinometer to use to measure the various angles of an off-road vehicle.

This particular guide goes through the setup of SDL to control the video output to a small screen. Then, a function is created to rotate the images based on input from the IMU so that the vehicle position can be shown graphically on the screen. Now, when your truck is about to roll over on a hill, you’ll get advance warning!

Of course, this whole project is predicated on installing the IMU and getting it up and running on the Raspberry Pi in the first place. [Mark] has you covered on a guide for setting that up as well. This delves into setting up the IMU over I2C to get it talking to the Raspberry Pi, and then converting the raw data from the IMU into data that is more usable. Be sure to check out [Mark]’s page for all of the code and details!