An RFID Ring For The Body Mod Squeamish

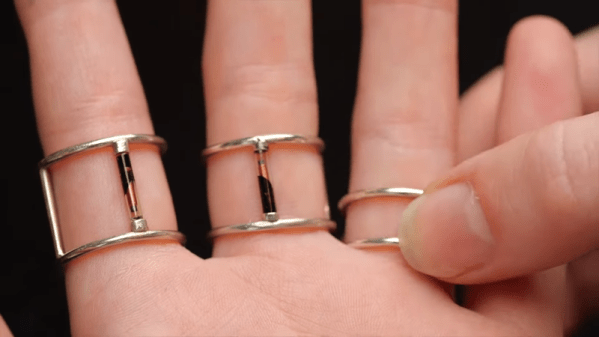
Some people get inked, while others get henna or those water transfer tattoos you might find in a box of Cracker Jack. [Becky] wanted the benefits of having an RFID tag in her finger — unlock doors or log into your computer with a swipe of your finger — but wasn’t ready to get an implant. Her solution: make an artistic ring that conceals a tiny glass capsule RFID tag.

Besides not having to shove some tech under your epidermis, there are a few other advantages: you can change out tags as easy as changing rings, for one. You can also easily loan your ring to someone just as you might give them keys to your door.

Continue reading “An RFID Ring For The Body Mod Squeamish”

The Battery Is Part Of The Art

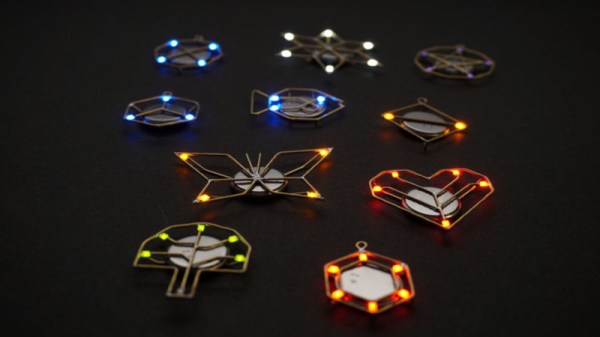
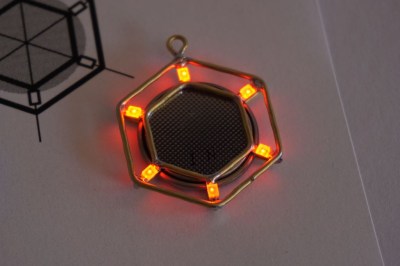
A work of art is appreciated for its own sake and we will never tire of seeing stunning circuits from microscopic dead-bugs to ornate brass sculptures. We also adore projects that share the tricks to use in our own work. Such is the case with [Jiří Praus] who made some jewelry and shared his templates so we try this out ourselves.

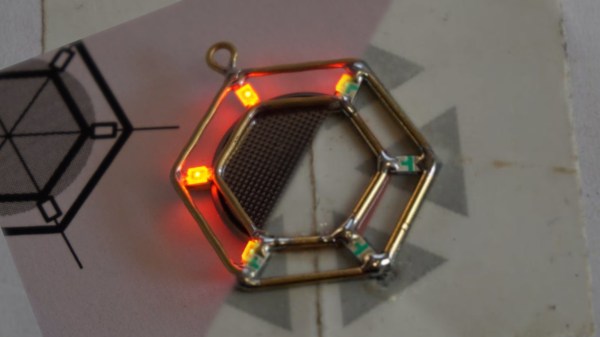
The materials include brass wire, solder, and surface-mount LEDs. Template design expects a 1206 light, so if you step outside that footprint, plan accordingly. The printable templates are intuitive and leverage basic wire jewelry making skills. Some good news is that flashing LEDs are available in that size so you can have an array of blinkenlights that appears random due to drifting circuits. Please be wary with RGB lights or mixing colors because red LEDs generally run at a lower voltage and they will siphon a significant chunk of a coin-cell’s power from a competing green or blue. How else can these be personalized?

[Jiří]’s charms are just the latest of circuits that capture our eyes and tickle our ears.

A Stylish Pair Of FPGA Earrings

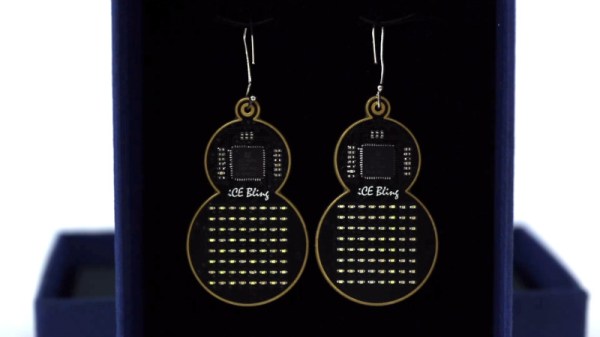
Sometimes, rather than going the commercialistic route, it can be nice to make a gift for that personal touch. [Mahesh Venkitachalam] had been down this very road before, often stumbling over that common hurdle of getting in too deep and missing the deadline of the occasion entirely. Not eager to repeat the mistake, help was enlisted early, and the iCE bling earrings were born.

The earrings were a gift for [Mahesh]’s wife, and were made in collaboration with friends who helped out with the design. The earrings use a Lattice iCE40UP5k FPGA to control an 8×8 grid of SMD LEDs. This is all achieved without the use of shift registers, with the LEDs all being driven directly from GPIO pins. This led to several challenges, such as routing all the connections and delivering enough current to the LEDs. The final PCB is a 4-layer design, which made it much easier to get all the lines routed effectively. A buffer is used to avoid damaging the FPGA by running too many LEDs at once.

It’s a tidy build, which makes smart choices about component placement and PCB design to produce an attractive end result. LEDs naturally lend themselves to jewelry applications, and we’ve seen some great designs over the years. Video after the break.

Continue reading “A Stylish Pair Of FPGA Earrings”

LED Jewelry Makes Neat Use Of Brass

Wearable electronics can be both fun and fashionable. However, there are certain challenges involved in neatly integrating electronic components in a way that is both functional and comfortable for the wearer. In this vein, [Jiri Praus] has managed to create some glowing earrings that are remarkably simple to boot.

The body of the earring also acts as the conductor and battery holder, all in one.

The earrings start out with brass rod, bent with pliers and soldered at the ends. By following a paper template, it’s possible to get neat and accurate bends by hand, which is necessary to make a matching pair. Through careful design, the brass rods are soldered to the LEDs, and more rod is then used to create an integrated holder for a coin cell battery, which powers the lights.

Thanks to [Jiri]’s smart designs — which we’ve featured before in the form of a blooming wireframe tulip — no wires are needed. The brass rods which make up the body of the jewelry also act as the conductors to pass current to the LEDs. The internal resistance of the coin cell battery also eliminates the need for an in-line resistor. In combination, this serves to create a simple and attractive finished product that should shine for several hours.

We’ve seen other LED earring designs before, too. There are plenty of ways to experiment with glowing jewelry, and if you’ve done something novel, be sure to let us know.

Edge Lit Pendant, Is, Well… Lit

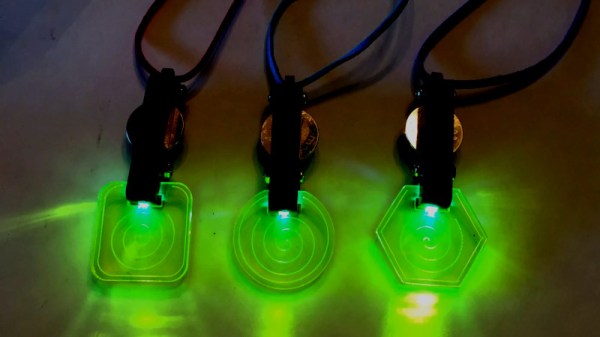
Acrylic is a great material. It’s not cheap, but it comes in a wide variety of colours and styles and can be used to make some very attractive projects. [Geek Mom Projects] is a big fan, and whipped up some fun pendants for a high school Maker Faire.

[Geek Mom] has long been a fan of edge-lighting, as it’s a great way to make beautiful glowy projects out of acrylic. In this case a fluorescent acrylic is used with white LEDs to generate an eerie green glow, though it’s also noted that the project can be done with clear acrylic and color-shifting LEDs instead for an equally cool look. If you’re filming a low-budget sci-fi film, this could be just what you need.

The pendants made a great project for young makers to learn about LEDs, electronics, and technologies such as lasercutting that were used to produce the parts. With copper tape used instead of soldering and a CR2032 battery used to eliminate the need for a current limiting resistor, it’s a very accessible project that most teens were able to complete without assistance.

It’s not the first time we’ve seen edge-lit pendants, either. Alternatively, if you need your acrylic bent, there’s a tool for that, too.

CNC Turns A Single PCB Into Origami Hemisphere

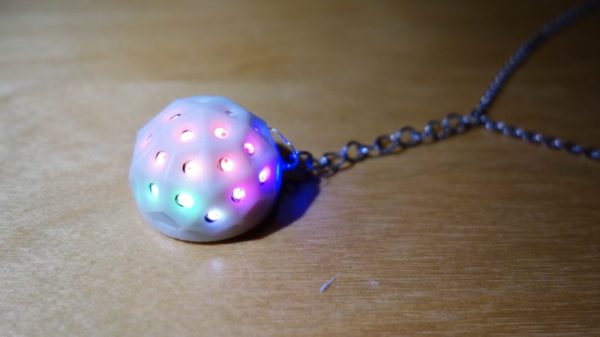
Trying to make a hemispherical surface out of a PCB is no easy feat. Trying to do that and make the result a working circuit is even harder. Doing it with one solid piece of FR4 seems impossible, right?

Not so much. [brainsmoke] came up with a clever way to make foldable, working PCBs that can be formed into hemispheres. The inspiration for this came from a larger project that resulted in a 32-cm diameter LED-studded sphere, which a friend thought would make a swell necklace if it was scaled down. That larger sphere was made somewhat like a PCB soccer ball, with individual panels soldered together. [brainsmoke] didn’t relish juggling dozens of tiny PCBs to make a necklace-sized version, so the unfolded pattern for half a deltoidal hexecontahedron was laid out as one piece on single-sided FR4. The etched boards were then cut out on a CNC mill, with the joints between the panels cut as V-grooves from the rear of the board. By leaving just enough material to act as a live hinge, [brainsmoke] was able to fold the pattern up into a hemisphere while leaving the traces intact. The process was fussy and resulted in a lot of broken FR4 and traces, but with practice and the use of thicker board material and heavier copper, the hemisphere came together. The video below shows the final product

This objet d’art is [brainsmoke]’s entry in the Circuit Sculpture Contest, which is just wrapping up wrapped up last week. We can’t wait to share some of the cool things people came up with in this contest, which really seemed to get the creative juices flowing.

Continue reading “CNC Turns A Single PCB Into Origami Hemisphere”

Morse Code Blinking Jewelry

With the size of electronic parts and batteries these days, very small items are obviously becoming more and more viable. [Yann Guidon] has made some awesome pieces of LED jewelry using a minimal number of surface mount parts and a small lithium-ion battery. To make the jewelry stand out a bit, other than just blinking on and off, these LEDs blink a short message in Morse code.

This is an update and open sourcing of some work that [Yann] did a few years ago, and the iterations have resulted in a smaller design. But the main part of the latest version is the addition of the Morse code blinking using a small microcontroller. The microcontroller [Yann] used is the SMD version of the PIC10F200, a small, 8 pin PIC microcontroller. This, a resistor and a metal clip are soldered to pads on a Luxeon Star LED.  The LEDs are undervolted so they’re not too bright, so the heat sink isn’t really needed, but it’s a good size for the components. Because the LEDs don’t generation much heat, the back of the aluminum frame that the LED is on is carved out a bit so that the small lithium-ion battery can go there.

The final component is the code itself, and [Yann] has released it as an assembly file. An associated text file contains the text of the message that you want the earrings to blink. The text file can contain up to 190 bytes. A shell script converts the text to a file that can be included in the asm file. After that script is run, assemble the code and flash it to the PIC and you’re done!

We’ve seen a couple of other LED jewelry projects done, including this LED engagement ring, and these tiny light-up earrings. You can see video of [Yann]’s project in the video below:
Continue reading “Morse Code Blinking Jewelry”