Hand-Stitched Keycaps For Truly Luxurious Typing

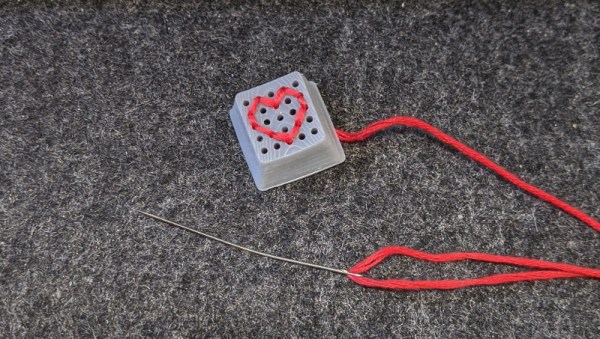
We’ve seen some very unique custom keycaps recently, but nothing quite like the embroidered ones that [Billie Ruben] has been experimenting with. Using a clever 3D printed design, she’s crafted what could well be one of the most easily customizable keycaps ever made…assuming you’ve got a needle and thread handy.

The idea is to take a standard keycap blank and pop an array of 25 holes in the face. Your thread or yarn is run through these holes, allowing you to create whatever shape you wish within the 5 x 5 matrix. While it’s somewhat tight quarters on the underside of the cap, nothing prevents you from using multiple colors or even materials to do your stitching. As an added bonus, the soft threads should provide a very comfortable and particularly tactile surface to tap on.
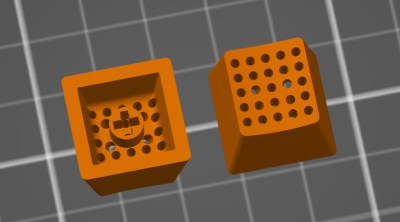
Now the most obvious application is to simply stitch up versions of all the alphanumeric keys, but there’s clearly room for some interpretation here. [Billie] has already shown off some simple iconography like a red heart and we’re sure creative folks will have no trouble coming up with all sorts of interesting needlepoint creations to top their prized mechanical keyboards.

The intricate details necessary to make this idea work may be beyond the common desktop FDM 3D printer, so [Billie] ran these prototypes off on a resin printer (she attributes the visible layer lines to a hasty print). She’d love to hear feedback from other keyboard aficionados who’ve made the leap to liquid goo printing, so be sure to drop her a line if you print out a set of your own. It sounds like a new version is in the works which will provide a false bottom to cover the stitching from below, but functionally these should get you started.

Keycap Customizer Brings All Your Caps To The Board

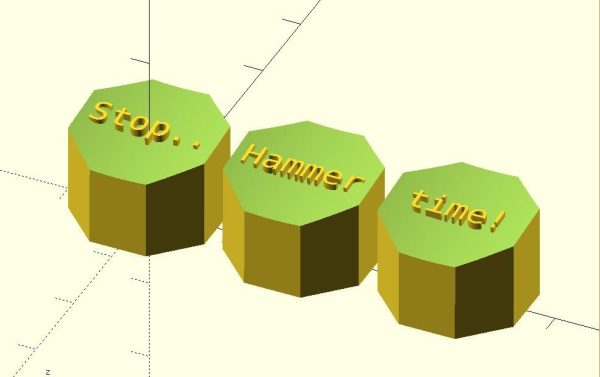
With bright colors and often intricate designs, after the physical shape of a keyboard the most conspicuous elements are surely the keycaps. Historically dictated by the stem of the key switch it attaches to, keycaps come in a variety of sizes, colors, profiles, and designs. As they necessarily include small features with tight tolerances to fit the stem of their key switch, injection molding is the classic manufacturing technique for a keycap. But as hobbyist 3D printing matures and resin printers become more accessible, home keycap manufacturing is increasingly good option. Instead of designing each cap by hand, consider trying [rsheldiii]’s KeyV2 OpenSCAD script to create custom caps with ease.

To cover the basics, KeyV2 can generate full keycap sets with Cherry or Alps stems, in the SA, DSA, DCS profiles (and more!) for any typically sized keyboard. Generating a particular cap of arbitrary profile, position, and size is just a short chain of function calls away. But standard keycap sets aren’t the highlight of this toolset.

If you’re not an OpenSCAD aficionado yet, visit [Brian Benchoffs] great getting-started guide or our other coverage to get a feel for what the tool can do. Part of OpenSCAD’s attraction is that it is the the paragon of parametric modeling. It’s declarative part files ensure that no parameter goes undefined, which is a perfect fit for KeyV2.

The root file upon which all caps are based on has about 150 keycap parameters which can be tweaked, and that’s before more elaborate customization. Making simple “artisan” caps is a snap, as the magic of OpenSCAD means the user can perform any Boolean operations they need on top of the fully parameterized keycap. Combining an arbitrary model with a keycap is one union() away. See the README for examples.

For the prospective user of KeyV2 worried about complexity; don’t be, the documentation is a treat. Basic use to generate standard keycaps is simple, and there are plenty of commented source files and examples to make more complex usage easy. Thinking about a new keyboard? Check out our recent spike in clacky coverage.

Making Art With Keycap Bots

Robots come in all shapes and sizes, from remote landers on distant planets to assembly arms working hard in auto plants. Of course, the definition is broad and can contain more frivolous entities, too. [smdavee]’s watercoloring ‘bots may not be particularly complex or sentient, but they’re a fun creative build.

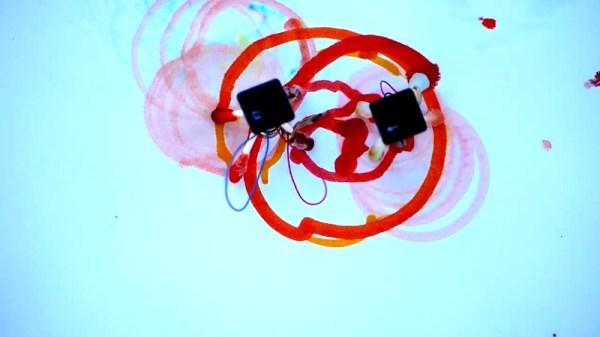
The design is akin to that of the BristleBot, with a pager vibration motor allowing the ‘bot to wobble about on unsteady feet. In this case, a keyboard cap is used, with cottontips inserted in the base to act as legs. These are then dipped in watercolor paints, and the attached motor is then switched on to vibrate the ‘bot around the page.

It’s an easy build, and one that would be particularly well-suited to teaching young children basic electronic concepts. Plus, there’s the added fun of getting to make a mess with watercolors, too. If you’ve got a fun art robot hiding away in your garage, be sure to let us know. Video after the break.

Continue reading “Making Art With Keycap Bots”

Greatest Keycaps And Where To Find Them

Look at your keyboard. Do the keycaps excite you? That’s what we thought. You pound on that thing day in and day out. Shouldn’t it at least be attractive? Or even happiness-inducing? You don’t necessarily have to replace every single keycap to spark joy. When it comes to artisan keycaps, the point is to have something that stands out.

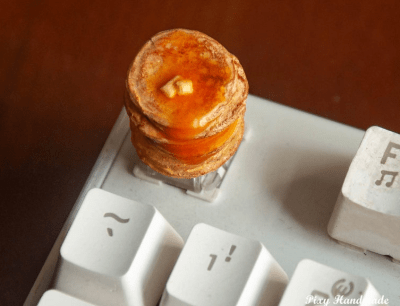
How about an Escape key that looks like a tall stack of flapjacks or a tiny, intricate cream puff? From a practical standpoint, how about a spiky Escape key that makes you think twice about rage quitting?

If you’re into games or anime, chances are good that there are more than enough artisan keycaps out there to keep you cash-poor for a while. The same goes for scrumptious foodstuffs with Cherry MX-compatible stems.

In this day and age, you can get just about any type of keycap you want, especially those encapsulating pop culture phenomena and fads. Yes there’s a fidget spinner keycap, and it’s adorable.

Continue reading “Greatest Keycaps And Where To Find Them”

C64 Keyboard Helps Keep The Memory Alive

To say that the Commodore 64 was an important milestone in the history of personal computing is probably a bit of an understatement. For a decent chunk of the 1980s, it was the home computer, with some estimates putting the total number of them sold as high as 17 million. For hackers of a certain age, there’s a fairly good chance that the C64 holds a special spot in their childhood; perhaps even setting them on a trajectory they followed for the rest of their lives.

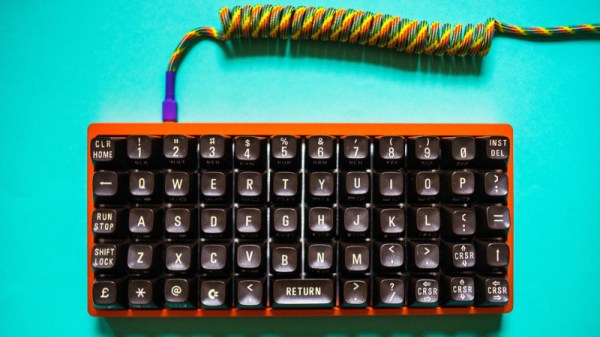
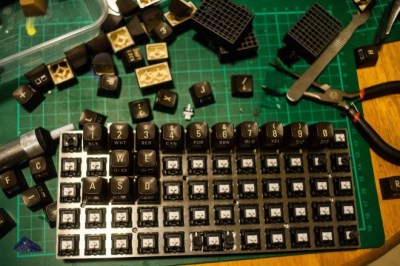
At the risk of showing his age, [Clicky Steve] writes in to tell us about the important role the C64 played in his childhood. He received it as a gift on his fifth birthday from his parents, and fondly remembers the hours he and his grandfather spent with a mail order book learning how to program it. He credits these memories with getting him interested in technology and electronic music. In an effort to keep himself connected to those early memories, he decided to build a modern keyboard with C64 keycaps.

As you might expect, the process started with [Steve] harvesting the caps from a real Commodore, in fact, the very same computer he received as a child. While the purists might shed a tear that the original machine was sacrificed to build this new keyboard, he does note that his C64 had seen better days.

Of course, you can’t just pull the caps off of C64 and stick them on a modern keyboard. [Steve] found the STLs for a 3D printable C64 to Cherry MX adapter on GitHub, and had 80 of them professionally printed as he doesn’t have access to an SLS printer. He reports the design works well, but that non-destructively removing the adapters from the caps once they are pressed into place probably isn’t going to happen; something to keep in mind for others who might be considering sacrificing their personal C64 for the project.

[Steve] installed the caps on a Preonic mechanical keyboard, which worked out fairly well, though he had to get creative with the layout as the C64 caps didn’t really lend themselves to the keyboard’s ortholinear layout. He does mention that switches a bit heavier than the Cherry MX Whites he selected would probably be ideal, but overall he’s extremely happy with his functional tribute to his grandfather.

If you’re more of a purist, you can always adapt the C64 keyboard directly to USB. Or go in the complete opposite direction and put a Raspberry Pi into a C64 carcass.

A Custom Keyboard At Maximum Effort

No one loves hacked keyboards more than Hackaday. We spend most of our workday pressing different combinations of the same 104 buttons. Investing time in that tool is time well spent. [Max] feels the same and wants some personality in his input device.

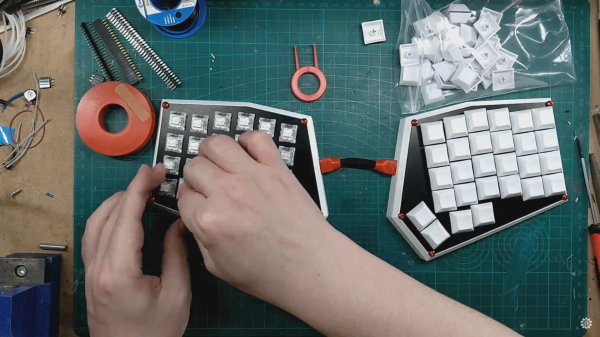
In the first of three videos, he steps us through the design and materials, starting with a layer to hold the keys. FR4 is the layer of fiberglass substrate used for most circuit boards. Protoboards with no copper are just bare FR4 with holes. Homemade CNC machines can glide through FR4, achieving clean lines, and the material comes in different mask colors so customizing an already custom piece is simple. We see a couple of useful online tools for making a homemade keyboard throughout the videos. The first is a keypad layout tool which allows you to start with popular configurations and tweak them to suit your weirdest desires. Missing finger? Forget one key column. Extra digit? Add a new key column. Huge hands? More spaces between the keys. [Max] copied the Iris keyboard design but named his Arke, after the fraternal sister to Iris which is fitting since his wrist rests are removable. Continue reading “A Custom Keyboard At Maximum Effort”

Nixies And Raspis For A Modern Vintage Calculator

There are a few very rare and very expensive calculators with Nixie tube displays scattered about calculator history, but so far we haven’t seen someone build a truly useful Nixie calculator from scratch. [Scott] did just that. It’s a complete, fully-functional electronic calculator with all the functions you would expect from a standard scientific calculator.

The calculator uses IN-12 Nixies, the standard for anyone wanting to build a clock or other numerical neon discharge display. Each Nixie is controlled by a K155D driver chip, with the driver chip controlled by an I2C IO expander.

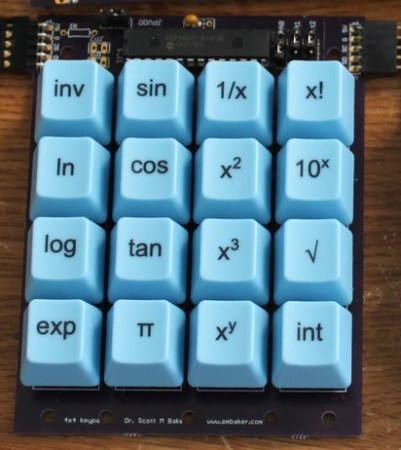
The keypad is where this gets interesting; electronics are one thing, but electromechanicals and buttons are a completely new source of headaches. [Scott] ended up using Cherry MX Blue switches, one of the more common switches for mechanical keyboards. By using a standard keyboard switch [Scott] was able to get custom keycaps made for each of the buttons on his calculator.

The brains of the calculator is a Raspberry Pi, with the I2C pins going off to listen in on the several IO expanders on the device. A Raspi might be a little overkill, but an Internet-connected calculator does allow [Scott] to send calculations off to WolframAlpha, or even the copy of Mathematica included in every Pi.

[Scott] has put his project up on Kickstarter. Videos below.

Continue reading “Nixies And Raspis For A Modern Vintage Calculator”