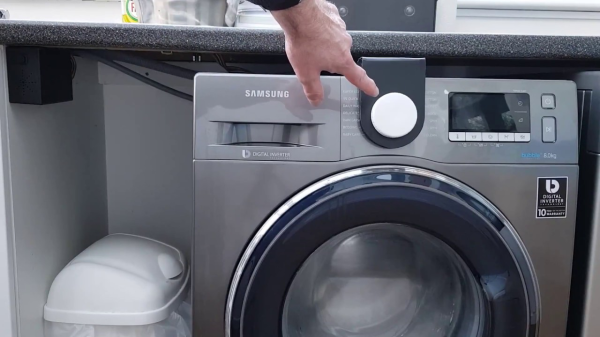
Have you shopped for an appliance lately? They’re all LEDs, LEDs everywhere. You might say that manufacturers are out of touch with the utility of tactile controls. [Wingletang]’s fancy new washing machine is cut from this modern cloth. While it does have a nice big knob for selecting cycles, the only indication of your selection is an LED. This isn’t an issue for [Wingletang], but it’s a showstopper for his visually impaired wife.
They tried to make tactile signposts for her most-used cycles with those adhesive rubber feet you use to keep cabinet doors quiet. But between the machine’s 14(!) different wash cycles and the endlessly-rotating selector knob, the tactile map idea was a wash. It was time to make the machine talk.
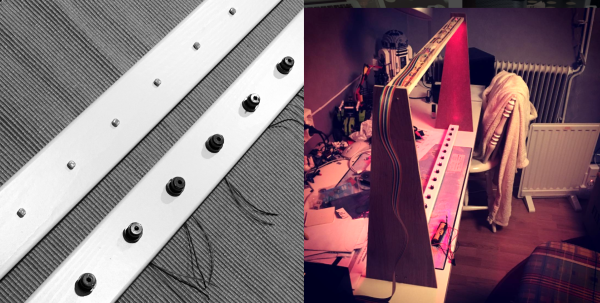
For his very first microcontroller project, [Wingletang] designed a completely non-invasive and totally awesome solution to this problem. He’s using LDRs arranged in a ring to detect which LED is lit. Recycled mouse pad foam and black styrene keep ambient light from creating false positives, and double as enclosure for the sensor and support boards. As [Mrs. Wingletang] cycles through with the knob, an Arduino clone mounted in a nearby project box determines which program is selected, and a Velleman KA02 audio shield plays a recorded clip of [Wingletang] announcing the cycle number and description.
The system, dubbed SOAP (Speech Output Announcing Programmes), has been a great help to [Mrs. Wingletang] for about the last year. Watch her take it for a spin after the break, and stick around for SOAP’s origin story and walk-through videos.
It’s baffling that so few washers and dryers let you know when they’re finished. Don’t waste your time checking over and over again—Laundry Spy waits for the vibrations to end and sends you a text.
Continue reading “Talking Washer Is A Clean Solution For The Visually Impaired”