Glowing Easter Eggs More Fun Than A Dye Job

glowing-easter-eggs

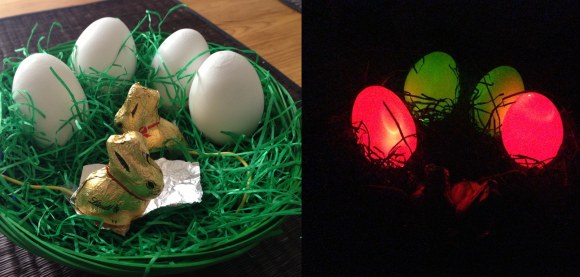
This is a project to keep in mind for the kids next Easter. It uses electronics to light up your eggs instead of dying them (translated).

The project still has one foot in the old tradition as it starts by blowing out the eggs. The larger hole on the bottom, which was used to evacuate the yoke an albumen, ends up being just the right size to insert an LED. You could simply hook these up to a battery and resistor, but [Rene] decided to add some functionality by hiding an Arduino board in the fake grass of the Easter basket. This way the way the RGB LEDs can glow, blink, and rotate through different colors. And the foil covered chocolate bunnies aren’t just for show. He wired them up to the I/O pins of the Arduino to use as a switch. When they’re both placed on the same piece of foil it completes the circuit and starts the light show. See for yourself in the clip after the jump.

Of course for the older kids you’re going to need something more complicated to keep their attention.

Continue reading “Glowing Easter Eggs More Fun Than A Dye Job”
Perpetual Pong

perpetual-pong

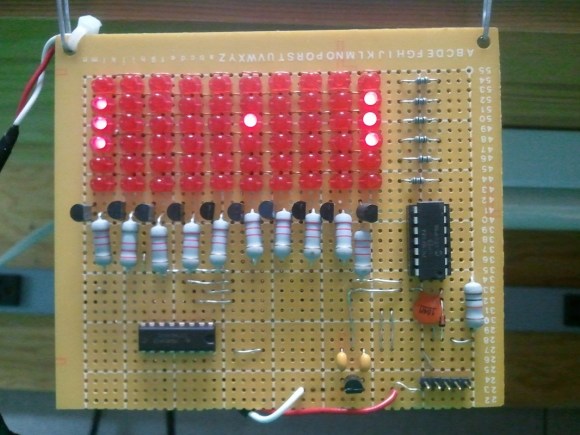
[Jeff Joray] wrote in to show off this perpetual Pong device he built. The six by ten LED matrix acts as a game board for Pong but there are no controls. The board simply plays against itself. It’s pretty much a pong clock without the clock.

The brain of the device is a PIC 16F684 which drives the six rows of the display directly. He went with a decade counter (CD74HC401) to scan the rows one at a time. Now what would you expect to find on the underside of this hunk of protoboard? A rat’s nest of point to point wiring? If so you’re going to be disappointed. [Jeff] spent the time to generate a schematic and board layout in Eagle. While at it, he knew he was going to be using protoboard so the artwork is designed to use solder bridging as much as possible. What he ends up with is one of the cleanest mutiplexed one-off projects you’re going to find. See it in action after the jump.

Continue reading “Perpetual Pong”

Microscope Ring Light With A Number Of Different Features

microscope-ring-light

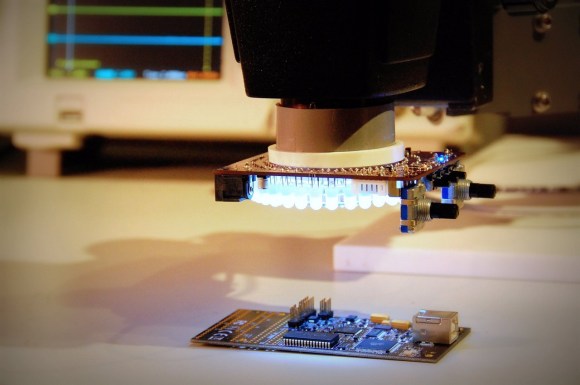
Microscopes magnify light. It makes sense that having more light reflecting off of the subject will result in a better magnified image. And so we come to Aziz! Light! It’s [Steve’s] LED light ring for a stereo microscope. It’s also a shout out to one of our favorite Sci-Fi movies.

He’s not messing around with this microscope. We’ve already seen his custom stand and camera add-on. This is no exception. The device uses a fab-house PCB which he designed. It boasts a dual-ring of white LEDs. But the controls don’t simply stop with on and off. He’s included two rotary encoders, three momentary push switches, and three LEDs as a user interface. This is all shown off in his demo video after the break.

An ATtiny1634 is responsible for controlling the device. When turned on it gently ramps the light up to medium brightness. This can be adjusted with one of the rotary encoders. If there are shadows or other issues one of the push buttons can be used to change the mode, allowing a rotary encoder to select different lighting patterns to remedy the situation. There are even different setting for driving the inner and outer rings of LEDs.

We haven’t worked with any high-end optical microscopy. Are these features something that is available on commercial hardware, or is [Steve] forging new ground here?

Continue reading “Microscope Ring Light With A Number Of Different Features”

Ikea Dioder Ambilight Hack

There are a lot of hacks out there for Ikea’s Dioder LED light set. [Lambertus] wanted to create an easy and affordable ambilight while keeping the hardware modifications to a minimum. He also wanted anyone to be able to easily duplicate his work. He recently wrote in to share his successful solution.

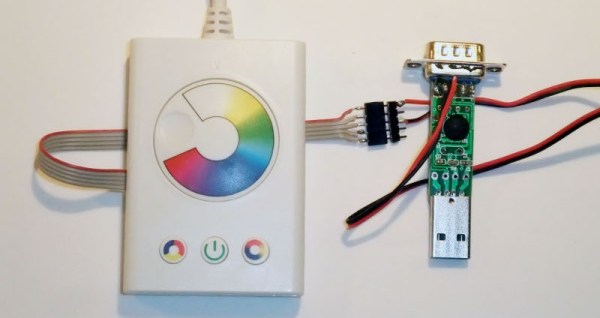
The customizations boil down to three main steps: solder the ICSP connector wires to the test points on the Dioder PCB, connect a PIC programmer to the ICSP port (and reprogram), and attach a 5V RS-232 device to the ICSP port. The software was the most difficult part of the procedure for [Lambertus]. The PIC16F684 didn’t contain the required UART and PWM controllers, so he had to get crafty. Fortunately he’s done all the work for us, and lists the necessary .hex file he created on his site.

By adding support to boblight, his new ambilight is working with his media center very nicely. There’s a little demo video after the break.

Continue reading “Ikea Dioder Ambilight Hack”

Epson Projector LED Mod

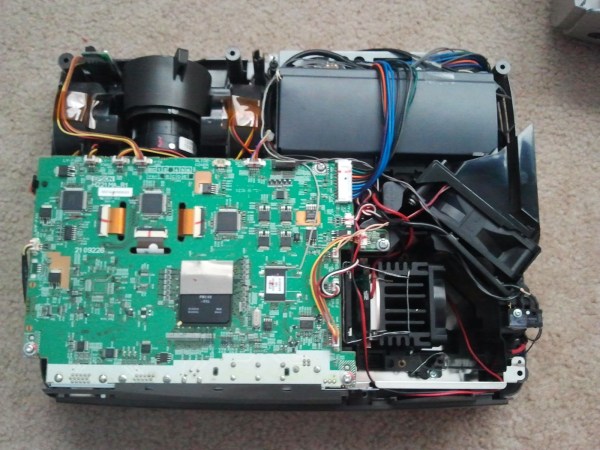
Projector bulbs can be incredibly expensive to replace. Sometimes it’s more cost efficient to just buy a whole new projector instead of a new bulb. [Shawn] recently found a nice deal on an ‘as is’ Epson EMP-S4 on eBay and decided to take a chance. He assumed it probably worked with the exception of the missing lamp the seller mentioned. His suspicions were correct, and one custom LED mod later, his projector was up and rolling.

Without a stock lamp installed, the projector would give an error message and shut itself off. So, the first step was to wire up a little bypass. Once that was taken care of, [Shawn] installed a 30W 2000 lumen LED and custom fit an old Pentium CPU heatsink to keep the LEDs temperature down. He also wired up the heatsink fan in parallel with the stock exhaust fan for good measure.  Optical lenses help focus the light, and some custom wiring makes the LED turn on and off just like the stock lamp would.

In the end, his first experiment was a success, but [Shawn] wants to try an 8000 lumen 100W LED to make it about as bright as the stock lamp was. Check out a little video walkthrough after the break.

[Thanks Shawn]

Continue reading “Epson Projector LED Mod”

Centerpieces For A Geeky Wedding

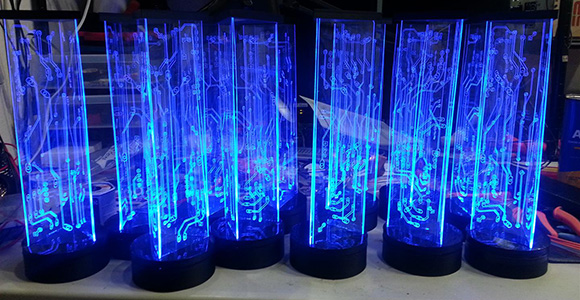
[Bill Porter] is a married man now, and evidently his new wife, [Mara], is awesome. They put together one of the geekiest weddings that included custom side-lit LED centerpieces.

Instead of laser engraving the dozens of plastic panels for each centerpiece, [Bill] tricked [Mara]’s Silhouette Cameo home vinyl cutter – the same one they made their invitations with – into engraving acrylic panels. They’re made out of very thin plastic, but the fact that the couple were able to snap apart the engraved plasic after putting sheets though the machine is very impressive for something that’s generally used for scrapbooking.

As for the base of each centerpiece, [Bill] whipped up a few enclosures on his 3D printer and built a few battery packs out of 18650 lithium ion cells. The nine LEDs in each base were leftovers from a previous project involving LED strips, perfectly suited to run for a few hours in a reception hall.

It’s a great build for a wonderful occasion, and we’re really impressed with the plastic cutting ability of the Sihouette Cameo. Very nice work there.

Making A 12V Bulb Work In A 6V Socket

12v-led-in-6v-socket

This is something of a square peg in a round hole type of problem. [Kiel Lydestad] has been riding a vintage Moped around. You know, a motorcycle that can be pedaled like a bike. He of course wants to keep the thing looking stock, but also needs it to be fully functional. Enter this light bulb replacement project. His brake light needed a new bulb, and he managed to make this 12V LED bulb work in the 6V socket.

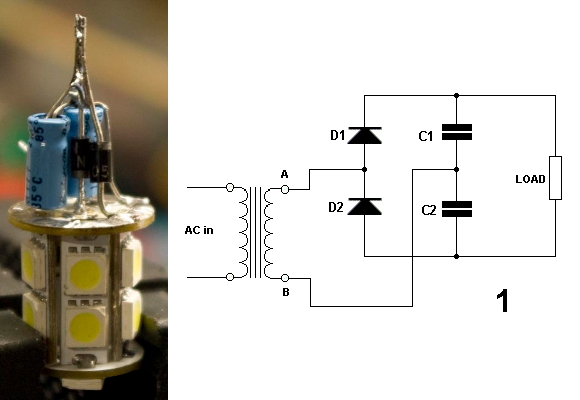
An LED is a really great choice for this application since the Motobécane Moped uses a magneto generator to power the lights. It won’t pull much current, but it did need modification to run from half as much voltage. [Kiel] mentions that it may have been possible to crack open the LED tower and adjust the current limiting circuit inside, but he felt it was easier to just add this voltage doubling circuit. He assembled the components in a way that still allows them to fit in the metal base of the bulb.