An Arcade Cabinet With Displays To Spare

We’ve all got a pretty good mental image of what an arcade cabinet looks like, so you probably don’t need to be reminded that traditionally they are single-screen affairs. But that idea dates back to when they were built around big and bulky CRT displays. Now that we have modern LCD, LED, and OLED panels, who says you have to follow the old rules?

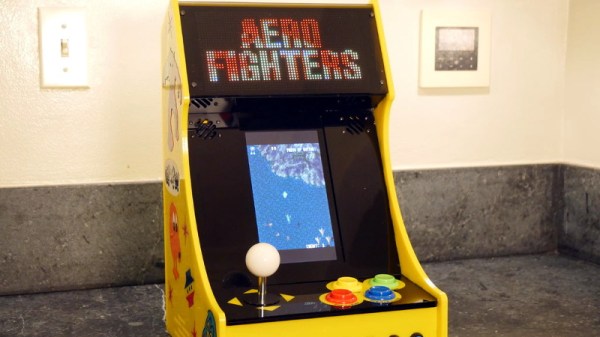
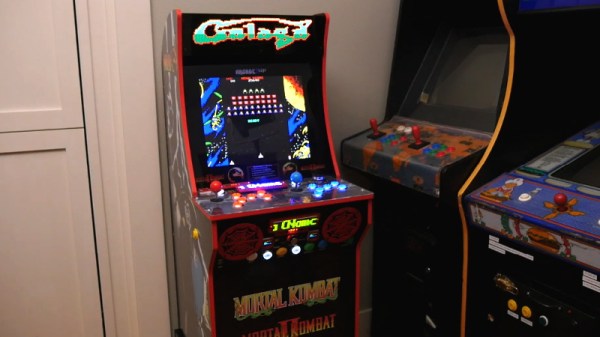
That’s precisely the sort of out of the box thinking that lead [Al Linke] to build this unique multi-display arcade cabinet. The game itself is still played on a single screen, but several smaller sub-displays are dotted all around the cabinet to indicate various bits of ancillary information. Are they necessary? Hardly. But we can’t deny it’s a clever idea, and we wouldn’t be surprised if we start seeing something similar in other DIY cabinets.
The build started with a commercially available cabinet from Arcade1Up, which at this point are popular enough that some of the Big Box retailers have them in stock. All of the electronics except for the display were stripped out, and replaced with a Dell OptiPlex 9020 computer and high-quality joysticks and buttons. [Al] then installed his various displays all over the cabinet, including a gorgeous LED marquee that we’ve featured previously.

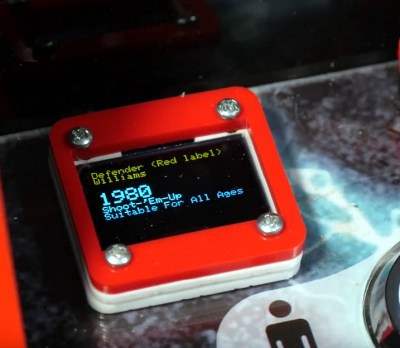
So what do all these little screens do? [Al] explains them in the video after the break, but the general idea is that they provide contextual information about the game you currently have loaded up. A two-color OLED display shows the name of the game and what it’s rated, while a seven segment LED display shows the year the game was released. The displays are located both by the controls and where you’d expect the coin slot to be, so whether you’re actively playing or across the room, you can see all the information.

We’re always amazed to see how builders find ways to make their own personal arcade cabinets stand out. While it’s an idea that at this point we’ve seen quite a lot of, no two projects have ever been quite the same.

Continue reading “An Arcade Cabinet With Displays To Spare”

Arcade With LED Marquee Shows Off Your Game

We’ve seen a lot of arcade machine builds here on Hackaday. Seriously, a lot. Even more so since the Raspberry Pi took over the world and made it so you didn’t have to cannibalize an old laptop to build one anymore. It’s one of those projects with huge appeal: either you’re somebody who’s built their own arcade, or you’re somebody who wishes they had. But even after seeing all these builds, we occasionally come across a specimen that deserves special recognition.

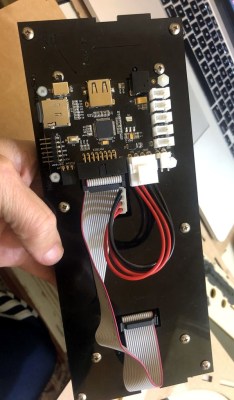
LED display controller

[Al Linke] recently wrote in to tell us about his arcade build, which we think you’ll agree is worth a closer look. The core build is actually a modification of a previously published design, but what makes this one unique is the addition of a programmable LED matrix in the top that actually shows the logo and artwork for whatever game you’re currently playing. This display really helps sell the overall look, and instantly makes the experience that much more authentic. Sure you don’t need the marquee of your home arcade machine to show era-appropriate artwork…but we know you want it to.

So how does one interface their Raspberry Pi with this beautiful 64×32 LED marquee display? Well it just so happens that [Al] is in the business of making cool LED displays, and even has a couple successful Kickstarter campaigns under his belt to prove it. He’s developed a board that lets you easily connect up to low-cost HUB75 LED panels such as the one used in the arcade. It’s been a few years since we’ve last seen a project that tackled these specific LED displays, and it’s encouraging to see how far things have come since then.

Even if you’re somehow not in love with the LED marquee, this build really does stand on its own as a fantastic example of a desktop arcade machine. [Al] went to great length to document his build, including putting together several videos during different phases of construction. If you’re curious about the start of the art for home arcade builds, this project would be a pretty good one to use as a barometer.

Whether it’s a full-size replica of the machine you spent your youth standing in front of, or an entirely new design made to your exacting specifications, there’s few projects that are a better conversation starter than one of these beauties blinking away in your living room.

Continue reading “Arcade With LED Marquee Shows Off Your Game”

Marquee Display Uses Six Dozen Surplus VFD Tubes To Great Effect

The quest to repurpose surplus parts into new and interesting displays never ends, it seems. And the bigger the display, the better, with extra points for using some really obscure part, like these surplus Russian vacuum-fluorescent tubes turned into a marquee display.

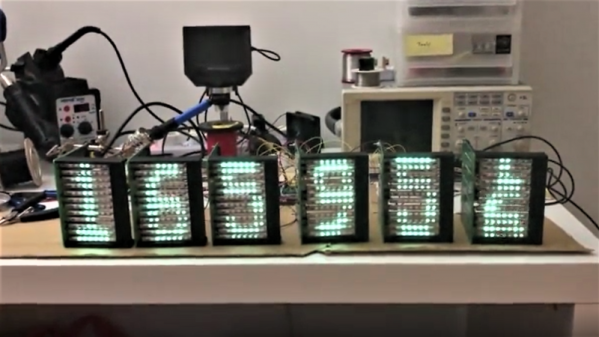
As [tonyp7] freely admits, this is a pet project that’s just for the fun of it, made possible by the flood of surplus parts on the market these days. The VFD tubes are IV-25s, Russian tubes that can be had by the fistful for a song from the usual sources. The seven small elements in the tube were intended to make bar graph displays like VU meters, but [tonyp7] ganged up twelve side by side to make 84-pixel displays. The custom driver board for each matrix needs three of the old SN75518 driver chips, in 40-pin DIPs no less. A 3D-printed bracket holds the tubes and the board for each module; it looks like a clock is the goal, with six modules ganged together. But the marquee display shown below is great too, and we look forward to seeing the finished project.

From faux-Nixies made with LEDs to flip-segment displays driven by relay logic to giant seven-segment LEDs that can be 3D-printed, we really like the trend to unique displays. What are you dreaming up?

Continue reading “Marquee Display Uses Six Dozen Surplus VFD Tubes To Great Effect”

IoT-ifying An Old LED Signboard

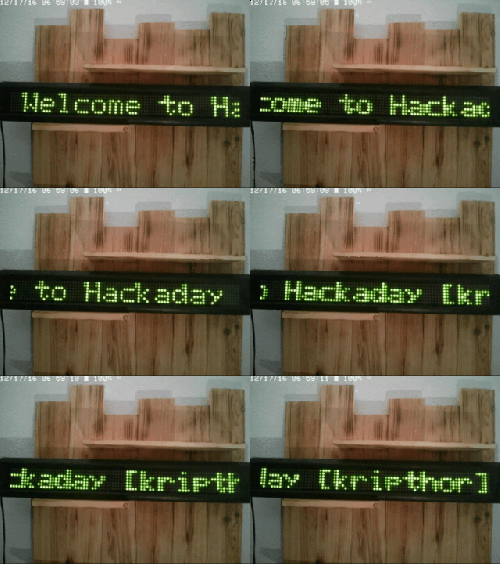
Scrolling LED signs were pretty keen back in the day, and now they’re pretty easy to come by on the cheap. Getting a signboard configured for IoT duty can be tricky, but as [kripthor] shows us, it’s not that bad as long as security isn’t your top concern and you can tweak a serial interface.

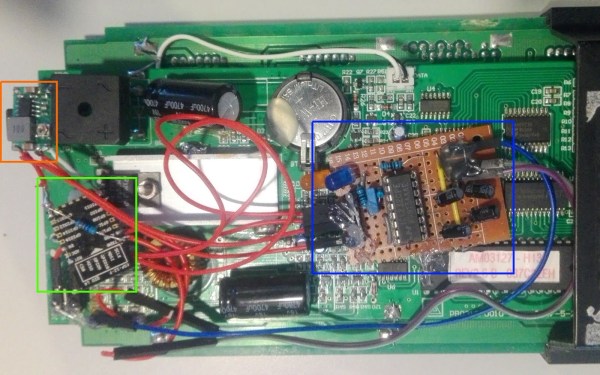
dec-16-2016-10-57-pm-edited[kripthor] chanced upon an Amplus AM03127 signboard that hails from the days when tri-color LEDs were the big thing. The unit came with a defunct remote thanks to leaking batteries, but a built-in serial interface offered a way to connect. Unfortunately, the RS-232 standard on the signboard wants both positive and negative voltages with respect to ground to represent the 1s and 0s, and that wouldn’t work with the ESP8266 [kripthor] was targeting. The ubiquitous MAX-232 transceiver was enlisted to convert logic levels to RS-232 signals and a small buck converter was added to power the ESP. A little scripting and the signboard is online and ready for use and abuse by the interwebz — [kripthor] says he’ll regret this, but we’re pleased with the way the first remote access turned out. Feel free to check out the live video feed and see what the current message is.

Personally, we don’t have much use for a signboard, but getting RS-232 devices working in the Arduino ecosystem is definitely a trick we’ll keep in mind. If asynchronous serial protocols aren’t your strong suit, you might want to check out this guide to what can go wrong by our own [Elliot Williams].

Old LED Marquee Turned Embedded Video Player

driving-led-marquee-with-rpi

[Sprite_TM] is was sent an old LED Marquee by an anonymous fan of his hacking projects. The display isn’t full color, but it’s large — 224 by 48 pixels — and he figured he could render some okay images with the bi-color diodes. In the end, he replaced the controller and turned it into a video player.

The original system work well enough, but the 100 MHz 486 industrial style PC that drove the display seems a little comical these days. After giving it a spin and testing out how it drives the display [Sprite] hooked up an FTDI chip and managed to get it playing video from his computer. Above you can see part of the opening sequence of The Simpsons.

Now that he had learned its secrets he set out to give it an embedded controller. His first attempt was with a Carambola board which he’s worked with before. That proved to be a little slow for all the pixel data he was pushing so he upgraded to a Raspberry Pi and never looked back. You can see the demo video after the jump.

Continue reading “Old LED Marquee Turned Embedded Video Player”

LED Marquee Uses Discrete Through-hole Lights

through-hole-led-marquee

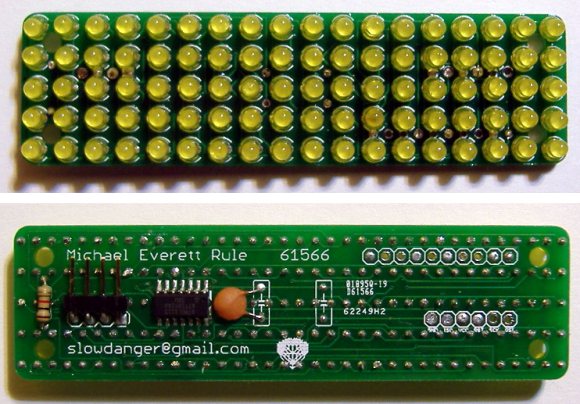
[Michael] built his own LED marquee using individual diodes. Despite his choice to forego the 8×8 or 5×7 modules we often see in these projects, his decision to spin a dedicated PCB saved him a lot of trouble during assembly. Sure, he still had to solder 180 leads on the 9×18 grid of lights, but at least he didn’t have to deal with wiring up the complex display layout.

The chip driving the display is an ATtiny24. You can see that it’s an SMD package and spans one row of the through hole LED footprint. There are way too few pins to drive a multiplexed display of this size. Instead of adding a separate driver IC he decided to design the display to use Charlieplexing. We didn’t see a schematic for the project, but judging from the board images all of the I/O pins are used by either the display itself, or the serial connection provided by that right angle pin header.

Dead Motherboard Wall Hides An LED Marquee

dead-motherboard-led-marquee

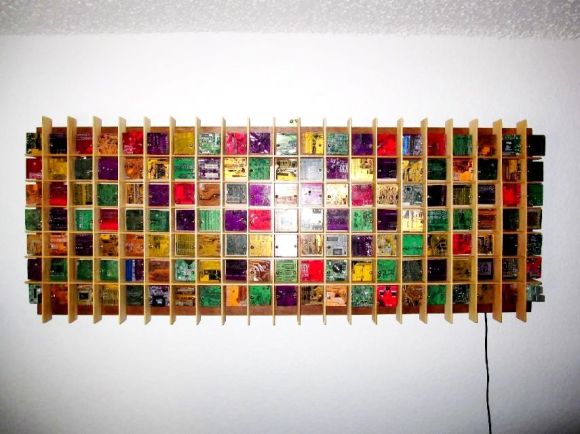
[Jared] is a computer technician so he has no problem getting his hands on broken motherboards. It looks like he tends to save the more interesting colors and has finally found a use for the waste. He built this wall art which also acts as an LED marquee.

He came up with the size and shape — 18″ by 48″ — because it meshes well with a sheet of MDF. The outline allows for a grid made up of 2″ square pixels arranged seven high and twenty-one wide. The top and bottom rows will serve as a frame for the lights, which still leaves the five pixels necessary to display characters. From there he started wiring up the LED array, which is shown in the testing phase in the clip after the break. Each pixel is cordoned off by a frame of basswood which [Jared] fabricated on the table saw. The project is finished up by cutting the motherboards down to size and mounting them with threaded rod and nuts. The board chunks are not transparent but they’re smaller than the grid so the LEDs will make the edges glow.

This reminds us of the motherboards used to mimic stained glass from several years back.

Continue reading “Dead Motherboard Wall Hides An LED Marquee”