A Gif-Playing Top Hat For FRC 2018!

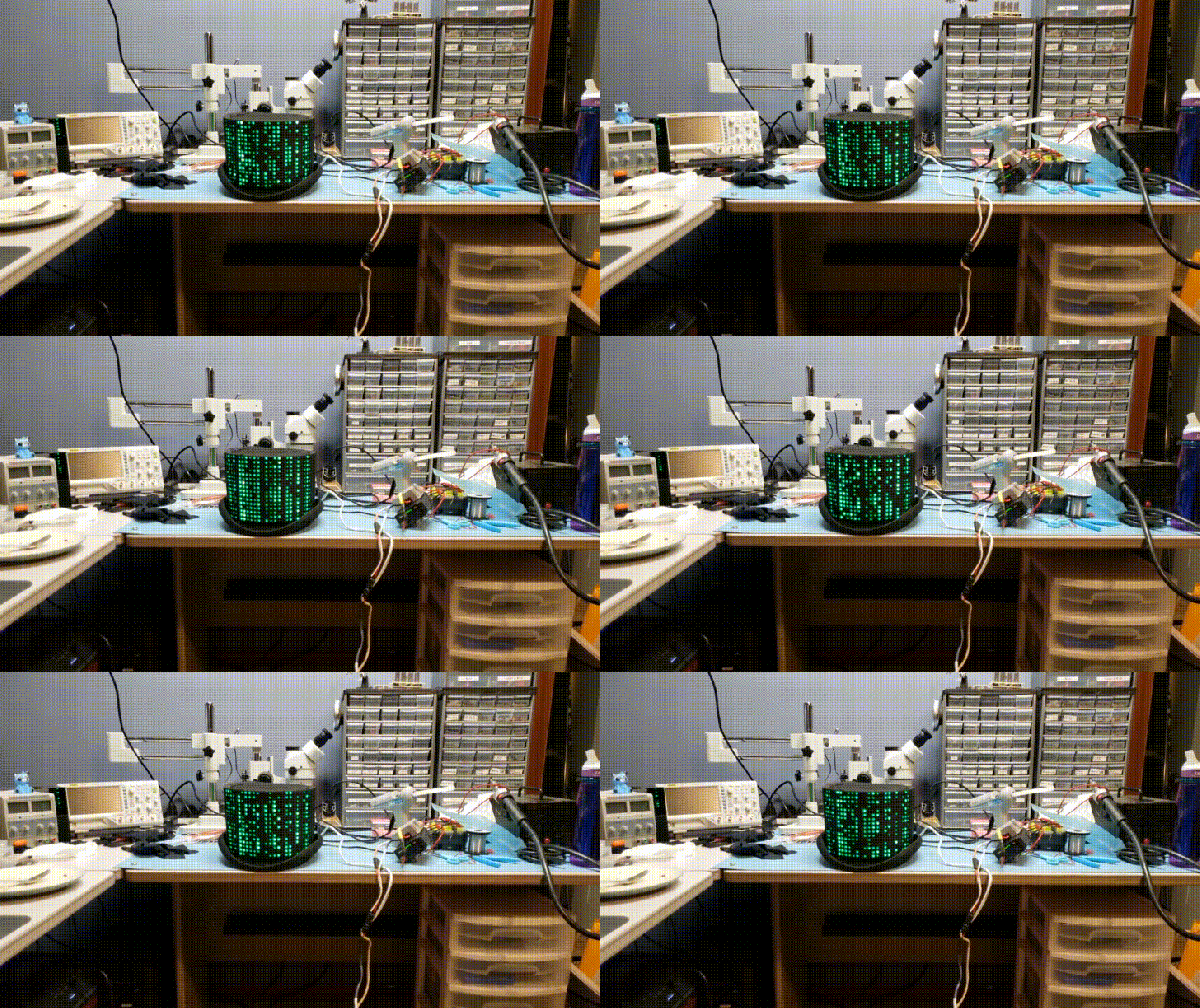
In gearing up to mentor a team at the 2018 FIRST Robotics Competition, redditor [dd0626] wanted to do something cool that resonated with this year’s 8-bit gaming theme. Over the course of a few days, they transformed a top hat into a thematically encapsulating marquee: a LED matrix display loaded with gifs!

The display is actually a sleeve — made from shipping foam, a pillow case, and an old t-shirt — that fits over the hat, leaving it intact and wearable for future events. A Teensy3.6 displays the gifs on four WS2812 16×16 RGB LED matrices, and while a sheer black fabric diffuses the light, it’s still best viewed from several feet away. This is decidedly not intended to be a stealthy hat display.

To mitigate current draw, [dd0626] is using a 5V 30A DC/DC converter and keeping the brightness at a minimum — otherwise, each panel can pull up to 15A! To offset any dip in performance, they’ve bundled in a massive 22,400mAh, 24V battery pack to keep the hat running for a while. Despite all the hardware, the hat weighs under two pounds — eminently wearable for a long day of competition. Continue reading “A Gif-Playing Top Hat For FRC 2018!”

A Bluetooth Speaker For Babies

[Mike Clifford] of [Modustrial Maker] had not one, not two, but five friends call him to announce that their first children were on the way, and he was inspired to build them a Bluetooth speaker with a unique LED matrix display as a fitting gift. Meant to not only entertain guests, but to audio-visually stimulate each of their children to promote neurological development.

Picking up and planing down rough maple planks, [Clifford] built a mitered box to house the components before applying wood finish. The brain inside the box is an Arduino Mega — or a suitable clone — controlling a Dayton Bluetooth audio and 2x15W amp board. In addition to the 19.7V power supply, there’s a step down converter for the Mega, and a mic to make the LED matrix sound-reactive. The LED matrix is on a moveable baffle to adjust the distance between it and a semi-transparent acrylic light diffuser. This shifts the light between sharp points or a softer, blended look — perfect for the scrolling Matrix text and fireplace effects! Check it out!

Continue reading “A Bluetooth Speaker For Babies”

A Minimalist Weather Clock With A Unique Display

If you’re looking for a home hub to display weather, time, and important family information, the formula is pretty simple: build yet another “magic mirror” project. We’re not complaining — magic mirrors look great. But if all you need is time and weather, this elegant pixel display is something just a little bit different.

Among his many criteria for the perfect hack, [Dominic] lists usefulness, visual appeal, and low cost. We’ll agree that his minimalist weather clock hits all those marks, and with the careful selection of a 16 x 32-pixel RGB display module, [Dominic] ended up giving back to the community by developing an Arduino driver for it. He points out that strips of Neopixels could have been used for the display, but they’d have ended up costing more, so the LED matrix was a sensible choice. A 3D-printed separator grid and a paper diffuser provide the proper pixelated look, and some simple animated icons display the two-day weather forecast. We find the time and temperature numerals a little hard to read, but it’s not bad considering the limited resolution of the display. And the case is a nice bit of woodworking too. Not a bad result for only €43.

We’re intrigued by the P10 LED matrix module [Dominic] used for this one. It might be a good choice for a word clock and weather station, or with his driver, a display for just about anything.

Flip-Dot Display Brought Out Of Retirement By New Drivers

LED matrix displays and flat-screen monitors have largely supplanted old-school electromechanical models for public signage. We think that’s a shame, but it’s also a boon for the tinkerer, as old displays can be had for a song these days in the online markets.

Such was the case for [John Whittington] and his flip-dot display salvaged from an old bus. He wanted to put the old sign back to work, but without a decent driver, he did what one does in these situations — he tore it down and reverse engineered the thing. Like most such displays, his Hannover Display 7 x 56-pixel flip-dot sign is electromechanically interesting; each pixel is a card straddling the poles of a small electromagnet. Pulse the magnet and the card flips over, changing the pixel from black to fluorescent green. [John] used an existing driver for the sign and a logic analyzer to determine the protocol used by the internal electronics to drive the pixels, and came up with a much-improved method of sending characters and graphics. With a Raspberry Pi and power supply now resident inside the case, a web-based GUI lets him display messages easily. The video below has lots of details, and the code is freely available.

You may recall [John] from a recent edge-lit Nixie-like display. Looks like he’s got a thing for eye-catching displays, and we’re fine with that.

Continue reading “Flip-Dot Display Brought Out Of Retirement By New Drivers”

Hackaday Prize Entry: ESPMetric, A Simple And Easy Matrix

There’s a lot you can do with a bunch of LEDs connected to the Internet. You can display the time, the weather, the bus schedule, or any one of a number of important data points in your life. Custom matrices are a pain in the butt to set up, which is why we like to see one looking rather polished and clean. [Faire-soi-meme] prettied up an 8×32 NeoPixel matrix with some diffusers and a grid bezel. It’s the ESPMetric, and it’s also an entry for this year’s Hackaday Prize.

The NeoPixel matrix is controlled by a NodeMcu using elements from [squix]’s ESP82666 weather station code as well as Adafruit’s NeoMatrix library. There is a photoresistor to control brightness as well as 3 buttons to control its various modes. Tapping the buttons brings you by various settings like the time, WiFi status, stock market, and so on.

If you parlez-vous français–or enjoy the Google Translate experience–[Faire-soi-meme] has detailed the build steps on his blog, though you can also download his code from his GitHub repository. There’s a great video of this build, you can check that out below.

Continue reading “Hackaday Prize Entry: ESPMetric, A Simple And Easy Matrix”

Graduation Cap Shows Us What It’s Got!

A high school graduation ceremony is well due the pomp and circumstance for making it through one of life’s many milestones. To commemorate the event with their own flair, redditor [PM_(cough)_FOR_KITTENS] hid a 32 x 32 GIF-playing LED matrix in their graduation cap!

The board is controlled by a Teensy hosting a SmartMatrix shield. With the shield’s assistance, the matrix enables scrolling text and GIFs to play across the LEDs, as well as an SD card slot to load up your favourites. Currently, it’s set to a 50-50 chance of playing a gif — one of sixty — or one of the twenty scrolling text lines loaded onto the SD card. [PM_(ahem)_FOR_KITTENS] co-opted his friend’s expertise to write the code — available here — while he designed the circuit and handled the assembly.

Carefully unwrapping his cap, [PM_(yep)_FOR_KITTENS] reinforced it with thinner and stronger cardboard, cutting slots into it, allowing the boards and wires to — barely — fit inside. A hole in the side of the cap is enough for a barely noticeable USB cable to run down his neck to a 2000 mAh battery which can power the cap for over five hours at 5V and 2A. Check out a demo video after the break!

Continue reading “Graduation Cap Shows Us What It’s Got!”

DIY Shortcut Keyboard

Working with CAD programs involves focusing on the task at hand and keyboard shortcuts can be very handy. Most software packages allow the user to customize these shortcuts but eventually, certain complex key combination can become a distraction.

[awende] over at Sparkfun has created a Cherry MX Keyboard which incorporates all of the Autodesk Eagle Shortcuts to a single 4×4 matrix. The project exploits the Arduino Pro Mini’s ability to mimic an HID device over USB thereby enabling the DIY keyboard. Pushbuttons connected to the GPIOs are read by the Arduino and corresponding shortcut key presses are sent to the host machine.

Additional functionality is implemented using two rotary encoders and the Teensy encoder library. The first knob functions as a volume control with the push-button working as a mute button. The encoder is used to control the grid spacing and the embedded button is used to switch between imperial and metric units. The entire code, as well as the schematic, is available on GitHub for your hacking pleasure. It’s a polished project just ready for you to adapt.

The project can be extended to be used with other computer software such as Gimp and the keys may be replaced by capacitive touch sensors making it more sturdy. Bluetooth can be added to make things wireless and you can check out the Double Action Keyboard to extend functionality further. Continue reading “DIY Shortcut Keyboard”