A man in black glasses and a black t-shirt has his arms resting on a grey workbench. Between his opened hands are the two halves of a copper ice press. They are fist-sized copper cylinders. The lower half has large spiraling grooves to aid in the release of excess water from the ice being formed as it melts.

Make Ice Spheres In A Copper Press

Perfectly clear ice spheres are nifty but can be a bit tricky to make without an apparatus. [Seth Robinson] crafted a copper ice press to make his own.

Copper is well-known for its thermal conductivity, making it a perfect material for building a press to melt ice into a given shape. Like many projects, a combination of techniques yields the best result, and in this case we get to see 3d printing, sand casting, lost PLA casting, lathe turning, milling, and even some good old-fashioned sanding.

The most tedious part of the process appears to be dip coating of ceramic for the lost PLA mold, but the finished result is certainly worth it. That’s not to say that any of the process looks easy if you are a metal working novice. Taking over a week to slowly build up the layers feels a bit excruciating, especially compared to 3D printing the original plastic piece. If you’re ever feeling discouraged watching someone else’s awesome projects, you might want to stick around to the end when [Robinson] shows us his first ever casting. We’d say his skill has improved immensely over time.

If you’re looking for something else to do with casting copper alloys, be sure to checkout this bronze river table or [Robinson’s] copper levitation sphere.

Thanks to [DjBiohazard] for the tip!

Continue reading “Make Ice Spheres In A Copper Press”

A dark walnut table sits in the sun in what appears to be a field. Voids in the natural wood slab have been filled with shiny bronze, and a bundle of copper wire sits upon the edge of the table in a jaunty artistic fashion.

A Different Take On The River Table Does It In Bronze

River tables are something we’ve heard decried as a passé, but we’re still seeing some interesting variations on the technique. Take this example done with bronze instead of epoxy.

Starting with two beautiful slabs of walnut, [Burls Art] decided that instead of cutting them up to make guitars he would turn his attention to a river table to keep them more intact. Given the price of copper and difficulty in casting it, he decided to trim the live edges to make a more narrow “river” to work with for the project.

Since molten copper is quite toasty and wood likes to catch on fire, he wisely did a rough finish of the table before making silicone plugs of the voids instead of pouring metal directly. The silicone plugs were then used to make sand casting molds, and a series of casting trials moving from copper to bronze finally yielded usable pieces for the table. In case that all seems too simple, there were then several days of milling and sanding to get the bronze and walnut level and smooth with each other. The amount of attention to detail and plain old elbow grease in this project is impressive.

We’ve seen some other interesting mix-ups of the live edge and epoxy formula like a seascape night light or this river table with embedded neon. And if you’re looking to get into casting, why not start small in the microwave?

Continue reading “A Different Take On The River Table Does It In Bronze”

Getting A Close-Up View Of Chip Formation With An SEM

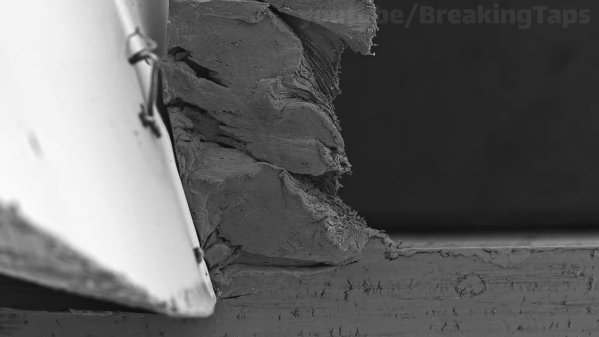
When all you’ve got is a hammer, everything looks like a nail. And when you’ve got a scanning electron microscope, everything must look like a sample that would be really, really interesting to see enlarged in all its 3D glory. And this is what [Zachary Tong] delivers with this up close and personal look at the chip formation process.

We’ve got to hand it to [Zach] with this one, because it seems like this was one of those projects that just fought back the whole time. Granted, the idea of cutting metal inside the vacuum chamber of an SEM seems like quite an undertaking right up front. To accomplish this, [Zach] needed to build a custom tool to advance a cutting edge into a piece of stock by tiny increments. His starting point was a simple off-the-shelf linear stage, which needed a lot of prep work before going into the SEM vacuum chamber. The stage’s micrometer advances a carbide insert into a small piece of aluminum 50 microns at a time, raising a tiny sliver of aluminum while it slowly plows a tiny groove into the workpiece.

Getting the multiple shots required to make a decent animation with this rig was no mean feat. [Zach]’s SEM sample chamber doesn’t have any electrical connections, so each of the 159 frames required a painstaking process of advancing the tool, pulling down a vacuum in the chamber, and taking a picture. With each frame taking at least five minutes, this was clearly a labor of love. The results are worth it, though; stitched together, the electron micrographs show the chip formation process in amazing detail. The aluminum oxide layer on the top of the workpiece is clearly visible, as are the different zones of cutting action. The grain of the metal is also clearly visible, and the “gumminess” of the chip is readily apparent too.

For as much work as this was, it seems like [Zach] had things a bit easier than [Ben Krasnow] did when he tried something similar with a much less capable SEM.

Continue reading “Getting A Close-Up View Of Chip Formation With An SEM”

Barely HDMI Display Gets A Steampunk-Inspired Enclosure

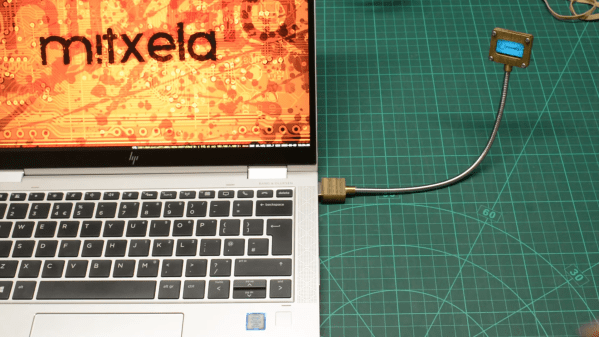
It’s an interesting question: What does one do for a follow-up to building the world’s worst HDMI display? Simple — stick it in a cool steampunk-inspired case and call it a day.

That seems to have been [mitxela]’s solution, and please don’t take our assessment as a knock on either the original build or this follow-up. [mitxela] himself expresses a bit of wonder at the attention garnered by his “rather stupid project,” which used the I2C interface in an HDMI interface to drive a tiny monochrome OLED screen. Low refresh rate, poor resolution — it has everything you don’t want in a display, but was still a cool hack that deserved the attention it got.

The present work, which creates an enclosure for the dodgy display, is far heavier on metalworking than anything else, as the video below reveals. The display itself goes in a small box that’s machined from brass, while the HDMI plug gets a sturdy-looking brass housing that makes the more common molded plastic plug look unforgivably flimsy — hot glue notwithstanding. Connecting the two is a flexible stalk, allowing it to plug into a computer’s HDMI port and giving the user the flexibility to position the nearly useless display where it can be seen best.

But again, we may be too harsh in our judgment; while DOOM is basically unplayable on the tiny display, “Bad Apple!!” is quite watchable, especially when accompanied by [mitxela]’s servo-controlled MIDI music box. And since when has usability been a criterion for judging a hack’s coolness, anyway?

Continue reading “Barely HDMI Display Gets A Steampunk-Inspired Enclosure”

Custom-Fit Small Shop Crane Lightens The Load

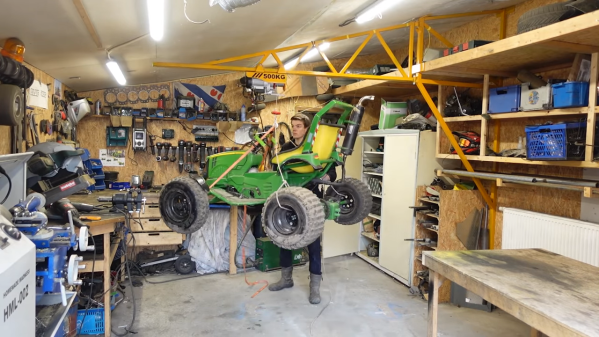
On the shortlist of workshop luxuries, we’d bet a lot of hackers would include an overhead crane. Having the ability to lift heavy loads safely and easily opens up a world of new projects, and puts the shop into an entirely different class of capabilities.

As with many of us, [Jornt] works in a shop with significant space constraints, so the jib crane he built had to be a custom job. Fabricated completely from steel tube, the build started with fabricating a mast to support the crane and squeezing it into a small slot in some existing shelves in the shop, which somehow didn’t catch on fire despite being welded in situ. A lot of custom parts went into the slewing gear that mounts the jib, itself a stick-built space frame that had to accommodate a pitched ceiling. A double row of tubing along the bottom of the jib allows a trolley carrying a 500 kg electric winch to run along it, providing a work envelope that looks like it covers the majority of the shop. And hats off for the safety yellow and black paint job — very industrial.

From the look of the tests in the video below, the crane is more than up to the task of lifting engines and other heavy loads in the shop. That should prove handy if [Jornt] tackles another build like his no-compromises DIY lathe again.

Continue reading “Custom-Fit Small Shop Crane Lightens The Load”

File testing rig

Science Vs Internet Trolls: Testing Another Kind Of File System

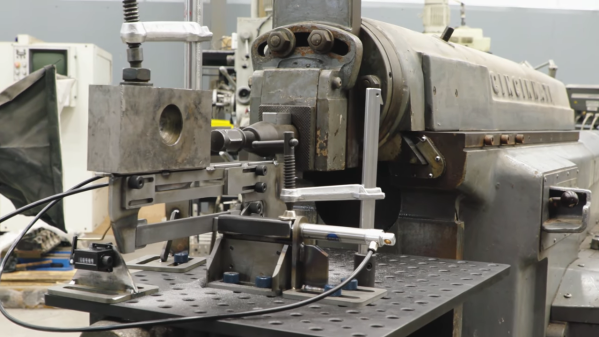
No matter what you do or say on the Internet, you’re always doing it wrong. Keyboard commandos are ready to pounce and tell you how it’s “ackchyually” supposed to be done. And so it was of little surprise when [Jason] of Fireball Tools was taken to task by the armchair millwright for his supposedly deficient method of filing metal.

But [Jason] chose to fight back not with words but deeds, building a system to test alternative methods of filing. His filing style is to leave the file in contact with the stock on both the front- and back-strokes, which enraged those who claim that a file must never be dragged back over the workpiece, lest the teeth become dull. The first video below shows the build of the test rig, which leveraged his enormous Cinncinatti shaper as the prime mover, as well as a pneumatic jig to hold the workpiece and imitate both styles of filing. Part two below shows the test rig in action, and [Jason] really outdoes himself with his experimental approach. He tested three different grades of Pferd files — nothing but the best, no expense spared — and did duplicates of each run using both the Internet-approved style and his lazier style.

The result? We won’t spoil that for you, but suffice it to say that the hive mind isn’t always right. And what’s more, [Jason]’s careful myth-busting yielded a few interesting and unexpected results. His channel is full of great shop tips and interesting builds, so check him out if you want to see how metalworking is done.

Continue reading “Science Vs Internet Trolls: Testing Another Kind Of File System”

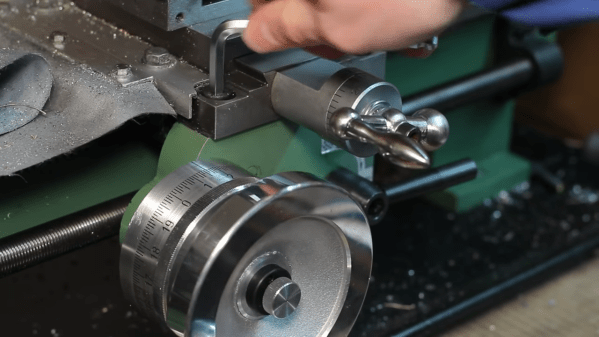
Mini-lathe carriage wheel

Improving A Mini-Lathe With A Few Clever Hacks

Like many budget machinists, the delightfully optimistically named [We Can Do That Better] had trouble with some of the finer controls on his import mini-lathe. But rather than suffer through it, he chose to rectify the machine’s shortcomings and in the process, teach everyone a bunch of great tips.

[We Can Do That Better]’s lathe retrofit focused on the carriage handwheel, which appears to lack proper bearings and wobbles around in a most imprecise manner. On top of that, the gearing of the drive made for an unsatisfying 19 mm of carriage travel per revolution of the handwheel. A single gear change made that an even 20 mm per rev, which when coupled with a calibrated and indexed handwheel ring greatly simplifies carriage travel measurements.

While the end result of the build is pretty great in its own right, for our money the best part of the video is its rich collection of machinist’s tips. The use of a wooden dowel and a printed paper template to stand in for a proper dividing head was brilliant, as was using the tailstock of the lathe to drive an engraving tool to cut the index lines. We’ve seen the use of a Dremel tool mounted to the toolpost to stand in for a milling machine before, but it’s always nice to see that trick used. And the mechanism for locking the dial to the handwheel was really clever, too.

Considering a mini-lathe? As encouraging as [We Can Do That Better]’s experience may be, it might be wise to take a deep dive into the pros and cons of such a machine.

Continue reading “Improving A Mini-Lathe With A Few Clever Hacks”