PocketCHIP As A Hardware Hacker’s Terminal

Conferences these days can be tricky places to be at – especially hardware and hacker cons. If you aren’t the one doing the hacking, then you can be sure your devices are being probed, pinged and possibly, hacked. It certainly isn’t the place to bring your precious laptop. Besides, as the day wears on and your feet start aching, regular laptops start feeling bigger and heavier. What you need is a burner laptop – one that is lightweight, cheap and that you don’t mind getting hacked. [dalmoz] wrote a short, to-the-point, tutorial on making use of PocketCHIP as a hardware-hacker’s best friend when it comes to UART connections. It’s also handy to use as a stand alone serial monitor for your projects without having to dedicate a USB port and screen real estate.

The PocketCHIP is a dock for the C.H.I.P. microcomputer and adds a LED backlit touchscreen display, QWERTY keyboard and LiPo battery in a lightweight, molded case. For $70, you get a 1 GHz ARM v7 processor, 512MB RAM, Mali 400 GPU, WiFi and Bluetooth. It’s light enough to be hung around your neck via its lanyard slot. And all of the GPIO pins are conveniently broken out, including the UART pins. Right now, it’s in the hands of Kickstarter backers, but the Next Thing Co website indicates availability sometime this month.

On the hardware side, all you need to do is add header pins to TX, RX and GND (and maybe 5 V and 3 V if required) on the PocketCHIP GPIO header and you’re good to go. On the software side, things are equally easy. The UART pins are meant to provide debug access to the CHIP itself and need to be released from internal duty. Once the UART port is identified, a single terminal command frees its status as a debugging interface. After that, use any terminal emulator – [dalmoz] recommends Minicom – and you’re all set. In the unlikely event that all you have is an Arduino lying around, [dalmoz] posted a simple sketch that can be used to make sure you have it working. Great hacking tip, ’cause it is as simple as it gets. If you’d like to know more about the CHIP project, check out its documentation and Github repository – it’s all open source.

Hacking Touch Screens To Count Pulses

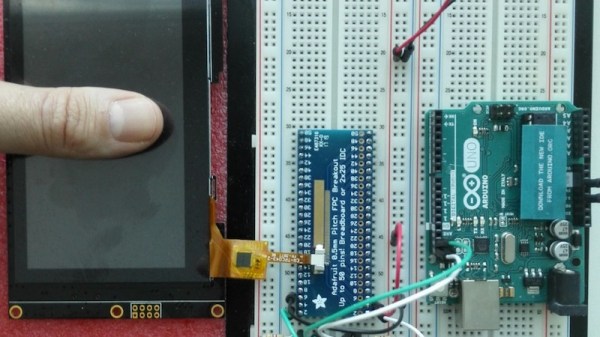
Heart rate sensors available for DIY use employ photoplethysmography which illuminates the skin and measures changes in light absorption. These sensors are cheap, however, the circuitry required to interface them to other devices is not. [Petteri Hyvärinen] is successfully investigating the use of capacitive touchscreens for heart rate sensing among other applications.

The capacitive sensor layer on modern-day devices has a grid of elements to detect touch. Typically there is an interfacing IC that translates the detected touches into filtered digital numbers that can be used by higher level applications. [optisimon] first figured out a way to obtain the raw data from a touch screen. [Petteri Hyvärinen] takes the next step by using a Python script to detect time variations in the data obtained. The refresh rate of the FT5x06 interface is adequate and the data is sent via an Arduino in 35-second chunks to the PC over a UART. The variations in the signal are very small, however, by averaging and then using the autocorrelation function, the signal was positively identified as a pulse.

A number of applications could benefit from this technique if the result can be replicated on other devices. Older devices could possibly be recycled to become low-cost medical equipment at a fraction of the cost. There is also the IoT side of things where the heart-rate response to media such as news, social media and videos could be used to classify content.

Check out our take on the original hack for capacitive touch imaging as well as using a piezoelectric sensor for the same application.

Landscape To Portrait At The Click Of A Mouse

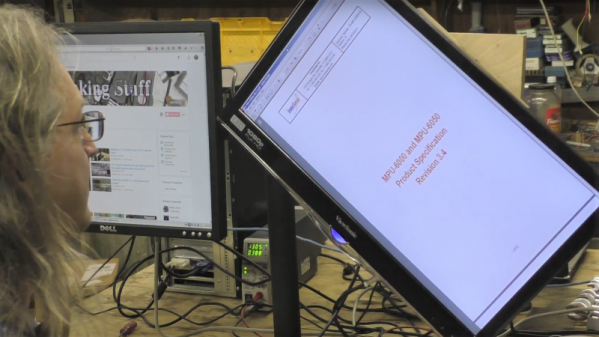
Modern 16:9 aspect ratio monitors may be great for watching a widescreen movie on Netflix, but for most PDFs, Word documents, and certain web pages, landscape just won’t do. But if you’re not writing the next great American novel and aren’t willing to commit to portrait mode, don’t — build an auto-rotating monitor to switch your aspect ratio on the fly.

Like many of us, [Bob] finds certain content less than suitable for the cinematic format that’s become the standard for monitors. His fix is simple in concept, but a little challenging to engineer. Using a lazy susan as a giant bearing, [Bob] built a swivel that can be powered by a NEMA 23 stepper and a 3D-printed sector of a ring gear. Due to the narrow clearance between the top and bottom of the lazy susan, [Bob] had to do considerable finagling to get through holes for the mounting hardware located, but in the end the whole thing worked great.

Our only quibble would be welding galvanized pipe for the stand, which always gives us the willies. But we will admit the tube notching turned out great with just a paper template. We doubt it would have been much better if he used an amped-up plasma-powered tubing notcher.

Continue reading “Landscape To Portrait At The Click Of A Mouse”

Monitor All The Laundry Things With This Sleek IoT System

If like us you live in mortal fear of someone breaking into your house when you’re on vacation and starting a dryer fire while doing laundry, this full-featured IoT laundry room monitor is for you. And there’s a school bus. But don’t ask about the school bus.

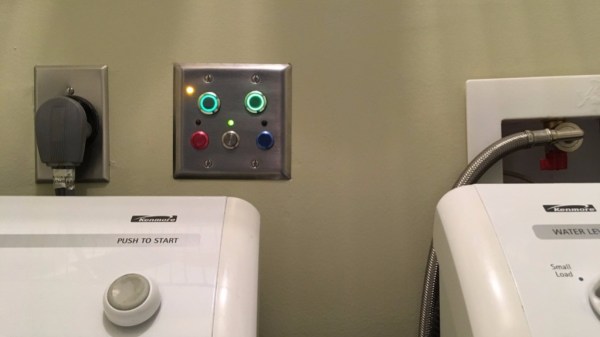
In what [seasider1960] describes as “a classic case of scope creep,” there’s very little about laundry room goings on that escapes the notice of this nicely executed project. It started as a water sensor to prevent a repeat of a leak that resulted in some downstairs damage. But once you get going, why not go too far? [seasider1960] added current sensing to know when the washer and dryer are operating, as well as to tote up power usage. A temperature sensor watches the dryer vent and warns against the potential for the aforementioned tragedy by sounding an obnoxious local alarm — that’s where the school bus comes in. The whole system is also linked into Blynk for IoT monitoring, with an equally obnoxious alarm you can hear in the video below. Oh, and there are buttons for testing each alarm and for making an Internet note to reorder laundry supplies.

We’ve seen a spate of laundry monitoring projects lately, all of which have their relative merits. But you’ve got to like the fit and finish of [seasider1960]’s build. The stainless face plate and in-wall mount makes for a sleek, professional appearance which is fitting with the scope-creepy nature of the build.

Continue reading “Monitor All The Laundry Things With This Sleek IoT System”

Send A Raspberry Pi Back In Time To 1980

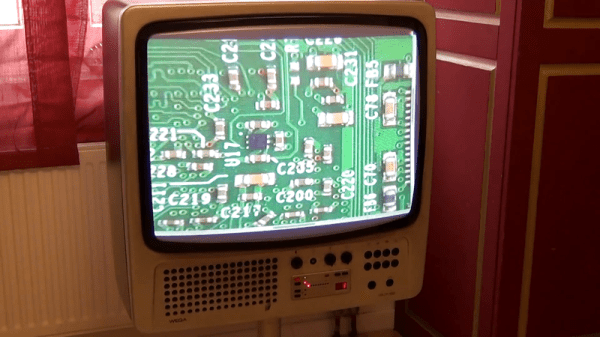
One of our favorite hacker-scavengers on YouTube, [The Post-Apocalyptic Inventor], has been connecting his Raspberry Pi up to nearly every display that he’s got in his well-stocked junk pile. (Video embedded below.)

Modern monitors with an HDMI input connect right up to the Pi. Before HDMI came VGA, but the Pi doesn’t do that natively. One solution is to use a composite-to-VGA converter and pull the composite signal out of the audio jack. Lacking the right 4-pole audio cable, [TPAI] soldered some RCA plugs directly onto the Pi, and plugged that into the converter. On a yet-older monitor, he faced a SCART adapter. If you’re European, you’ll know these — it’s just composite video with a different connector. Good thing he had a composite video signal already on hand.

online-with-my-1980-tv-set-huc2ls56hwimkv-shot0004The pièce de resistance, though, was attaching the Pi to his 1980 Vega TV set. It only had an antenna-in connector, so he needed an RF modulator. With a (presumably) infinite supply of junk VCRs on hand, he pulled an upconverter out of the pile, and got the Pi working with the snazzy retro TV.

Continue reading “Send A Raspberry Pi Back In Time To 1980”

Colorful Display Keeps Track Of Your Network

So you’ve built out your complete home automation setup, with little network-connected “things” scattered all around your home. You’ve got net-connected TVs, weather stations, security cameras, and whatever else. More devices means more chances for failure. How do you know that they’re all online and doing what they should?

[WTH]’s solution is pretty simple: take a Raspberry Pi Zero, ping all the things, log, and display the status on an RGB LED strip. (And if that one-sentence summary was too many words for you, there’s a video embedded below the break.)

Continue reading “Colorful Display Keeps Track Of Your Network”

FPGA Drives Old Laptop Screen

Every year, new models of laptops arrive on the shelves. This means that old laptops usually end up in landfills, which isn’t exactly ideal. If you don’t want to waste an old or obsolete laptop, though, there’s a way to reuse at least the screen out of one. Simply grab an FPGA off the shelf and get to work.

[Martin] shows us all how to perform this feat on our own, and goes into great detail about how all of the electronics involved work. Once everything was disassembled and the FPGA was wired up, it took him a substantial amount of time just to turn the display on. From there it was all downhill: [Martin] can now get any pattern to show up on the screen, within reason. The only limit to his display now seems to be the lack of external RAM. He currently uses the setup to drive an impressive-looking clock.

This is a big step from days passed where it was next to impossible to repurpose a laptop screen. Eventually someone discovered a way to drive these displays, and now there are cheap electronics from China that can usually get a screen like this running. It’s impressive to see it done from scratch, though, and the amount of detail in the videos are a great way to understand how everything is working.

Continue reading “FPGA Drives Old Laptop Screen”