While the Commodore 64 was an immensely popular computer for its time, and still remains a strong favorite within the retrocomputing community, there’s a reason we’re not using modern Commodore-branded computers today. Intense competition, company mismanagement, and advancing beyond 8-bit computers too late in the game all led to the company’s eventual downfall. But if you’re still a Commodore enthusiast and always wished you were able to get an upgraded C64, you might want to take a look at the Commander X16, a modern take on this classic computer.
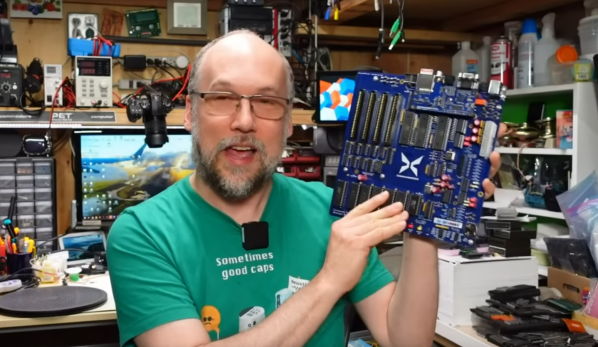
We’ve actually seen the Commander X16 before, but this was back in its early days of prototyping and design. This video from [Adrian’s Digital Basement], also linked below the break, takes a look at how it’s come in the four years since [David Murray] started this project. At its core, it’s an 8-bit 6502-based computer like you’d find in the 1980s but built with new components. There are some more modern updates as well such as the ability to use an SD card as well as built-in SNES controller ports, but the real magic here is the VERA module. Built around an FPGA, this module handles graphics, some of the audio, and the storage capabilities and does all of these things much better than the original Commodore, while still being faithful to what made these computer great.
While the inclusion of the FPGA might offend some of the most staunch 8-bit purists, it turns out to be necessary due to the lack of off-the-shelf video chips and really makes this build shine in the end. It’s also capable of running 6502-based software from other machines too, including the original NES. The VERA module makes it possible to run other software too, including a sample of Sonic the Hedgehog from the Sega Genesis which [Adrian] demonstrates in his video. 6502-based computers are quite versatile as the Commander X16 demonstrates, and it’s even possible to build a rudimentary 6502 on a breadboard with just a few parts.