Printed Nexus 7 SIM Tray Is Good ‘Nuff

When repairing something, there are in effect two schools of thought: you can craft a repair that seamlessly blends into the original hardware and doesn’t look like a repair, or you can slap that thing together and keep it moving. A lot of variables go into this decision making process, such as the complexity of the repair, the available materials, and of course whether or not you need to keep the fact you broke the thing from your significant other.

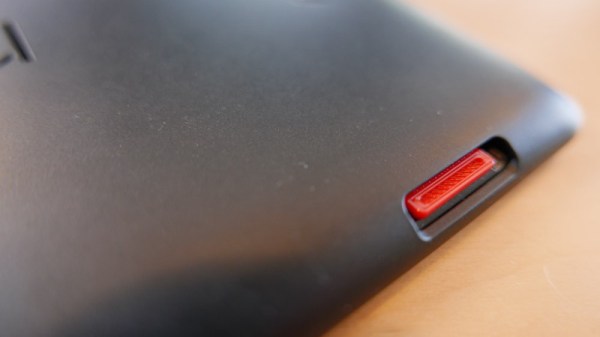
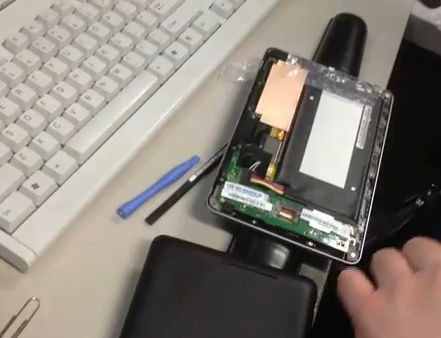
When the SIM holder on his Nexus 7 tablet broke recently, [Alex Whittemore] did the mental arithmetic and came to the conclusion that it wasn’t worth his time trying to figure out how to model an exact replacement. But he was able to print something that works well enough for his purposes, which is all that matters in the end. A perfect entry for our ongoing “Repairs You Can Print” contest.
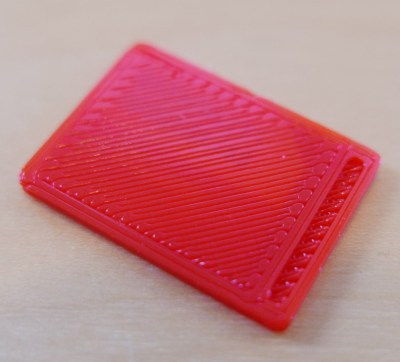
You must be this small to ride

Apparently the SIM holder in the 2013 Nexus 7 is notoriously poor, and of course since this is a known issue, online retailers are trying to get as much as $100 USD out of you for a tiny sliver of plastic. Sometimes it really seems like Google was determined to run the Nexus line into the ground before bailing on it.

Printing such a tiny part, especially with the little details like the channel for you to hook your fingernail into, requires a fairly well calibrated printer. If you can’t muster up a 0.1mm first layer you might as well sit this one out; and if you haven’t mastered the art of bridging, that little valley to help you get the SIM back out may end up overflowing into a river of tears.

For [Alex], the piece ended up working perfectly. It might look a little weird, but if you’ve got the tablet in a case you’ll never see it anyway. It’s also worth noting that this design may work on other devices with a similar SIM arrangement, or at the very least, might be a good starting point to work from if you’ve got to come up with your own.

Remember, there’s still plenty of time to enter your own printed fix into our “Repairs You Can Print” contest. The top 20 repairs will take home $100 in Tindie credit, and for the best repair done by a Student or Organization, there’s two Prusa i3 MK3 printers with the Quad Material upgrade kits on the line.

FatPiBoy: Respin Game Boy With A Pop-Out Controller

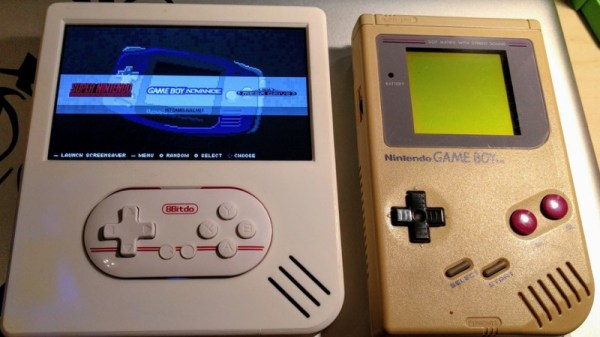
Have you ever found yourself wishing you had a clone of the Game Boy, except it was actually twice as wide, and instead of holding it in your hands you pop a tiny separate controller out of the middle and play it that way? No? Well, neither have we. But that didn’t stop [Christian Reinbacher] from designing and building exactly that, and by the looks of the finished product, we have to say he might be onto something.

To be fair, the charmingly-named FatPiBoy is not really meant to be played like the GameBoy of yesteryear. It’s more like a game console with built in display; you prop the console up on something, and then remove the controller from the system and play that way.

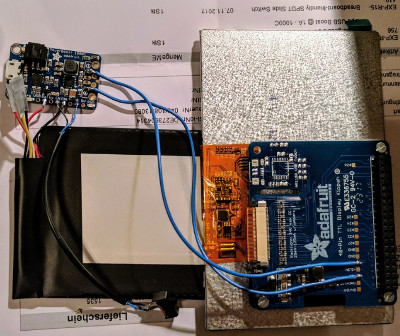
The controller itself is a commercial product, the 8bitdo Zero, but [Christian] based the rest of the system on parts intended for the Adafruit PiGRRL. For the battery, [Christian] used a 4,500 mAh pack that was originally from his Nexus 7 tablet; a tip to keep in mind next time you’re looking for a big and cheap lithium-ion battery.

[Christian] notes that the case design isn’t perfect. There’s currently no external access to the Pi’s USB ports, and the recess for the 8bitdo Zero could be a few millimeters deeper. Still, we think he did an excellent job finishing the case and giving it a professional look; the case and controller look like nearly a perfect match.

This isn’t the first time we’ve seen a Raspberry Pi put on a GameBoy costume, but the FatPiBoy does bring something new to the table with its removable controller. Of course, if you think the controller [Christian] selected for this build is a bit too small, you can always substitute your own

Turn That Old Tablet Into A Sub-$100 Linux Laptop

Tiny laptops have always been devices that promise so much, yet fail somehow to deliver. From the Atari Portfolio palmtops through to the recent crop of netbooks they have been either eye-wateringly expensive if they are any good, or so compromised by their size constraints as to be next-to-useless. We’ve seen DOS, EPOC, Windows, WinCE, Palm OS, Linux distros and more in tiny form factors over the years, yet few have made a significant mark.

The prospect of a “proper” computer in your hand isn’t something to abandon just yet though. We are now reaching the point at which the previous generation of higher-end Android tablets are both acceptably powerful and sufficiently numerous as to be available at a very reasonable price. Perhaps these can provide the tiny laptop seeker with a basis for something useful. [NODE] certainly thinks so, because he’s produced a nice little Ubuntu laptop using a second-hand Nexus 7 tablet and a Bluetooth keyboard case. Android is replaced with an Ubuntu image, and a cardboard cut-out display bezel is held in place with magnetic strips. A step-by-step guide has been put up to help others interested in following the same path.

This is not the most amazing of hardware hacks, in that it involves mostly off-the-shelf items and a piece of software. However it’s worth a look because it does provide a route to a very acceptable little Linux laptop for an extremely reasonable price. One concern is that the Ubuntu version seems not to be a recent one, however we’re sure readers will point at any newer distribution builds in the comments. If you fancy a look at the finished laptop he’s posted a video which we’ve included below the break.

Continue reading “Turn That Old Tablet Into A Sub-$100 Linux Laptop”

Nexus 7 Dashboard

Custom Double-Din Mount For Nexus 7 Carputer

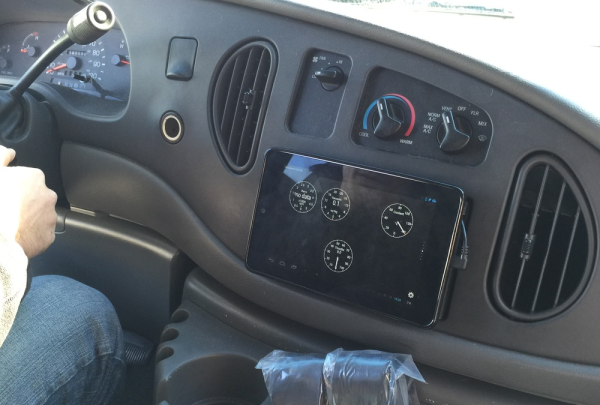
Many new vehicles come with computers built into the dashboard. They can be very handy with features like GPS navigation, Bluetooth connectivity, and more. Installing a computer into an older car can sometimes be an expensive process, but [Florian] found a way to do it somewhat inexpensively using a Nexus 7 tablet.

The size of the Nexus 7 is roughly the same as a standard vehicle double-din stereo slot. It’s not perfect, but pretty close. [Florian] began by building a proof of concept mounting bracket. This model was built from sections of MDF hot glued and taped together. Plastic double-din mounting brackets were attached the sides of this new rig, allowing it to be installed into the dashboard.

Once [Florian] knew that the mounting bracket was feasible, it was time to think about power. Most in-vehicle devices are powered from the cigarette lighter adapter. [Florian] went a different direction with this build. He started with a cigarette lighter to USB power adapter, but he cut off the actual cigarette lighter plug. He ended up wiring this directly into the 12V line from the stereo’s wiring harness. This meant that the power cord could stay neatly tucked away inside of the dashboard and also leave the cigarette lighter unused.

[Florian] then wanted to replace the MDF frame with something stronger and nicer. He modeled up his idea in Solidworks to make sure the measurements would be perfect. Then the pieces were all laser cut at his local Techshop. Once assembled, the plastic mounting brackets were placed on the sides and the whole unit fit perfectly inside of the double-din slot.

When it comes to features, this van now has it all. The USB hub allows for multiple USB devices to be plugged in, meaning that Nexus only has a single wire for both power and all of the peripherals. Among these peripherals are a USB audio interface, an SD card reader, and a backup camera. There is also a Bluetooth enabled OBD2 reader that can monitor and track the car’s vitals. If this project seems familiar to you, it’s probably because we’ve seen a remarkably similar project in the past.

Nexus 7 Dash

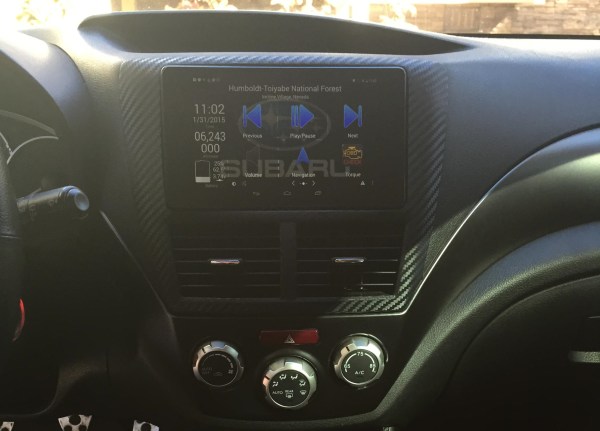
Suburu Dash Mounted Nexus 7 Looks Like Stock

Nexus 7 tablets, being cheap and really quite decent for the price, have long since been used in the dashboards of people’s cars. Sometimes they’re mounted quite good — sometimes not so good — but every once in a while, someone gets it right.

Usually the reason mods like this don’t work out so well is because people are worried about damaging their car’s interior. But [tsubie320] had a better idea — buy a radio bezel off eBay to mess around with — that way he can always revert to stock when he sells the vehicle.

With a crisp-new-freshly-injection-molded-bezel in hand, he got to work. Funny enough, Nexus 7’s tend to be almost the exact size of double DIN stereo slots — hence their appeal. He wrapped the tablet in blue painter’s tape and positioned it in the bezel. Using fiberglass, he created a new shell for the tablet to sit inside of the bezel. Lots of sandpaper later and a whole bunch of bondo, he was done. Continue reading “Suburu Dash Mounted Nexus 7 Looks Like Stock”

Adapting The Nexus 7 For A Double DIN Car Dashboard Opening

It turns out that the Nexus 7 Android tablet is the perfect size to fit in a double DIN opening. DIN is the form factor of a single CD head unit for an automobile. Many models have room for a double DIN, which is defined as 4″ high by 7″ wide. Once [Meta James] figured out that the dashboard bezel for his Subaru framed the Nexus 7 perfectly he set out to fabricate the mounting system for an in-dash tablet installation.

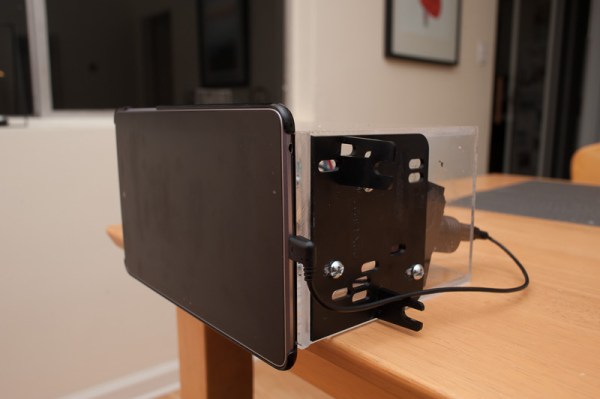
Unlike a lot of these dashboard tablet installs, [James] didn’t need any Bondo, sanding, or painting to get things to look right. Like we mentioned, the bezel is a perfect fit so his alterations are hidden behind the tablet itself. He removed the stock head unit and ordered a DIN adapter kit to get the black bracket plate seen above. He built an acrylic box the same size as a double DIN head unit, then mounted the plates to the sides and a Nexus 7 case to the front. This holds the tablet in firmly, lets him mount the entire assembly using the factory mounting points, and leaves plenty of room for the cabling that connects the device to the car. Since he already had a hands-free phone system he just uses that to amplify the audio fed to it via Bluetooth.

[via Reddit]

Bubble Wrap Cure For Nexus 7 Speaker Distortion

nexus-7-bubble-wrap-fix

[Home Brand Cola] is quite happy with his Nexus 7 with the exception of the built-in speaker. It produces fairly good audio quality until he reaches about 50% volume level. Anything above that produces distortion. He figured out how to fix it using a small piece of bubble wrap.

The eureka moment came when he was using his Nexus 7 and discovered he could fix the distortion by gripping the top and bottom parts of the case strongly between his finger and thumb. This led him to realize that the speaker unit is a bit loose and the unwanted noise is produced when it vibrates against the case. The video after the break shows the fix, which places a strip of bubble wrap (looks to be about 1″ by 3″) on top of that speaker unit. When the case is snapped back together the packing material helps hold everything in place and now he can use his tablet at full volume without any problems. One of the comments on the Reddit thread asks about heat problems with the addition of this plastic. He’s been using it for a few weeks and so far no issues there.

Continue reading “Bubble Wrap Cure For Nexus 7 Speaker Distortion”