See In The Dark, The Simple Way

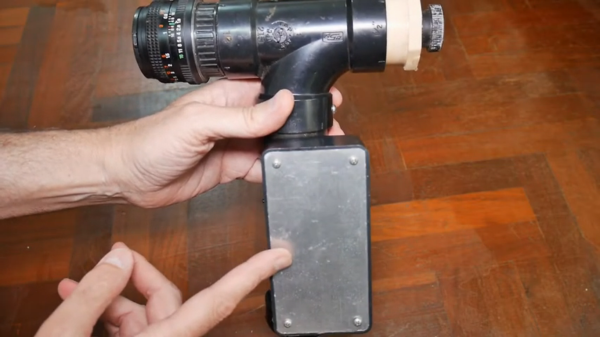
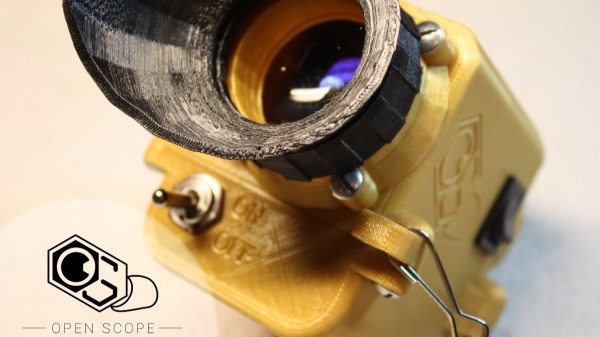
Night vision googles used to be the exclusive preserve of the military, and then of the well-heeled. Image intensifier tubes were very expensive, and needed high-voltage power supplies to keep them going. Now that we have solid-state infra-red cameras the task of seeing in the dark had become much simpler, and [Alex Zidros] is here to show us just how easy that can be. His night vision goggles take a selection of off-the-shelf parts and a little bit of 3D printing to produce a complete set-up for a fraction of the cost of those night-vision goggles of old.

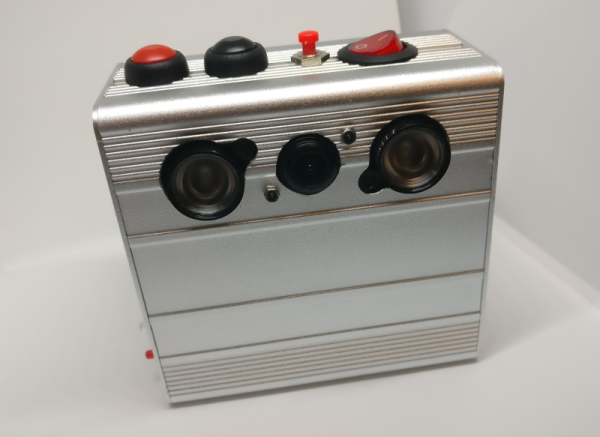
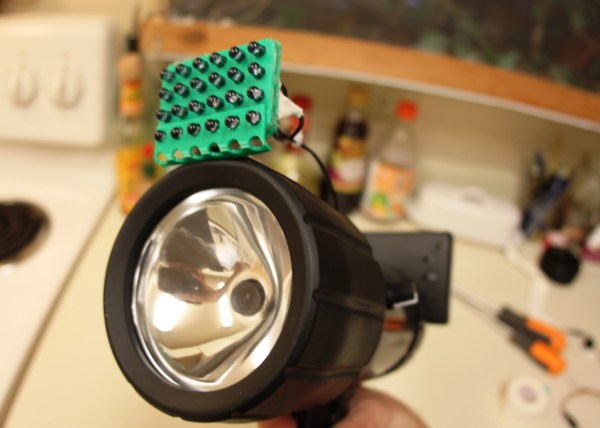
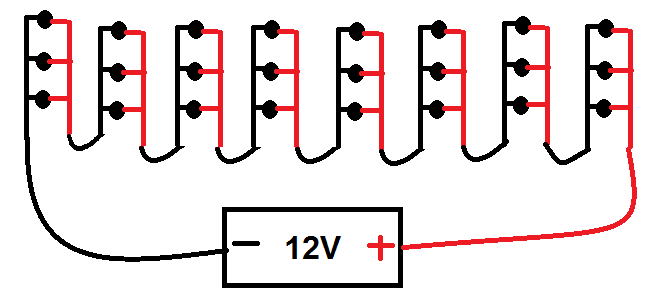
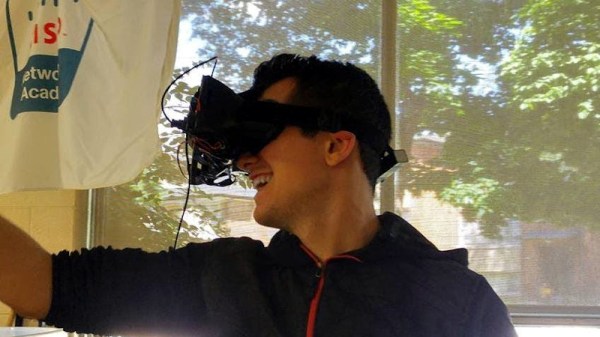
At its heart is a little NTSC/PAL LCD display in a 3D printed bracket. These used to be a small display of choice, but we see them rarely now because standalone displays and the microcontrollers to drive them have become so much more useful. Driving the display is a video camera with its IR filter removed, and providing illumination is an IR flashlight. In effect it’s a classic analogue CCTV system in miniature, but the most important thing is that it works.

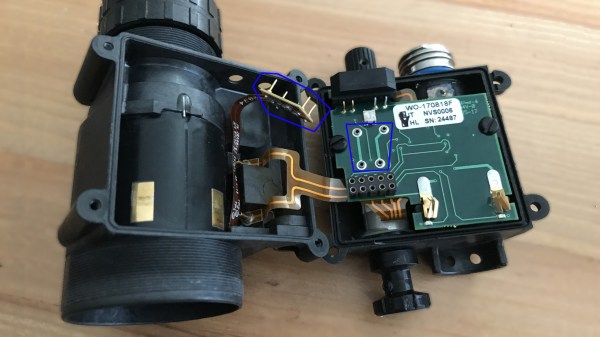
We might have expected a Raspberry Pi Zero and NoIR camera, but it’s difficult to argue with a functioning night vision system. If you want to look at a project with an image intensifier tube though, we’ve covered one of those in the past.

Hold 3500 Volts Up To Your Eye

Old military equipment can sometimes be found in places like flea markets and eBay for pennies, often because people don’t always know what they have. While [tsbrownie] knew exactly what he was getting when he ordered this mystery device, we’re not sure we could say the same thing if we stumbled upon it ourselves. What looks like a vacuum tube of some sort turns out to be an infrared sensor from an old submarine periscope that was repurposed as a night vision device. (Video, embedded below.)

Of course, getting a tube like this to work requires high voltage. This one specifically needs 3500V in order to work properly, but this was taken care of with a small circuit housed in a PVC-like enclosure. The enclosure houses the tube in the center, with an eye piece at one end and a camera lens at the other, attached presumably by a 3D-printed mount. The electronics are housed in the “grip” and the whole thing looks like a small sightglass with a handle. Once powered up, the device is able to show a classic green night vision scene.

Old analog equipment like this is pretty rare, as are people with the expertise to find these devices and get them working again in some capacity. This is a great video for anyone with an interest in tubes, old military gear, or even if you already built a more modern night vision system a while back.

Thanks to [Zzp100] for the tip!

Continue reading “Hold 3500 Volts Up To Your Eye”

See What’s Inside Night Vision, And How To Build Your Own

[Nick Chen] shared some fascinating and useful details about building a AN/PVS-14 monocular night vision device from parts. It’s not cheap, but the build would be a simple one for most Hackaday readers, at least the ones who are residents of the USA. Since the PVS-14 is export controlled under the International Traffic in Arms Regulations (ITAR), parts are not sold outside of the US. Still, [Nick]’s illustrated build instructions provide a good look at what’s inside these rugged devices.

The build consists of purchasing a PVS-14 parts kit (or “housing kit”) which includes nearly everything except the image intensifier module, which must be purchased separately. Once all the parts are in hand, [Nick] explains how to assemble the pieces into a working unit.

The view through a blemished (or “blem”) image intensifier. Cheaper, and perfectly serviceable as long as the center is clear.

Since the image intensifier is by far the most expensive component, there is an opportunity to save money by shopping for what [Nick] calls “blem” units. These units are functional, but have blemishes or dead spots within the field of view. The good news it that this makes them cheaper, and [Nick] points out that as long as the center region of the tube is clear, they are perfectly serviceable.

How much can one save by building from parts? [Nick] says buying a complete PVS-14 with a Gen 3 tube (sensitive to 450-950 nm) can cost between $2500 to $4000. It’s expensive equipment, no doubt, but deals can be found on the parts. Housing kits can be had for well under $1000, and [Nick] has purchased serviceable image intensifiers for between $500 and $1000. He says searching for “blem tubes” can help zero in on deals.

Knowing the right terms for searching is half the battle, and along with his build instructions (and a chunk of cash) a curious hacker would have all they need to make their own. Heck, build two because the PVS-14 is designed such that two units can be combined to make a binocular unit! Not ready to drop that kind of cash? Check out OpenScope, the open source digital night vision tool.

Rage Against The Dying Of The Light With A Raspi Night Vision Camera

One of the most interesting things about hacking is the difference between the vision we have at the beginning and the reality of we’ve built at the end. What began as a simple plan to build a night vision VR headset turned into a five-month adventure for [facelessloser] that culminated in this great-looking camera. He thought it would be easy, but almost every aspect presented some kind of challenge. The important thing is that he kept at it.

One of the major issues [facelessloser] encountered was power. He found that the Pi (Zero W), the screen, and the IR LEDs draw between 1.5 and 2A altogether. He was able to solve this one by using the charging board from a 2A power bank paired with a 1200mAh Li-Po built for the high draw required by vaping. If not for space issues, he might have used a 18650 or two.

Another challenge he faced was storing the video and images. He’d considered setting up the Pi as an access point to view them from a phone browser, but ultimately extended a USB port with an OTG cable to use flash drives. With a bit of Python he can watch for the drive to mount and then write to it. If the flash drive suddenly disappears, the Pi starts saving to the SD card.

There are two videos after the break, a walk through and a night vision demo. You’ll see a bit of a lag happening in the demo video—that’s because [facelessloser] is running the feed through PyGame first. No matter what nightlife you want to peep, it might be nice to add automated zoom with a rangefinder or get a closer look with some PiNoculars.

Continue reading “Rage Against The Dying Of The Light With A Raspi Night Vision Camera”

Another Day, Another Air Gap Breached

What high-tech, ultra-secure data center would be complete without dozens of video cameras directed both inward and outward? After all, the best informatic security means nothing without physical security. But those eyes in the sky can actually serve as a vector for attack, if this air-gap bridging exploit using networked security cameras is any indication.

It seems like the Cyber Security Lab at Ben-Gurion University is the place where air gaps go to die. They’ve knocked off an impressive array of air gap bridging hacks, like modulating power supply fans and hard drive activity indicators. The current work centers on the IR LED arrays commonly seen encircling the lenses of security cameras for night vision illumination. When a networked camera is compromised with their “aIR-Jumper” malware package, data can be exfiltrated from an otherwise secure facility. Using the camera’s API, aIR-Jumper modulates the IR array for low bit-rate data transfer. The receiver can be as simple as a smartphone, which can see the IR light that remains invisible to the naked eye. A compromised camera can even be used to infiltrate data into an air-gapped network, using cameras to watch for modulated signals. They also demonstrated how arrays of cameras can be federated to provide higher data rates and multiple covert channels with ranges of up to several kilometers.

True, the exploit requires physical access to the cameras to install the malware, but given the abysmal state of web camera security, a little social engineering may be the only thing standing between a secure system and a compromised one.

Continue reading “Another Day, Another Air Gap Breached”

Own The Night With This Open Source Night Vision Monocular

If you’ve always wanted to see in the dark but haven’t been able to score those perfect Soviet-era military surplus night vision goggles, you may be in luck. Now there’s an open-source night vision monocular that you can build to keep tabs on the nighttime goings-on in your yard.

Where this project stands out is not so much the electronics — it’s really just a simple CCD camera module with the IR pass filter removed, an LCD screen to display the image, and a big fat IR LED to throw some light around. [MattGyver92] seemed to put most of his effort into designing a great case for the monocular, at the price of 25 hours of 3D printer time. The main body of the case is nicely contoured, the eyepiece has a comfortable eyecup printed in NinjaFlex, and the camera is mounted on a ball-and-socket gimbal to allow fine off-axis angle adjustments. That comes in handy to eliminate parallax errors while using the monocular for nighttime walks with both eyes open. One quibble: the faux mil-surp look is achieved with a green filter over the TFT LCD panel. We wonder if somehow eliminating the red and blue channels from the camera might not have been slightly more elegant.

Overall, though, we like the way this project came out, and we also like the way [MattGyver92] bucked the Fusion 360 trend and used SketchUp to design the case. But if walking around at night with a monocular at your face isn’t appealing, you can always try biohacking yourself to achieve night vision.

Infrared Flashlight With Screen Uncovers What’s Hidden

Flashlights are handy around the house, but what if you want a stealthier approach to illuminating the night? Infrared LED flashlights can be acquired at relatively low cost, but where’s the fun in that? To that end [johnaldmilligan] spent a couple hours building an infrared flashlight-gun with an LED display to venture into the night.

[johnaldmilligan] disassembled a handheld spotlight to use as the housing, leaving the trigger assembly and 12V DC charge port in place. A miniature camera was used as the video source after removing its infrared filter. Note: if you do this, don’t forget that you will need to manually readjust the focus! The camera was mounted where LED Array Diagramthe flashlight bulb used to be instead of the LED array since the latter was impractically large for the small space — but attaching it to the top of the flashlight works just as effectively. The infrared LEDs were wired in eight groups of three LEDs in parallel to deliver 1.5V to each bank and preventing burnout. Here is an extremely detailed diagram if that sounds confusing.

Continue reading “Infrared Flashlight With Screen Uncovers What’s Hidden”