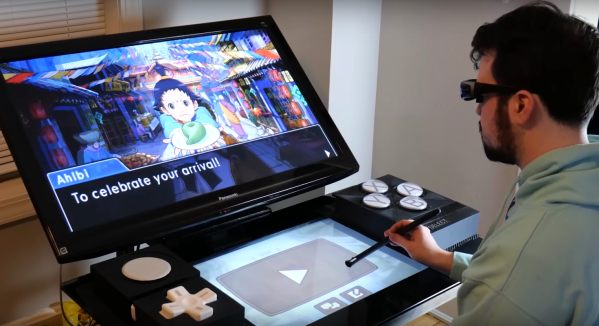
While the Nintendo 3DS was capable of fairly impressive graphics (at least for a portable system) back in its heyday, there’s little challenge in emulating the now discontinued handheld on a modern computer or even smartphone. One thing that’s still difficult to replicate though is the stereoscopic 3D display the system was named for. But this didn’t stop [BigRig Creates] from creating this giant 3DS with almost all of the features of an original console present.
The main hurdle here is that the stereoscopic effect that Nintendo used to allow the 3DS to display 3D graphics without special glasses doesn’t work well at long distances, and doesn’t work at all if there is more than one player. To get around those limitations, this build uses a 3D TV with active glasses. This TV is mounted to a bar stool with the help of some counterweights, and a second touch-sensitive screen courtesy of McDonalds makes up the other display.
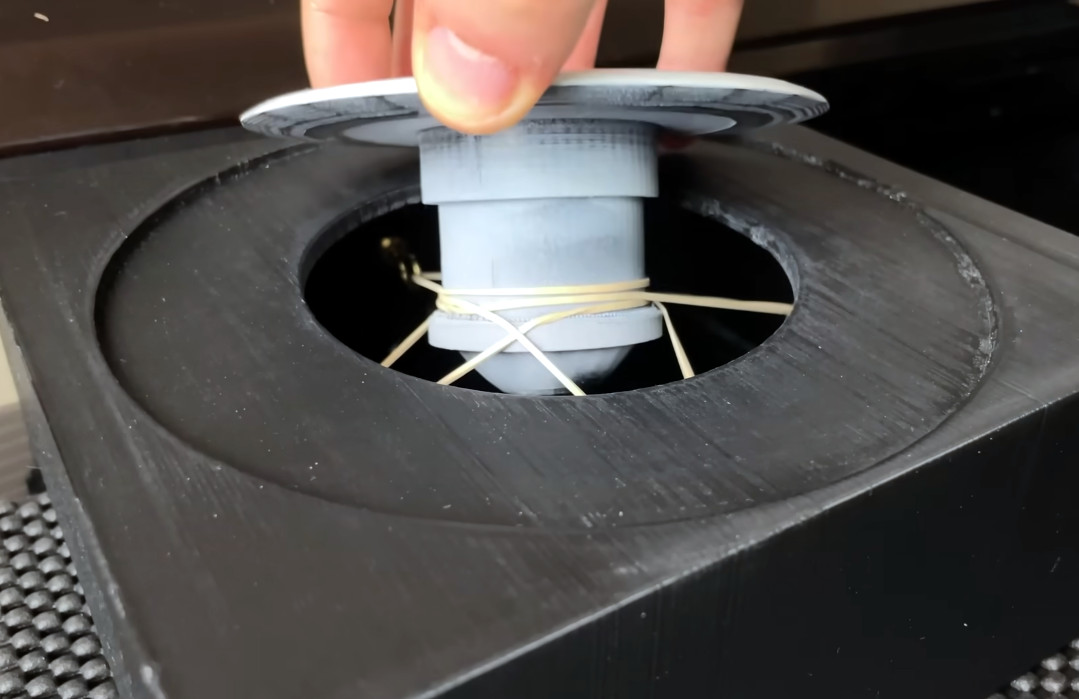 The computer driving this massive handheld console runs Citra, and also handles the scaled-up controls as well. To recreate the system’s analog touch pad, a custom joystick tipped with conductive filament is used to interact with a smartphone hidden inside the case. Opposing rubber bands are used to pull the stick back into the center when it’s not being pushed.
Plenty of 3DS games are faithfully replicated with this arcade-sized replica, and as Citra supports various 3D displays, upscaling of the graphics, and the touchscreen interface, almost everything from the original console is produced here. There are a few games that don’t work exactly right, but all in all it’s a remarkable build and, as far as we can tell, the largest 3DS in the world. Don’t forget that even though this console is out of production now, there’s still a healthy homebrew scene to take part in.
Continue reading “Building The World’s Largest Nintendo 3DS”