Paper Tape Reader Self-calibrates, Speaks USB

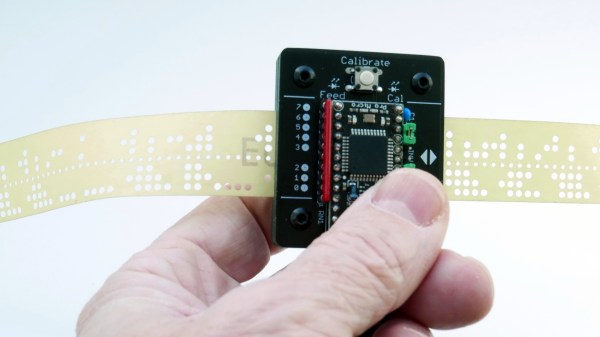
Input devices consisting of optical readers for punched paper tape have been around since the earliest days of computing, so why stop now? [Jürgen]’s Paper Tape Reader project connects to any modern computer over USB, acting like a serial communications device. Thanks to the device’s automatic calibration, it works with a variety of paper materials. As for reading speed, it’s pretty much only limited to how fast one can pull tape through without damaging it.

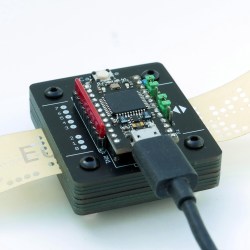
Stacked 1.6 mm PCBs act as an enclosure, of sorts.

While [Jürgen]’s device uses LEDs and phototransistors to detect the presence or absence of punched holes, it doesn’t rely on hardware calibration. Instead, the device takes analog readings of each phototransistor, and uses software-adjusted thresholds to differentiate ones from zeros. This allows it to easily deal with a wide variety of tape types and colors, even working with translucent materials. Reading 500 characters per second isn’t a problem if the device has had a chance to calibrate.

Interested in making your own? The build section of the project has all the design files; it uses only through-hole components, and since the device is constructed from a stack of 1.6 mm thick PCBs, there’s no separate enclosure needed.

Paper tape and readers have a certain charm to them. Cyphercon 4.0 badges featured tape readers, and we’ve even seen the unusual approach of encoding an I2C byte stream directly onto tape.

Old Printer Becomes Direct Laser Lithography Machine

What does it take to make your own integrated circuits at home? It’s a question that relatively few intrepid hackers have tried to answer, and the answer is usually something along the lines of “a lot of second-hand equipment.” But it doesn’t all have to be cast-offs from a semiconductor fab, as [Zachary Tong] shows us with his homebrew direct laser lithography setup.

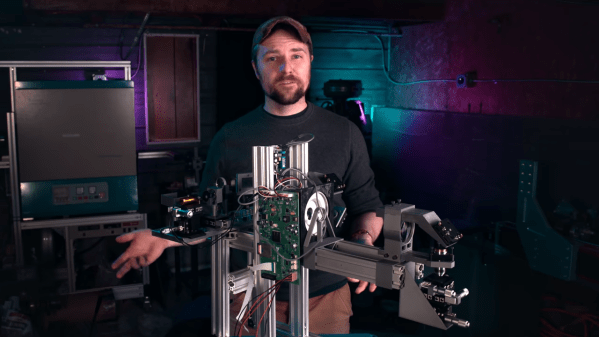
Most of us are familiar with masked photolithography thanks to the age-old process of making PCBs using photoresist — a copper-clad board is treated with a photopolymer, a mask containing the traces to be etched is applied, and the board is exposed to UV light, which selectively hardens the resist layer before etching. [Zach] explores a variation on that theme — maskless photolithography — as well as scaling it down considerably with this rig. An optical bench focuses and directs a UV laser into a galvanometer that was salvaged from an old laser printer. The galvo controls the position of the collimated laser beam very precisely before focusing it on a microscope that greatly narrows its field. The laser dances over the surface of a silicon wafer covered with photoresist, where it etches away the resist, making the silicon ready for etching and further processing.

Being made as it is from salvaged components, aluminum extrusion, and 3D-printed parts, [Zach]’s setup is far from optimal. But he was able to get some pretty impressive results, with features down to 7 microns. There’s plenty of room for optimization, of course, including better galvanometers and a less ad hoc optical setup, but we’re keen to see where this goes. [Zach] says one of his goals is homebrew microelectromechanical systems (MEMS), so we’re looking forward to that.

Continue reading “Old Printer Becomes Direct Laser Lithography Machine”

Beautiful Engineering In This Laser Unit From A Tornado Jet Fighter

Those of use hailing from the UK may be quite familiar with the Royal Air Force’s Tornado fighter jet, which was designed to fight in a theoretical nuclear war, and served the country for over 40 years. This flying deathtrap (words of an actual serving RAF fighter pilot this scribe met a few years ago) was an extremely complex machine, with state-of-the-art tech for its era, but did apparently have a bit of a habit for bursting into flames occasionally when in the air!

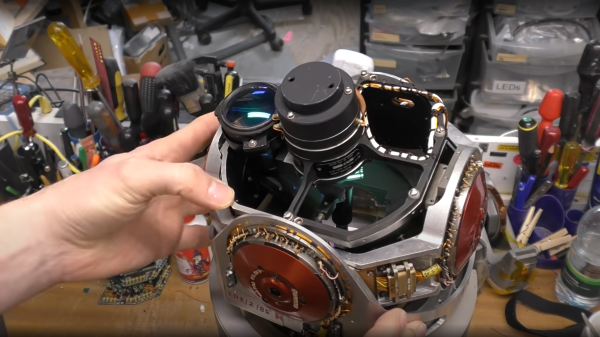
Anyway, the last fleet is now long retired and some of the tech inside it is starting to filter down into the public domain, as some parts can be bought on eBay of all places. [Mike] of mikeselectricstuff has been digging around inside the Tornado’s laser head unit,  which was part of the bomber’s laser-guided missile subsystem, and boy what a journey of mechanics and electronics this is!

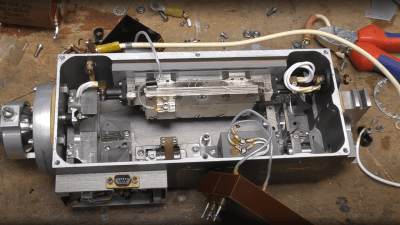
Pulse-mode optically pumped YAG laser

This unit is largely dumb, with all the clever stuff happening deep in an avionics bay, but there is still plenty of older high-end tech on display. Using a xenon-discharge-tube pumped yttrium aluminum garnet (YAG) laser, operating in pulsed mode, the job of the unit is to illuminate the ground target with an IR spot, which the subsequently fired missiles will home on to.

Designed for ground-tracking, whilst the aircraft is operating at speed, the laser head has three degrees of moment, which likely is synchronized with the aircraft movement to keep the beam steady. The optical package is quite interesting, with the xenon tube and YAG rod swimming in a liquid cooling bath, inside a metal housing. The beam is bounced around inside the housing using many prisms, and gated with a Q-switch which allows the beam to build up in intensity, before be unleashed on the target. Also of note is the biggest photodiode we’ve ever seen — easily over an inch in diameter, split into four quadrants, enabling the sensor to resolve direction changes in the reflected IR spot and track its error. A separate photodiode receiver forms part of the time-of-flight optical range finder, which is also important information to have when targeting.

There are plenty of unusual 3-phase positioning motors, position sensors, and rate gyros in the mix, with the whole thing beautifully crafted and wired-up military spec. It is definitely an eye opener for what really was possible during the cold war years, even if such tech never quite filtered down to civilian applications.

We’ve seen a few bits about the Tornado before, like this over-engineered attitude indicator, and here’s the insides of an old aircraft QAR (Quick Access Recorder)

Continue reading “Beautiful Engineering In This Laser Unit From A Tornado Jet Fighter”

A Soft Thumb-Sized Vision-Based Touch Sensor

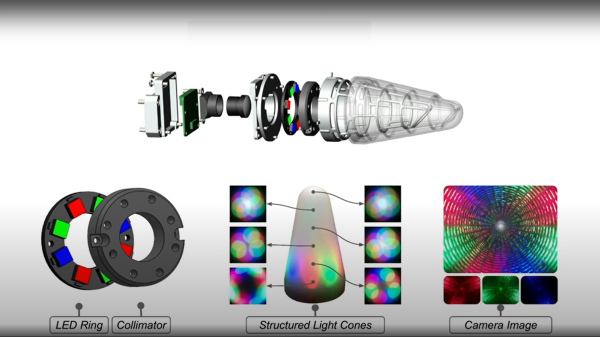
A team from the Max Planck Institute for Intelligent Systems in Germany have developed a novel thumb-shaped touch sensor capable of resolving the force of a contact, as well as its direction, over the whole surface of the structure. Intended for dexterous manipulation systems, the system is constructed from easily sourced components, so should scale up to a larger assemblies without breaking the bank. The first step is to place a soft and compliant outer skin over a rigid metallic skeleton, which is then illuminated internally using structured light techniques. From there, machine learning can be used to estimate the shear and normal force components of the contact with the skin, over the entire surface, by observing how the internal envelope distorts the structured illumination.

The novelty here is the way they combine both photometric stereo processing with other structured light techniques, using only a single camera. The camera image is fed straight into a pre-trained machine learning system (details on this part of the system are unfortunately a bit scarce) which directly outputs an estimate of the contact shape and force distribution, with spatial accuracy reported good to less than 1 mm and force resolution down to 30 millinewtons. By directly estimating normal and shear force components the direction of the contact could be resolved to 5 degrees. The system is so sensitive that it can reportedly detect its own posture by observing the deformation of the skin due its own weight alone!

We’ve not covered all that many optical sensing projects, but here’s one using a linear CIS sensor to turn any TV into a touch screen. And whilst we’re talking about using cameras as sensors, here’s a neat way to use optical fibers to read multiple light-gates with a single camera and OpenCV.

Continue reading “A Soft Thumb-Sized Vision-Based Touch Sensor”

All About Dichroic Optical Filters

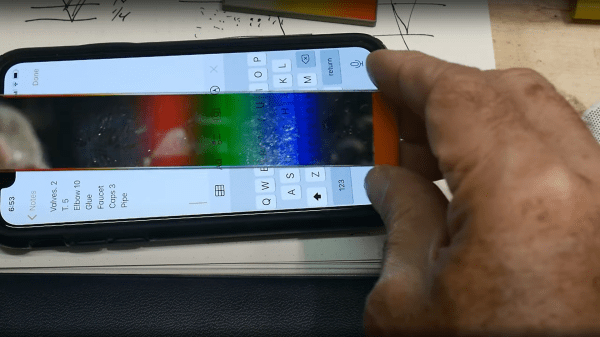
[IMSAI Guy] presents for your viewing pleasure, a nice video on the topic of optical filters and mirrors. (Video, embedded below) The first optical device is a simple absorption filter, where incoming light is absorbed in a wavelength-selective manner. Much more interesting however is the subject of interference or dichroic filters. These devices are constructed from many thin layers of a partially reflective material, and operate on the principle of interference. This means that photons hitting the filter stack will interfere either constructively or destructively giving the filter a pass or stop response for a particular wavelength.

As [IMSAI Guy] demonstrates, this makes the filters direction-specific, as photons hitting the stack at a different angle will travel slightly further. Longer travel means the interference effect will be different, and so will the filtering response. You can see this by playing around with one in your hands and seeing the color change as your rotate it. Dichroic filter films can also make for some stunning optical effects. Very cool stuff.

By creating a filter stack with a wide enough range of inter-layer thicknesses, it’s possible to construct a mirror that covers the full spectrum with excellent reflectivity.  Since you can tune the layers, you can make it reflect any range of wavelengths you like. One thing we’ve not seen before is a wedge-like optical filter device, where the layer thicknesses progressively increase lengthways, creating a variable optical frequency response along the length. We guess this would be useful for diagnostics in the field, or perhaps for manually tuning a beam path?

We like the applications for dichroic films – here’s an Infinity Mirror ‘Hypercrystal’. If you don’t want to buy off-the-shelf films, perhaps you could sputter yourself something pretty?

Continue reading “All About Dichroic Optical Filters”

Is Your Flashlight A Lumen Liar? Build A DIY Integrating Sphere

A lamp used to be simple thing: just stick a filament in a glass bulb, pass a current through it and behold! Let there be light. A bigger lamp meant a larger filament, taking more power and a larger envelope. Now we’ve moved on a bit, and it’s all about LEDs. There really isn’t such a thing as ‘just an LED,’ these are semiconductor devices, made from relatively exotic materials (OK, not just plain old silicon anyway) and there is quite a lot of variety to choose from, and a bit of complexity in selecting them.

For [Torque Test Channel] the efficiency of conversion from electrical power to radiant power (or flux) is the headline figure of interest, which prompted them to buy a bunch of lamps to compare. To do the job justice that requires what’s known in the business as an integrating sphere (aka an Ulbricht sphere), but being a specialist device, it’s a bit pricey for the home gamer. So naturally, they decided to build the thing themselves.

Coating the inside of the foam sphere took several attempts.

Firstly they did the sensible thing, and shipped off their test units to a metrology lab with the ‘proper’ equipment, to get a baseline to calibrate against. Next they set about using some fairly common materials to construct their sphere. The basic idea is quite simple; it has a uniform diffuse internal surface, which ensures that all photons emitted by a source can be measured at the appropriate measurement port, regardless of the angle they are emitted from the source. This way, the total radiated power can be determined, or at least estimated, since there will be a degree of absorption.

Anyway, after a couple of false starts with coating the internal surface, they came to the conclusion that mixing barium sulphate into the paint, and then a bit of a rub-down with sandpaper, gave the required pure white, diffuse surface.

The results from their testing, using a lux meter inserted into one of the other ports, showed a pretty good correspondence between their measured lux figure and the lab-determined lumens figure. Since one lux is defined as one lumen per square meter, they seemed to get lucky and found a consistent ten-to-one ratio between their observed value and the lab. This factor will be simply due to the physical setup of their contraption, but an encouraging result so far anyway. And what about the bottom line? Did those test units deliver their promised lumen output? It would seem that they pretty much did.

When it rains, it pours. Just a few hours ago we saw another DIY approach to building an integrating sphere, this time using a small cannonball mold of all things. Before that we hadn’t actually seen too many light measurement projects, save this old one that used the chipKIT. Continue reading “Is Your Flashlight A Lumen Liar? Build A DIY Integrating Sphere”

Integrating sphere test setup

Cannonball Mold Makes A Dandy Integrating Sphere For Laser Measurements

It’s an age-old riddle: if you have a perfect sphere with a perfectly reflective inner surface, will light bounce around inside it forever? The answer is pretty obvious when you think it through, but that doesn’t mean that you can’t put the principle to use, as we see with this homemade Ulbricht sphere for optical measurements.

If you’ve never heard of an Ulbricht sphere, don’t worry — it’s also known as an integrating sphere, and that makes its function a little more apparent. As [Les Wright] explains, an integrating sphere is an optical element with a hollow spherical cavity that’s coated with a diffusely reflective coating. There are two ports in the sphere, one for admitting light — usually from a laser — and one for light to exit. The light bounces around inside the sphere and becomes perfectly diffuse, and creates a uniform beam at the exit port.

[Les]’ need for an integrating sphere comes from the desire to measure the output of some of his lasers with his Raspberry Pi-based PySpectrometer. Rather than shell out for an expensive commercial integrating sphere, or turn one on a lathe, [Les] turned to an unlikely source: cannonball molds. The inside of the mold was painted with an equally unlikely ultra-white paint concocted from barium sulfate and PVA glue. With a few ports machined into the mold, it works perfectly to diffuse the light from his dye lasers for proper measurements.

Lasers can be an expensive hobby, but [Les] always seems to find a way to make things more affordable and just as good. Whether it’s homemade doorknob caps for high-voltage power supplies or blasting the Bayer filter off a cheap CCD camera, he always seems to find a way.

Continue reading “Cannonball Mold Makes A Dandy Integrating Sphere For Laser Measurements”