Analog Stylophone

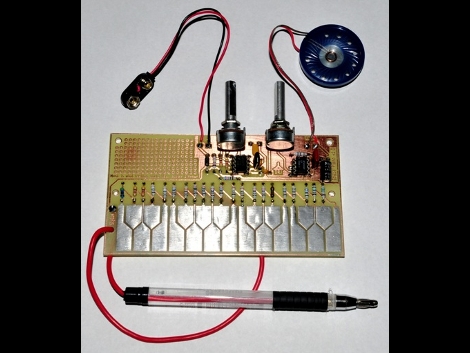
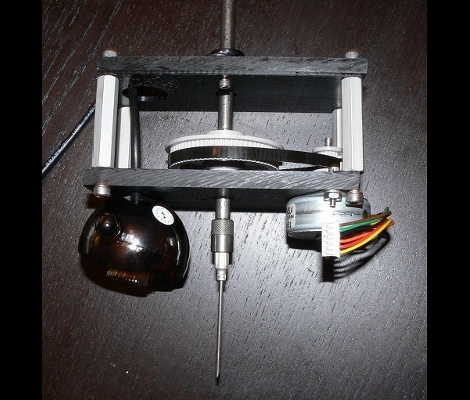
[Doug Jackson] just finished building an analog Stylophone. We’ve seen this instrument a few times before, most recently with an Arduino-based controller, but this one makes use of 555-timer, resistors, and potentiometers to generate the waveform for each note. If you’ve got the copper-clad and the means to etch the board everything else should be pretty easy to come by. We did note that since this is a single-sided board you’ll be soldering on the same side as the components, which can get a bit hairy but manageable. We just wish that [Doug] has posted a demonstration video so we could hear what this sounds like. But it can’t be too much different from that electronic vuvuzela that used a 555 timer as well.

Hackaday Links: August 29, 2010

Hotel room door lock picking

Here’s further proof that you should never leave anything of value in your hotel room. We’re not worried about someone getting in while the room is occupied. But these methods of defeating the chain lock and opening the door without a keycard (YouTube login required) do show how easy it is for the bad guys to steal your stuff.

iPhone frequency generator

Need one more way to make that iPhone a useful lab tool? Why not use it as a frequency generator. Start with a free app and mix in an audio cable with test leads and you’re in business.

Drag Soldering

[Andrei] sent us a link to a video about drag soldering. This is a method of soldering fine-pitch chips using a small bit of solder and a fat solder tip. The link he sent is dead now but we found another great example of the process. We were just using this method earlier in the week to solder a TSSOP38 package for an upcoming project and it worked like a charm.

Laser etched PCB

Here’s some art in PCB form thanks to a laser. We thought this might be interesting to share after seeing those art pieces made from old circuit boards. This example is laser etched, but not directly. As you probably guessed, the copper clad board is coated with resist and the laser etches some of it away. Whatever got zapped by the laser dissolves when the board is placed in acid, leaving [Riley Porter’s] art behind.

Art Piece From Board Artwork

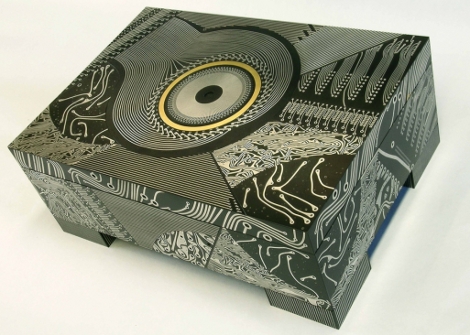
[Theo Kamecke] is an artist who produces striking pieces using printed circuit boards. We’ve seen PCBs used as faux stained-glass before, but [Theo’s] craftsmanship stands apart from everything we’ve seen. His webpage has at least one piece that sites the usage of vintage 1960’s circuit boards, but we wonder if he doesn’t design some of these to suit his work. Either way, we’d love to see him take on the finish work for that mechanized expanding round table we saw back in June. See more of his work on his photostream.

[Photo Credit]

[Thanks Mowcius]

EL Wire: Make It, Connect It, Power It

[Jeri’s] back with a series of videos that outlines the step-by-step electroluminescent wire manufacturing, making EL panels from PCBs, and assembling power supplies for EL hardware. These concepts are actually quite approachable, something we don’t expect from someone who makes their own integrated circuits at home.

The concept here is that an alternating current traveling through phosphors will excite them and produce light. You need two conductors separated by a dielectric to get the job done. For wire, [Jeri] uses one strand of enameled magnet wire and one strand of bare wire. The enamel insulates them, protecting against a short circuit.

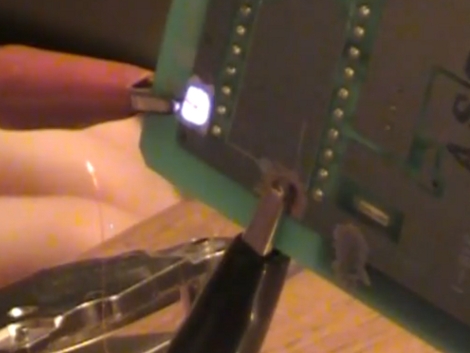
But that’s not all, she also tests using a circuit board as an EL panel. By repurposing the ground plane as one of the conductors, and using the solder mask as the dielectric she is able to paint on a phosphor product resulting in the glowing panel.

Finally, you’ve got to get juice to the circuit and that’s where her power supply video comes into the picture. We’ve embedded all three after the break. It’s possible that this is cooler than blinking LEDs and it’s fairly inexpensive to get started. The circuitry is forgiving, as long as you don’t zap yourself with that alternating current.

Continue reading “EL Wire: Make It, Connect It, Power It”

A Different Take On Electric Motor Cars

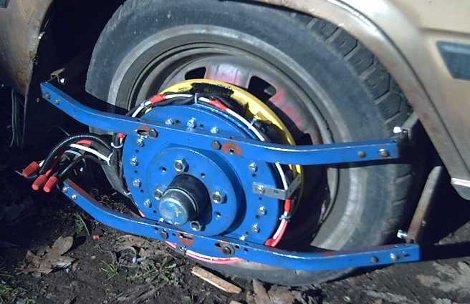
[Craig Carmichael] has been hard at work on his electric hub motor for cars. Unlike typical electrical vehicles the plan is to bypass the transmission, differential, and everything else all together by connecting directly to the hub of the wheel. The goal of giving greater thrust and still allowing the use of a gas engine if need be.

There’s really too much detail for us to even begin to try to explain the entire project in a short recap, but [Craig] builds the entire motor (from magnets to coil windings) and wires his own controller (from schematic to finished PCB), all while documenting the process thoroughly for those wishing to make their own.

Negative Laser Etching

[James] has been refining a method of negatively etching metal with a laser. He had been using a product called Thermark which is designed for this process, but it’s quite expensive. He found that paint designed for wood stoves works just as well. To prepare the surface he bead blasted it and then cleaned of the residue and finger prints off with acetone. The board was preheated in an oven before covering it with the spray paint. He ran the laser at 98/100 power and 90/400 speed at a step size of 0.1mm to achieve the results above. This should immediately make you think about making circuit boards. We’d love to ditch the toner transfer and we’re always looking for one more reason to get a laser cutter.

PCB Trace Antenna

If you’re working on a device that includes RF wireless, [Colin’s] Guide to PCB Trace Antenna Design might clear some headaches when sending off for PCBs. While it is directed at devices transmitting at 2.4GHz, the techniques and recommended equipment (read: espresso smith charts and network analyzers) should work for almost any frequency. While trace antennas aren’t as easy to implement as a measured wire, the space benefits make up for the difficulty. Unless you don’t mind how larger your project is, did someone say cantenna?