Mains Power Supply For ATtiny Project Is Probably A Bad Idea

When designing a mains power supply for a small load DC circuit, there are plenty of considerations. Small size, efficiency, and cost of materials all spring to mind. Potential lethality seems like it would be a bad thing to design in, but that didn’t stop [Great Scott!] from exploring capacitive drop power supplies. You know, for science.

The backstory here is that [Great Scott!] is working on a super-secret ATtiny project that needs to be powered off mains. Switching power supplies are practically de rigueur for such applications, but compared to the intended microcontroller circuit they are actually quite large, and they’ve just been so done before. So in order to learn a thing or two, [Scott!] designed a capacitive dropper supply, where the reactance of the cap acts like a dropping resistor to limit the current. His first try was just a capacitor in series with an LED; this didn’t end well for the LED.

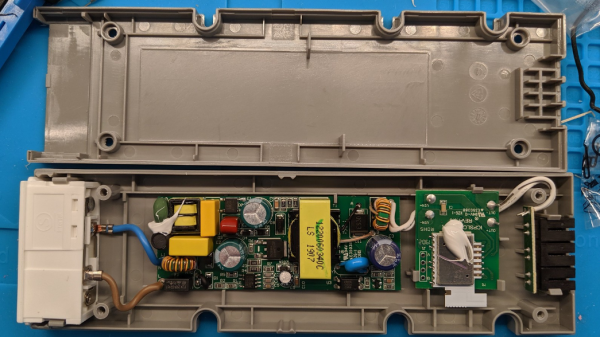
To understand why, he reverse-engineered a few low-current mains devices and found that practical capacitive droppers need a few more components, chiefly a series resistance to prevent inrush current from getting out of hand, but also a bridge rectifier and a zener to clamp things down. Wiring up all that resulted in a working capacitive dropper supply, but a the cost of as much real estate as a small switcher, and with the extra bonus of being potentially lethal if the power supply is plugged in the wrong way. Side note: we thought German line cords were polarized to prevent this, but apparently not? (Ed Note: Nope!)

As always, even when [Great Scott!]’s projects don’t exactly work out, like a suboptimal 3D-printed BLDC or why not to bother building your own DC-AC inverter, we enjoy the learning that results.

Continue reading “Mains Power Supply For ATtiny Project Is Probably A Bad Idea”

Well-Protected USB Power Strip Makes It Easy To Plug In

When we get a new device these days, somewhere in the package is likely to be a wall-wart USB power supply. We look for a place to plug in the little switch-mode dongle, rearrange a few plugs in the mains power strip, and curse its designers for the overly cozy outlet spacing. And all the while that USB-A plug on the power supply cable taunts us with its neat, compact form factor. If only there were a USB power strip.

Unwilling to suffer such indignity any longer, [Scott M. Baker] took matters into his own hands and designed this USB power distribution system. We were surprised to hear that he was unable to find a commercial USB power strip, but even if he had, it likely wouldn’t have had the bells and whistles that he added to his. The circuit went through a couple of revs, but each was focused on protection of the connected USB devices. He included both overcurrent protection, in the form of an electronic fuse built around a TPS2421 hot-swap controller, and overvoltage protection using a crowbar circuit with the usual zener-SCR arrangement. There’s also a transient voltage suppression diode to keep any inductive spikes at bay. Interestingly, each USB outlet has all these protections – it’s not just one protected bus feeding a bunch of USB outlets in parallel, but individual modules with all the circuitry. The modules are gangable and live inside a laser-cut acrylic case. The video below shows the design and build process in some detail.

We have to say that we always learn a lot about circuit design from [Scott]’s projects. You may recall his custom Atari 2600 controller or his dual-port memory retro game console, both interesting and instructive builds in their own right.

Continue reading “Well-Protected USB Power Strip Makes It Easy To Plug In”

Travelling The Oregon Trail With An Apple II Robot

For one reason or another, we’re going with a retro-futuristic 80s aesthetic in this case, [Mike] decided to turn an Apple IIe into a robot. If you have to ask why, you’ll never know, but this project does have some interesting things going for it. There’s a voice synthesizer, a brand spankin’ new power supply, and it rolls around on the floor thanks to Apple BASIC.

Since this is a mobile robot, there needs to be a power supply in there somewhere. The Apple II had a fantastic switching power supply, but it ran off mains voltage. To make this Apple run off a 14.8 V LiPO battery, [Mike] needed to re-engineer this power supply to give +5, +12, -5, and -12 Volts. The easiest is the positive voltage, and for that, he used a big ‘ol LM1084 linear regulator for the +5 V line. This outputs a ton of heat and probably isn’t the best solution, but it is a solution that works. The +12 line was again another linear regulator, an LM7812CV. Since this is dropping 14.8 V down to 12, the efficiency isn’t that bad, and since there’s no floppy drive it’s not pulling much current anyway. The negative voltages are a MAX764 / MAX765 inverting switching regulators. This completely replaces the original power supply in the Apple II, and is a decent reference design for anyone who wants to make a luggable Apple II laptop.

To move this thing around, the motors run on their own 11.1 V LiPO, with a bunch of Pololu gear tying everything together. The BASIC code was written on an emulator, transferred over with the Floppy Emu. Movement is controlled through the output pins on the joystick port, and there’s a text to speech module that was obviously needed and ties this project together wonderfully. You can check out the video demo of the build below.

Continue reading “Travelling The Oregon Trail With An Apple II Robot”

Power Supply Design For Clean Jazz Amps

Power supply design is a broad field, requiring entirely different tools and techniques depending on what you’re working with. Creating a low-cost and compact mobile phone charger is a completely different ball game to designing the power supply for a medium-sized laser cutter, for example. [Vasily Ivanenko] has been designing a power supply for a clean jazz guitar amplifier, and has helpfully documented the process.

For a guitar amplifier which prides itself on clean tones, it’s highly important to avoid all sources of noise, to let the natural sound of the guitar come through as clearly as possible. [Vasily] notes that this requires careful component selection, as well as consideration of the placement of key parts and the construction of the power supply. Strategies to minimise inductive and capacitive coupling are discussed, as well as grounding schemes to minimise undesirable hum or buzz during amplifier operation.

The article is the first of a three part series, in which [Vasily] will then cover the full design of the guitar amp, including a focus on the design of the power amplifier stage. We’ve seen some of [Vasily]’s work before, like this discussion of how to build high quality audio amplifiers for ham radio use. 

Laptop Chargers Team Up To Get The Juice Flowing

There’s perhaps nothing harder to throw away than a good power supply. Whether it’s the classic “wall wart” whose mate has long since been misplaced or a beefy ATX you pulled out of a trashed computer, it always seems like there should be something you could do with these little wonders of modern power conversion. So into the parts bin it goes, where it will stay evermore. But not for the [TheRainHarvester], who figured out that the secret to putting a drawer full of old laptop chargers to use was combing them like hacker Voltron.

Using three old IBM laptop chargers, he’s able to produce up to 48 volts DC at a healthy 4.5 amps. His cobbled together power supply even features an variable output, albeit with some mighty coarse adjustment. As each charger is individually rated for 16V, he can unplug one of the adapters to get 32V.

In the video after the break [TheRainHarvester] walks viewers through the construction of his simple adapter, which could easily be made with salvaged parts. Built on a trace-free piece of fiber board, the adapter consists of the three barrel jacks for the chargers and a trio of beefy Schottky diodes.

The nature of the barrel jacks (which short a pin once the plug is removed) along with the diodes allows [TheRainHarvester] to combine the output of the three adapters in series without running the risk of damaging them if for example one is left plugged into the adapter but not the wall. He’s also looking to add some status LEDs to show which chargers are powered on.

Unfortunately, [TheRainHarvester] realized a bit too late that what he thought was an inert piece of board actually had a ground plane, so he’s going to have to come up with a new way to tie the whole thing together on the next version which he says is coming now that he knows the concept seems workable.

In the meantime, if you’re thinking of hacking something together with the wealth of old laptop chargers we know are kicking around the lab, you might want to take a look at our primer for understanding all those hieroglyphs on the back of the thing.

Continue reading “Laptop Chargers Team Up To Get The Juice Flowing”

1,000 Watt Power Supply Tear Down And Repair

[TheSignalPath] wanted to repair a broken Instek PSW80-40.5 because it has a lot of output for a programmable power supply — 1,080 watts, to be exact. This isn’t a cheap supply — it looks like it costs about $2,200 new. The unit wasn’t working and when he took it apart, he found a nasty surprise. There is a base PCB and three identical power supply modules, and virtually no access without disconnecting the boards. He continued the teardown, and you can see the results in the video below.

Each of the power supply modules are two separate PCBs and the design has to account for the high currents required. The power supply is a switching design with some filtering on the motherboard. One of the boards of the power supply module rectifies the incoming line voltage to a high DC voltage (about 400 volts). The second board then does DC to DC conversion to the desired output.

Continue reading “1,000 Watt Power Supply Tear Down And Repair”

IBM PCjr Revived By An ATX Power Supply And Many False Starts

The IBM PCjr was a computer only the marketing geniuses of a multi-billion dollar corporation could love. On the face of it, it seemed like a great idea – a machine for the home market, meant to complement the “big boy” IBM PC in the office and compete against the likes of Apple and Commodore. What it ended up as was a universally hated, only partially PC-compatible machine which sold a mere half-million units before being mercifully killed off.

That doesn’t mean retrocomputing fans don’t still snap up the remaining machines, of course. [AkBKukU] scored a PCjr from a thrift store, but without the original external brick power supply. An eBay replacement for the 18-VAC supply would have cost more than the computer, so [AkBKukU] adapted a standard ATX power supply to run the PCjr. It looked as if it would be an easy job, since the external brick plugs into a power supply card inside the case which slots into the motherboard with a card-edge connector. Just etch up a PCB, solder on an ATX Molex connector, and plug it in, right? Well, not quite. The comedy of errors that ensued, from the backward PCB to the mysteriously conductive flux, nearly landed this one in the “Fail of the Week” bin. But [AkBKukU] soldiered on, and his hand-scratched adapter eventually prevailed; the video below tells the whole sordid tale, which thankfully ended with the sound of the machine booting from the 5-1/4″-floppy drive.

In the end, we’ve got to applaud [AkBKukU] for taking on the care and feeding of a machine so unloved as to be mentioned only a handful of times even on these pages. One of those articles marks the 25th anniversary of the PCjr, and lays out some of the reasons for its rapid disappearance from the market.

Continue reading “IBM PCjr Revived By An ATX Power Supply And Many False Starts”