Boredom + Lasers = Projector!

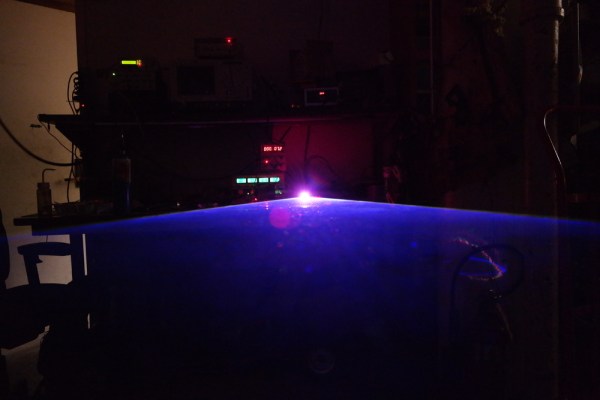
[Krazer], a post-doctoral researcher at MIT, loves him some lasers. When out of boredom one afternoon he hatched an idea for a laser projector, it grew until a few years later he wound up with this RGB laser for a projector — Mark IV no less.

In addition to 3D-printing the parts, the major innovation with this version is the ability to re-align the lasers as needed; tweaking the vertical alignment is controlled by a screw on the laser mounts while the horizontal alignment is done the same way on the mirror mounts. This simplifies the design and reduces the possibility of part failure or warping over time. An additional aluminium base epoxied to the projector aims to keep the whole from deforming and adds stability. With the help of a mirror for the final alignment — sometimes you must use what you have— the projector is ready to put on a show.

True to the spirit of the art [Krazer] used all open source software for this iteration, and sharing his designs means you can build your own for around $200. As always with lasers take extra precautions to protect your eyes! This 200mW setup is no joke, but that doesn’t mean fun and games are out of the question.

Embiggen Your Eclipse 2017 Experience With A Sun Funnel

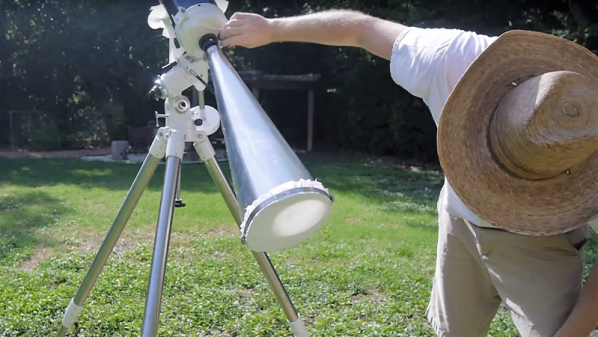
As exciting as Eclipse 2017 is going to be this Monday, for some folks it might appear a bit — underwhelming. Our star only occupies about half a degree of the sky, and looking at the partial phase with eclipse glasses might leave you yearning for a bigger image. If that’s you, you’ll need to build a sun funnel for super-sized eclipse fun.

[Grady] at Practical Engineering is not going to be lucky enough to be within the path of totality, but he is going to be watching the eclipse with a bunch of school kids. Rather than just outfitting his telescope with a filter and having the kids queue up for a quick peek, he built what amounts to a projection screen for the telescope’s eyepiece. It’s just a long funnel, and while [Grady] chose aluminum and rivets, almost any light, stiff material will do. He provides a formula for figuring out how long the funnel needs to be for your scope, along with plans for laying out the funnel. We have to take exception with his choice of screen material — it seems like the texture of the translucent shower curtain might interfere with the image a bit. But still, the results look pretty good in the video below.

Eclipse 2017 is almost here! How are you planning to enjoy this celestial alignment? By proving Einstein right? By studying radio propagation changes? Or just by wearing a box on your head? Sound off in the comments.

Continue reading “Embiggen Your Eclipse 2017 Experience With A Sun Funnel”

Microorganisms Can’t Hide From DropoScope

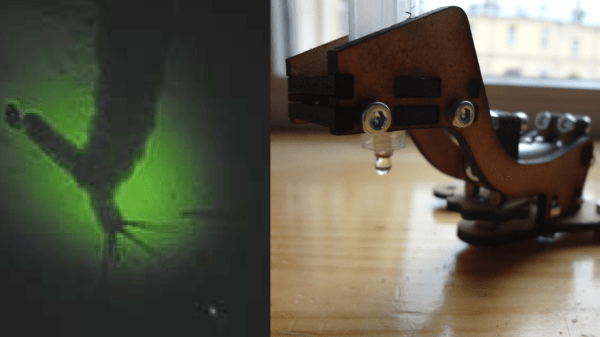
The DropoScope is a water-drop projector that works by projecting a laser through a drop of water, ideally dirty water crawling with microorganisms. With the right adjustments, a bright spot of light is projected onto a nearby wall, revealing a magnified image of the tiny animals within. Single celled organisms show up only as dark spots, but larger creatures like mosquito larvae exhibit definite structure and detail.

While simple in concept and requiring nothing more high-tech than a syringe and a laser pointer, getting useful results can require a lot of fiddly adjustment. But all that is a thing of the past for anyone with access to a laser cutter, thanks to [ingggis].  His design for a laser-cut a fixture lets anyone make and effortlessly adjust their own water-drop projector.

If you’d like to see some microorganisms in action, embedded below is video from a different water-drop projector (one identical in operation, but not lucky enough to benefit from [ingggis]’s design.)

Continue reading “Microorganisms Can’t Hide From DropoScope”

Shapes Made From Light, Smoke, And A Lot Of Mirrors

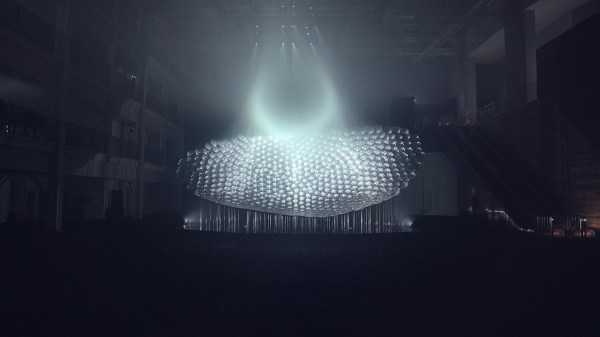
Part lightshow, part art piece, part exploratory technology, Light Barrier (third edition) by South Korean duo [Kimchi and Chips] crafts a visual and aural experience of ephemeral light structures using projectors, mirrors, and a light fog.

Presently installed at the ACT Center of Asia Culture Complex in Gwangju, South Korea, Light Barrier co-ordinates eight projectors, directing their light onto a concave cluster of 630 mirrors. As a result, an astounding 16 million ‘pixel beams’ of refocused light simulate shapes above the array.  The array itself was designed in simulation using an algorithm which — with subtle adjustments to each mirror — “grew” the display so as to line up the reflecting vectors. Upon setup, final calibration of the display used Rulr to treat each ‘pixel beam’ as a ray in 3D space to ensure image accuracy once the show began. Check out a preview after the break! Continue reading “Shapes Made From Light, Smoke, And A Lot Of Mirrors”

Want Gesture-Tracking? All You Have To Do Is Lift Your Finger.

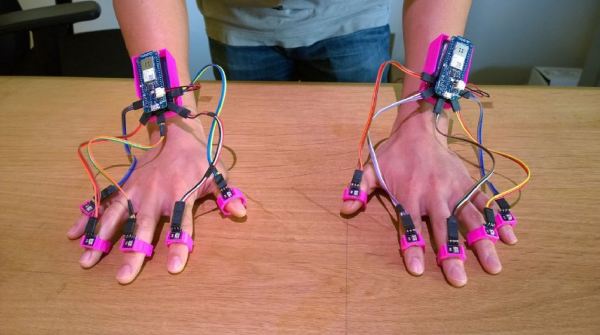
Watching Tony Stark wave his hands to manipulate projected constructs is an ever-approaching reality — at least in terms of gesture-tracking. Lift — a prototype built by a team from UC Irvine and FX Palo Alto Laboratory — is able to track up to ten fingers with 1.7 mm accuracy!

Lift’s gesture-tracking is achieved by using a DLP projector, two Arduino MKR1000s, and a light sensor for each digit. Lift’s design allows it to work on virtually any flat surface; the projected image acts as a grid and work area for the user. As their fingers move across the projected surface, the light sensors feed the information from the image to the Arduinos, which infers the location of each finger and translate it into a digital workspace. Sensors may also be mounted on other objects to add functionality.

So far, the team has used Lift as an input device for drawing, as well as using it to feign gesture controls on a standard laptop screen. The next step would be two or more projectors which would allow Lift to function fully and efficiently in three dimensions and directly interacting with projected media content. Can it also operate wirelessly? Yes. Yes, it can.

While we don’t have Tony Stark’s hologram workstation quite yet, we can still play Tetris, fly drones, and mess around with surgical robots.

Raspberry Pi Zero smart projector

Smart Projector With Built-in Raspberry Pi Zero

You’ve heard of smartphones but have you heard of smart projectors? They’ve actually been around for a few years and are sort of like a TV set top box and projector combined, leaving no need for a TV. Features can include things like streaming Netflix, browsing in Chrome, and Skyping. However, they can cost from a few hundred to over a thousand dollars.

[Novaspirit]  instead made his own cheap smart projector. He first got a $70 portable projector (800×480 native resolution, decent for that price) and opened it up. He soldered an old USB hub that he already had to a Raspberry Pi Zero so that he could plug in a WiFi dongle and a dongle for a Bluetooth keyboard. That all went into the projector.

Examining the projector’s circuit board he found locations to which he could wire the Raspberry Pi Zero for power even when the projector was off. He lastly made the Raspberry Pi dual-bootable into either OSMC or RetroPie. OSMC is a Linux install that boots directly into a media player and RetroPie is a similar install that turns your Raspberry Pi into a gaming machine. You can see a timelapse of the making of it and a demonstration in the video after the break.

Continue reading “Smart Projector With Built-in Raspberry Pi Zero”

High-Quality Film Transfers With This Raspberry Pi Frame Grabber

Untold miles of film were shot by amateur filmmakers in the days before YouTube, iPhones, and even the lowly VHS camcorder. A lot of that footage remains to be discovered in attics and on the top shelves of closets, and when you find that trove of precious family memories, you’ll be glad to have this Raspberry Pi enabled frame-by-frame film digitizer at your disposal.

With a spare Super 8mm projector and a Raspberry Pi sitting around, [Joe Herman] figured he had the makings of a good way to preserve his grandfather’s old films. The secret of high-quality film transfers is a frame-by-frame capture, so [Joe] set about a thorough gutting of the projector. The original motor was scrapped in favor of one with better speed control, a magnet and reed switch were added to the driveshaft to synchronize exposures with each frame, and the optics were reversed with the Pi’s camera mounted internally and the LED light source on the outside. To deal with the high dynamic range of the source material, [Joe] wrote Python scripts to capture each frame at multiple exposures and combine the images with OpenCV. Everything is stitched together later with FFmpeg, and the results are pretty stunning if the video below is any indication.

We saw a similar frame-by-frame grabber build a few years ago, but [Joe]’s setup is nicely integrated into the old projector, and really seems to be doing the job — half a million frames of family history and counting.

Continue reading “High-Quality Film Transfers With This Raspberry Pi Frame Grabber”