DIY Planetarium Built From PVC Pipes And Cardboard

When you think about DIY projects, you probably don’t consider building your own planetarium. Why would you? Building the thing is surely outside the capabilities of the individual, and even if you could figure it out, the materials would be far too expensive. There’s a limit to DIY projects, and obviously building a planetarium is on the wrong side of the line. Right?
Well, apparently not. [Gabby LeBeau] has documented the planetarium she built as her senior project, and if you’ll forgive the pun, it’s absolutely out of this world. Using readily available parts and the help of family and friends, she built a fully functional planetarium big enough to seat the Physics Department. No word on what grade she got, but it’s a safe bet she screwed the curve up for the rest of the class.

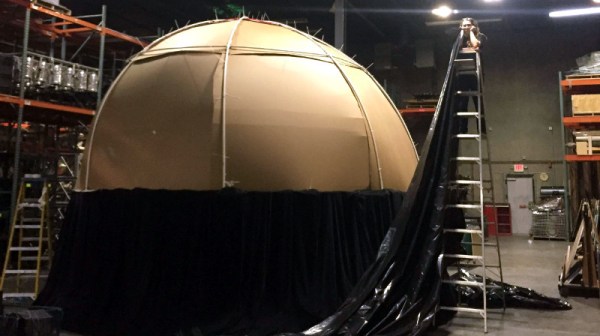
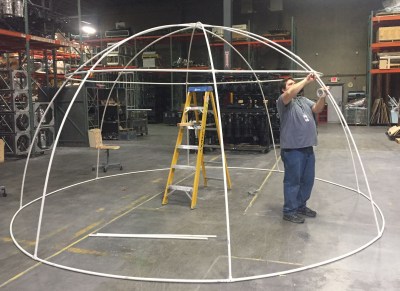
After two months of research and a couple of smaller proof of concept builds, she was able to find a business who graciously allowed her to construct the full scale planetarium in their warehouse. The frame is made of PVC pipes held together with zip ties. The big advantage to using the PVC pipes (beyond being cheap and easy to works with) is that they will automatically find a hemispherical shape when bent; saving the time and trouble it would take to create the shape with more rigid building materials.
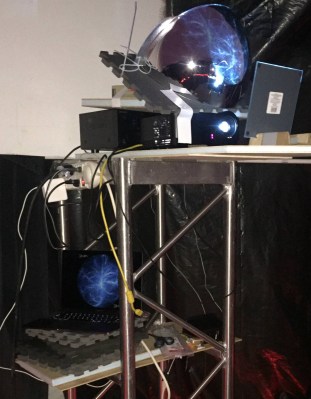
Once the PVC frame was up, white cardboard panels were cut to shape and attached to the inside. The panels were lined up as closely as possible, but gaps were covered with white tape so the fit didn’t need to be perfect. When the dome was finished, it was lifted and placed on metal trusses to get some room underneath, and finally covered with a black tarp and stage curtain to block out all light.

Of course, she didn’t go through all this trouble to just stick some glow in the dark stars on the inside of this thing. The image from a standard projector is directed at a flat mirror, which then bounces off of a convex mirror. Driving the projector is a laptop running Stellarium. While there were some imperfections she couldn’t get polished or cleaned off of the mirrors, the end result was still very impressive.

Unfortunately, you can’t really do a planetarium justice with a camera, so we aren’t able to see what the final image looked like. But judging by the slack-jawed faces of those who are pictured inside of it, we’re going to go out on a limb and say it was awesome.

We might suggest trying to quiet down the projector or adding some lasers to the mix, but overall this is a truly exceptional project, and we’re jealous of everyone who got to experience it first hand.

Alexa Controls This Projector Thanks To ESP8266

[jfessard] doesn’t have extra-sensory perception, but does have an ESP8266. The little board seems to pop up in every hack these days. Inspired by not wanting to get up from the bean-bag chair or leave the electronics-housing cabinet wide open to use an HDMI switcher, [jfessard] hacked together an Alexa-compatible projector control via the ESP8266!

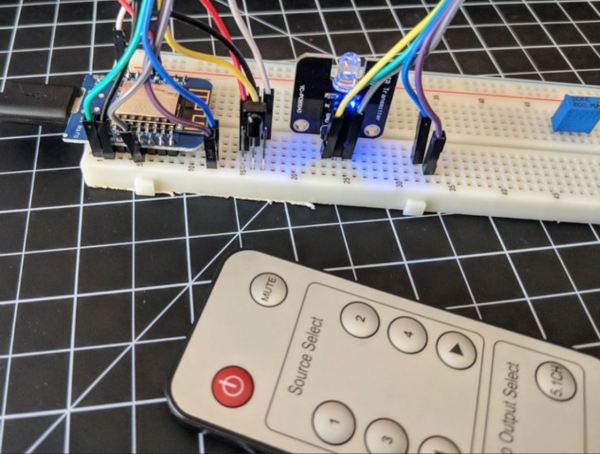
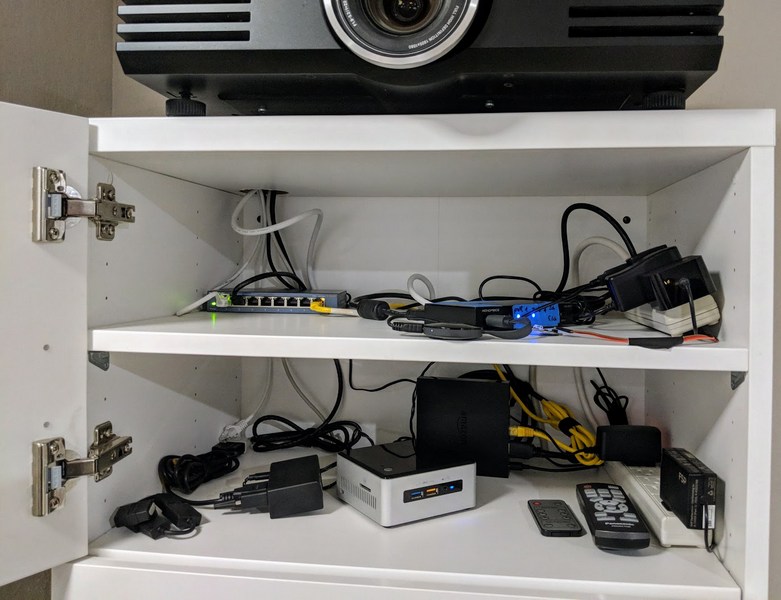
The core functionality here is the ability to turn the projector on and off, and to switch the HDMI source. [jfessard] connected the Panasonic PT-AE3000U projector to a Monoprice HDX-401TA 4×1 HDMI switcher. Tucked away in the cabinet below the projector, it is controlled using a IR LED transmitter breakout board sitting at the end of a fairly long set of jumper wire. The projector control itself is through a RS232 interface.

To make this easy to use with Amazon’s Alexa, [jfessard] turned to some libraries for the ESP8266 D1 Mini. The fauxmoesp library makes it look like a WeMo device, and the IRemoteESP8266 library made remote control code cloning a snap. One really frustrating part of this hack was the MAX232-style breakout board; getting a board to work when it’s labelled backwards takes a bit of head-scratching to figure out.

If the the projector ever gets too noisy, we suggest this hack that shushes the machine. For the moment, we’d rather take another look at this laser projector that mimics a cool ‘laser sky’ effect.

Running Programs On Paper

It’s a simple fact that most programs created for the personal computer involve the same methods of interaction, almost regardless of purpose. Word processors, graphics utilities, even games – the vast majority of interaction is performed through a keyboard and mouse. However, sometimes it can be fun to experiment with alternative technologies for users to interact with code – Paper Programs is an exciting way to do just that.

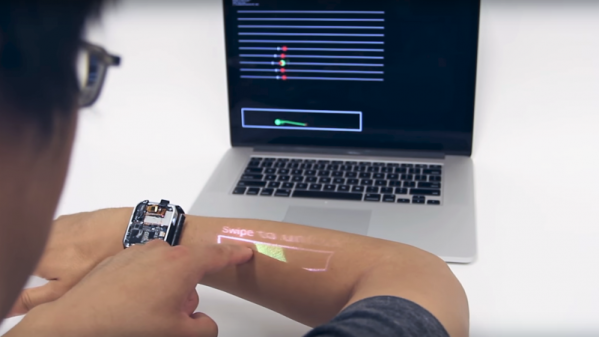
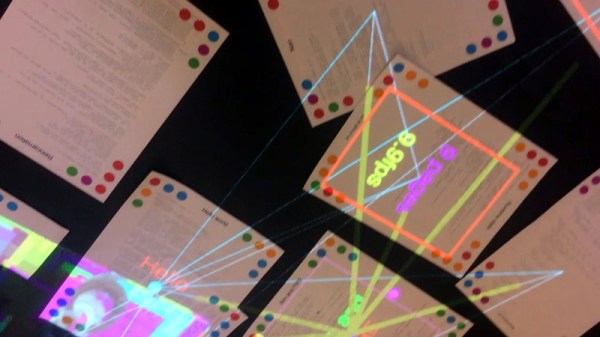
Paper Programs is a combination of a variety of existing technologies to create a way of interacting with code which is highly tangible. The setup consists of a projector, and a webcam which can see the projected area, combined with Javascript programs running in a browser. Programs can be edited in the browser, then printed out with special coloured dots around the page. When the page is placed in the projection area, these dots identify the unique program and are picked up by the webcam, and the server executes the relevant code, projecting back onto the page.

It’s a system that creates a very tactile way of interacting with a program – by moving the page around or placing different pages next to each other, programs can interact in various ways. The system is setup for collaboration as well, allowing users to edit code directly in the browser.

The project reminds us of earlier works on DIY multitouch screens, but with a greater focus on direct engagement with the underlying code. What other unique ways exist to interact with code? Let us know in the comments.

Continue reading “Running Programs On Paper”

Turn A Car Into A Game Controller

The CAN bus has become a staple of automotive engineering since it was introduced in the late ’80s, but in parallel with the spread of electronic devices almost every single piece of equipment inside a car has been put on the CAN bus. While there are opinions on whether or not this is a good thing, the reality is that enough data is gathered on this bus to turn an unmodified modern car into a video game controller with just a little bit of code.

The core of [Scott]’s project is a laptop and a Python program that scrapes information about the car from the car’s CAN bus, including positions of the pedals and the steering wheel. This information can be accessed by plugging an adapter into the OBD-II port (a standard for all cars made after 1995). From there, the laptop parses the CAN data into keyboard and mouse commands for your video game of choice.

This is an interesting investigation into the nitty-gritty of the CAN bus, but also a less dangerous demonstration of all of the data available from the car than some other cases we’ve seen. At least [Scott]’s Mazda (presumably) lacks any wireless attack vectors!

Continue reading “Turn A Car Into A Game Controller”

Bringing A Christmas Lights Show Inside

Instructables user [Osprey22] has been building towards this Christmas for years. Why? This year, he has brought an impressive musical Christmas light display inside, and at a fraction of the cost too!

An box at the tree’s base hides the power supply and the controller boards — a Raspberry Pi and a SanDevices e682 Pixel controller for the 400 WS2811 RGB LEDs — with an added router to connect them to the main network. The Pi is running Falcon Pi Player and a projector somewhere in the region of $100 complements the light show.

As far as mapping out the LEDs, Xlights is the program of choice, locating the LEDs in space with the help of a cell phone video recording. [Osprey22] had to write a quick program in C to fix the LED overlaps in the grid. (A spreadsheet would work just as well, here). Oh, and the gifts at the bottom of the tree double as a projector screen!

Continue reading “Bringing A Christmas Lights Show Inside”

Hacker Maketh Kingsman Umbrella

Yes! Someone made the Kingman umbrella and yes it can shoot and yes it has a display on the inside. [James Hobson] just put up a video on YouTube for this excellent project detailing the process that went into creating this live working prop and it is amazing.

The build starts with finding a rugged umbrella and was tested by standing on it as well as decimating a few household objects. Compress CO2 cartridges provide the fuel for propelling blow darts as well as other non-lethal forms of ammunition. The coolest part of the project is the screen inside the portable that allows you to see-through the dome. This is accomplished by a combination of a small camera and a portable mini projector. Simple yet awesome.

The camera is mounted near the muzzle whereas the projector is sliced-up and integrated into the grip. The handle in question is itself 3D printed and includes a custom trigger into the design. Check out the video for a demonstration of the project.

Movie props have a special place in every maker’s heart and this project is an excellent example of imagination meeting ingenuity. After seeing this video, security agencies are going to be giving umbrella owners some suspicious looks though creating own of your own could be a very rewarding experience. If you are looking for a more obvious prop, then check out the PiPBoy Terminal from Fallout which is sure to get everyone’s attention. Continue reading “Hacker Maketh Kingsman Umbrella”

Boredom + Lasers = Projector!

[Krazer], a post-doctoral researcher at MIT, loves him some lasers. When out of boredom one afternoon he hatched an idea for a laser projector, it grew until a few years later he wound up with this RGB laser for a projector — Mark IV no less.

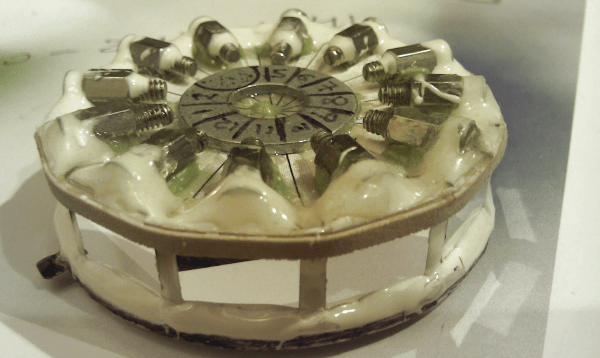
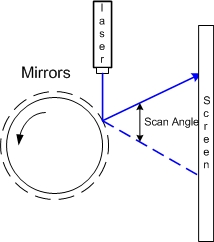
In addition to 3D-printing the parts, the major innovation with this version is the ability to re-align the lasers as needed; tweaking the vertical alignment is controlled by a screw on the laser mounts while the horizontal alignment is done the same way on the mirror mounts. This simplifies the design and reduces the possibility of part failure or warping over time. An additional aluminium base epoxied to the projector aims to keep the whole from deforming and adds stability. With the help of a mirror for the final alignment — sometimes you must use what you have— the projector is ready to put on a show.

True to the spirit of the art [Krazer] used all open source software for this iteration, and sharing his designs means you can build your own for around $200. As always with lasers take extra precautions to protect your eyes! This 200mW setup is no joke, but that doesn’t mean fun and games are out of the question.