Raspberry Pi Quadcopter

[youtube=http://www.youtube.com/watch?v=TjXvzMdf8Nk&w=470]

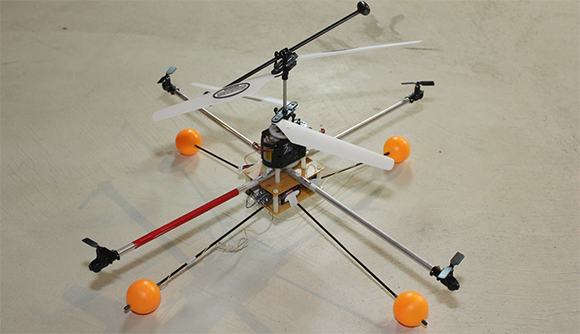
It was bound to happen sooner or later, but that doesn’t diminish the awesomeness of [Matthew]’s Raspberry Pi-powered quadcopter.

[Matthew]’s quadcopter is similar to all the other flying drones we’ve seen before with one important difference – all the processing, from reading the gyroscopes to computing exactly how much power to give each motor – is handled by a Raspberry Pi. This task is usually the domain of a microcontroller, as these calculations need to happen in real-time. The Linux distro [Matt] is running on his Pi has a lot more overhead than a simple AVR or ARM microcontroller, so doing everything that needs to be done in real-time isn’t guaranteed. With a bit of clever programming, [Matthew] managed to make sure all the necessary tasks were taken care of in time. It’s still not a real-time operating system, but for this project at least, it’s good enough.

Since the Raspberry Pi in [Matthew]’s quadcopter is much more powerful than a microcontroller, there’s plenty of head room to SSH into the ‘copter while it’s flying. There may even be enough processing power to stream video to a web server; we honestly can’t wait to see what [Matthew] does with his flying Linux computer in the future.

You can check out [Matthew]’s code over on the git or watch a few flight test videos over on his youtube.


Adding Node.js Based Sensors To The Parrot AR Drone

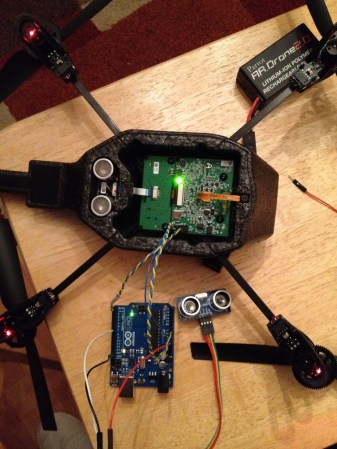
[Max Ogden] wanted the option to add sensors to his Parrot AR Drone. This a commercially available quadcopter which runs Linux. This makes it rather easy for him to use Node.js to read the sensors from an Arduino board. The use of the Arduino is merely for easy prototyping. It is only needed to bridge the drone’s serial port with a sensor’s delivery method, so just about any microcontroller could be substituted for it.

There are some hardware considerations to take into account. The manufacturer was nice enough to populate a 0.1″ pitch pin socket on the serial port (if only this kind of invitation to mess with hardware was an industry standard). But the device expects 3.3V levels so pick your hardware accordingly. There is one commenter who tried the project for themselves and found that the drone wouldn’t boot up with the Arduino already connect — he had to boot and then complete connections. Troubles aside this makes adding your own sensor payload very simple and you don’t have to wait until landing to get at the data.

Maybe we’ll have to add some shock voltage data reporting to our shockerDrone.

Building A Tilt Rotor UAV

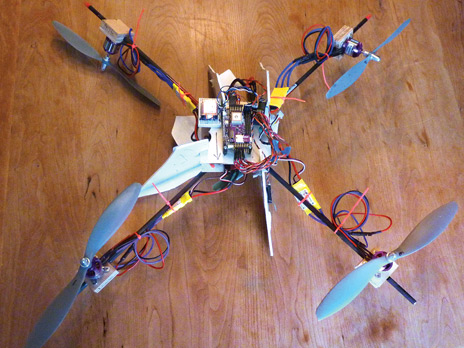
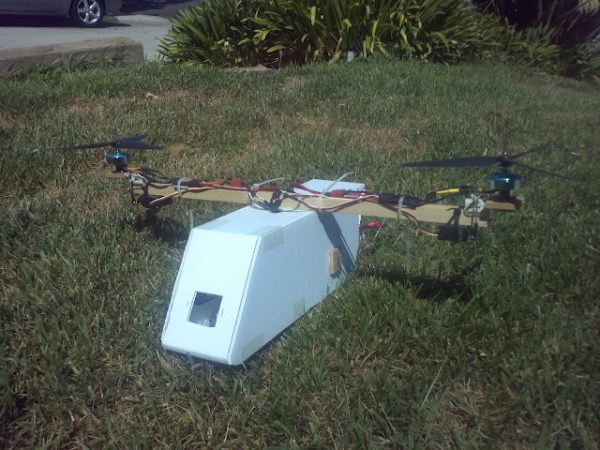
We see a lot of quadcopters, and even the occasional octocopter around here. But this build does it with just two propellers. It’s a tiltrotor build which allows the two upward-pointing propellers to tilt forward and backward. The real world equivalent of this UAV design that pops to mind is the V-22 Osprey.

The motors are mounted on a beam running perpendicular to the direction of travel. Each of them is mounted on a bearing which can be rotated by a servo motor. They rotate independently of each other, which allows for yaw. Of course roll is controlled by driving the propellers at different speeds and pitch is adjusted by tilting both mounts at the same time.

[Stephen] mentions that the tiltrotor design has several advantages over its relatives that use more than two props. This design costs less to build, uses less electricity, and makes for an easier autopilot implementation. If you want to see it in the air, don’t miss the clip after the break.

This is just the second tiltrotor build we remember seeing. The other one was a Halloween prop.

Continue reading “Building A Tilt Rotor UAV”

Integrating A Power Bus Into A Quadcopter Frame

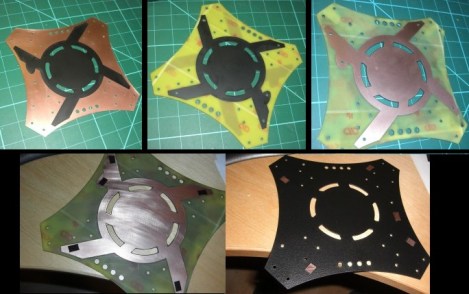
When working on flying vehicles weight is always a consideration. [Brendin] found a way to get rid of a wiring harness on his quadcopter, simplifying the assembly while lightening the load. He did it by incorporating the power bus into the frame of the vehicle.

He started with some copper clad board. Because the substrate is a structural component he didn’t want to use a CNC mill to do the etching as it also removes a bit more than just copper. After using the mill to cut out the shape and drill holes he coated the board with flat black paint. This acts as the etch resist, which he sent through a 50W laser engraver to remove the paint and expose the areas he wants to etch. After etching he removed the rest of the resist, and masked off his solder pads with small rectangles of electrical tape. This protects the solder pads from the truck bed liner paint he uses to insulate the copper. He says it works great and plans to use the technique on all future builds.

atmos

Autonomous Plane? Quadrotor? Both? Meet The ATMOS!

If you’ve been trying to decide between building an autonomous quadcopter or a fixed wing UAV, you may not have to choose anymore.  [Team ATMOS] from Tu Delft University in the Netherlands, has developed a UAV that can autonomously transition from quadcopter flight to that of a fixed-wing aircraft. Although the world has seen several successful examples of transitioning-flight or VTOL aircraft, team [ATMOS] claims to have made the first autonomous transition of this type of craft.

This UAV was featured in their school newspaper, which provides a write-up about the work that went into creating this hybrid UAV. When you’re done with that, be sure to check out the two videos after the break. The first shows the [ATMOS] taking off vertically and flying off as a flying-wing fixed aircraft. The second video shows this and other UAVs in the [DARPA] competition that it was designed for. Fast forward to 2:24 to see this aircraft do a fly-by.

http://www.youtube.com/watch?v=81NvfLFzhqQ

Thanks for the tip [Dirk]!

Hacking The AR Drone: Intro

Ever since we played with the original AR drone back at CES a few years ago, we’ve been keeping an eye on them. While we all agree there are better quadcopters out there, the price point for a ready-to-fly quadcopter of this size is really great with these.

When the fake video from FPS Russia of the weaponized drone made the rounds earlier this year, we were surprised at how people reacted. Anyone who has messed with quadcopters recognized it as fake right off the bat (not to mention the overly cliche fake russian character).

We won’t be adding a full fledged firearm to this. Mainly because it simply can’t lift the weight (There are ones that can, but we couldn’t justify the cost just for that). We do have some ideas though.

Lets go over the specs of the AR Drone 2.0 first.

Continue reading “Hacking The AR Drone: Intro”

Controlling A Quadcopter With A Homebrew Remote

When [Matt] started building his multirotor helicopter, he was far too involved with building his craft than worrying about small details like how to actually control his helicopter. Everything worked out in the end, though, thanks to his homebrew RC setup built out of a USB joystick and a few XBees.

After a few initial revisions and a lot of chatting on a multirotor IRC room, [Matt] stumbled across the idea of using pulse-position modulation for his radio control setup.

After a few more revisions, [Matt] settled on using an Arduino Pro Mini for his flight computer, paired with a WiFly module. By putting his multicopter into Ad-hoc mode, he can connect to the copter with his laptop via WiFi and send commands without the need for a second XBee.

Now, whenever [Matt] wants to fly his multicopter, he plugs the WiFly module into his MultiWii board, connects his laptop to the copter, and runs a small Python script. It may not be easier than buying a nice Futaba transmitter, but [Matt] can easily expand his setup as the capabilities of his copter fleet grows.

Video of [Matt]’s copter in flight after the break.

Continue reading “Controlling A Quadcopter With A Homebrew Remote”