Mechanical GIF Animates With The Power Of Magnets

It doesn’t matter how you pronounce it, because whichever way you choose to say “GIF” is guaranteed to cheese off about half the people listening. Such is the state of our polarized world, we suppose, but there’s one thing we all can agree on — that a mechanical GIF is a pretty cool thing.

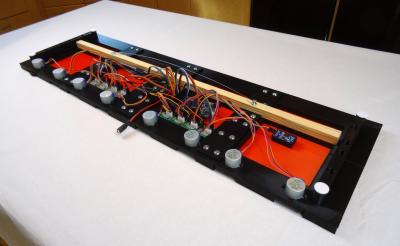
What’s even better about this thing is that [Mitch], aka [Hack Modular], put some very interesting old aircraft hardware to use to make it. He came upon a set of cockpit indicators from a Cold War-era RAF airplane — sorry, “aeroplane” — that used a magnetically driven rack and pinion to swivel a set of prism-shaped pieces to one of three positions. Which of the three symbols displayed depended on which faces were turned toward the pilot; they were highly visible displays that were also satisfyingly clicky.

After a teardown in which [Mitch] briefly discusses the mechanism behind these displays, he set about customizing the graphics. Rather than the boring RAF defaults, he chose three frames from the famous Horse in Motion proto-motion picture by [Eadweard Muybridge]. After attaching vertical strips from each frame to the three sides of each prism, [Mitch] came up with a driver for the display; he could have used a 555, but more fittingly chose series-connected relays to do the job. Capacitors slow down the switching cascade and the frame rate; a rotary switch selects different caps to make the horse appear to be walking, trotting, cantering, or galloping — yes, we know they’re each physically distinct motions, but work with us here.

The whole thing looks — and sounds — great mounted in a nice plastic enclosure. The video below shows it in action, and we find it pretty amazing the amount of information that can be conveyed with just three frames. And we’re surprised we’ve never seen these displays before; they seem like something [Fran Blanche] or [Curious Marc] would love.

Continue reading “Mechanical GIF Animates With The Power Of Magnets”

An electromechanical clock based on sliding frames

Watch Time Slide By With This Electromechanical Clock

Back in the 18th century, clockmakers were held in high esteem, as turning pieces of metal and wire into working timepieces must have seemed like magic at the time. The advent of mass production made their profession largely obsolete, but today there are several hardware hackers whom you could consider modern heirs of the craft. [Hans Andersson] is one of them, and has made a name for himself with an impressive portfolio of electromechanical clocks. His latest work, called the Time Slider, is every bit as captivating as his previous work.

The insides of the TIme Slider clockThe mechanical display is almost entirely made of 3D printed components. Four flat pieces of red PLA form a basic 88:88 indicator, onto which the correct time is displayed by sliding frames that black out certain pixels. Those frames are moved up and down by a rack-and-pinion system driven by stepper motors. Evertyhing is controlled by an Arduino Mega, acoompanied by a DS3231 RTC and eight ULN2003-based stepper motor drivers.

[Hans] wrote a detailed assembly guide to go along with the STL files and Arduino code, so it should be easy make your own Time Slider if you have a decent supply of PLA filament. The display takes about ten seconds to update, but the process has certain hypnotic quality to it, helped by the mechanical whirring of the stepper motors in the background. Especially the hourly change of three or four digits at once is mesmerizing, as you can see in the video embedded below.

Time Slider is the latest in [Hans]’s long line of mechanical clocks, which includes the Time Twister series that evolved from a clever Lego-based design to a neat 3D-printed model. The rack-and-pinion system can also be used to make a compact linear clock.

Continue reading “Watch Time Slide By With This Electromechanical Clock”

All Aboard The Garbage Express

Cog railways are a somewhat unusual way of train locomotion, typically only installed when a train needs to climb steep terrain. Any grade above about 10% needs the extra traction since the friction between the wheels and rails won’t be enough to push the train forward or keep it from falling backwards. Even without a steep hill to climb, sometimes a cog railway is necessary for traction as [Max Maker] discovered while building a train for his garbage cans.

The build started out as a way to avoid having to wheel his seven waste bins to the curb every month. Originally he built a more standard railway with a simple motor to drive the train, but he quickly realized that there wasn’t enough grip even when using plastic wheels, even though this track follows fairly flat terrain. Since the rail is built out of steel he quickly welded up a rack-and-pinion system to one of the rails. The build goes through many iterations before he finally settles on a design that solves the problem, and it includes several other features as well such as remote control and a spring-loaded automatic charger for the train at its station in the back yard.

While we always appreciate the eccentricity of those who would automate a relatively simple task that only happens once a month, [Max Maker] hopes to build this into a commercial product aimed at the elderly or disabled who would really benefit from a reliable, semi-automatic system that takes their trash bins to the curb for them. And, if your system only involves a single trash can, there are other ways of automating the task of taking the garbage to the curb.

Continue reading “All Aboard The Garbage Express”

Simple Wi-Fi Cat Door Solves The Extra Critter Problem, And Nothing More

Anyone with an outdoor cat in their life knows their propensity for bringing home offerings, in the form of critters in various stages of the process of becoming ex-critters. And anyone with a hacker in their life knows that there’s a tendency to throw technology at this problem. But sometimes, the simplest solutions are the best.

Take this simple stepper-powered cat door lock. For [Jason Winfield], the essential problem with his outdoor cat’s late-night demands for reentry was having to manually unlock the cat door after a quick visual check that no midnight snacks were along for the ride. Such activity tends to make it hard to get back to sleep. One natural reaction to this would be to completely automate the process with machine learning to recognize the offering and deny entry; we’ve seen exactly that before, after all. But recognizing that the disruptive part was the getting up to check bit, [Jason] just whipped up a simple stepper-driven lock with an ESP8266 microcontroller. With a 3D-printed case and a battery pack, and a nearby Wi-Fi camera, the lock denies entry to the cat until he gets a look at it, at which point he simply hits the lock’s webpage to unlock the door. The video below would show the lock in action, except the cat buggered off once it got a whiff of the doings. Cat’s gonna cat.

What we appreciate about this project is its simplicity. It solves the problem with the minimum feature set, which is something we see too little of sometimes. It’s also got some nice ideas, like the non-captive bolt that can be removed to unlock the door if the battery dies. Smart thinking, [Jason], and sweet dreams.

Continue reading “Simple Wi-Fi Cat Door Solves The Extra Critter Problem, And Nothing More”

I’ll See Your Seven-Segment Mechanical Display And Raise You To 16 Segments

Mechanical multi-segment displays have become quite a thing lately, and we couldn’t be more pleased about it. The degree of mechanical ingenuity needed to make these things not only work but look good while doing it never ceases to amaze us, especially as the number of segments increases. So we submit this over-the-top 16-segment mechanical display (Nitter) for your approval.

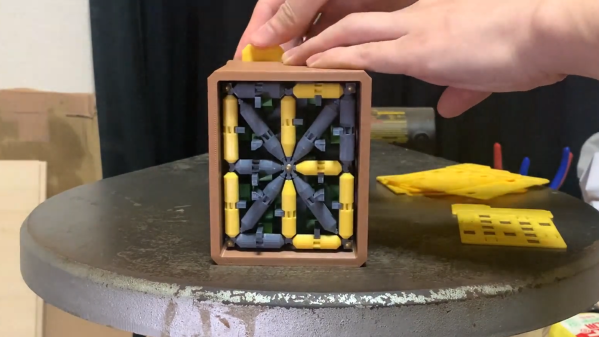
The original tweet by [Kango Suzuki] doesn’t have a lot of detail, especially if you can’t read Japanese, but we did a little digging and found the video shown below. It shows a lot more detail on how this mechanism works, as well as some of the challenges that cropped up while developing it. Everything is 3D printed, and flipping the state of each of the 16 segments is accomplished with a rack-and-pinion mechanism, with the pinions printed right into each two-sided cylindrical segment. The racks are connected to pushrods that hit a punch card inserted into a slot in the rear of the display. The card has holes corresponding to the pattern to be displayed; when it’s pushed home, the card activates a mechanism that slides all the racks that line up with holes and flips their segments.

This isn’t the first multi-segment mechanical masterpiece from [Kango Suzuki] that we’ve featured, of course. This wooden seven-segment display works with cams rather than punch cards, but you can clearly see the hoe the earlier mechanism developed into the current work. Both are great, and we’re looking forward to the next segment count escalation in the mechanical display wars.

Continue reading “I’ll See Your Seven-Segment Mechanical Display And Raise You To 16 Segments”

A Linear Stencil Clock Built For Quiet Operation

We around the Hackaday shop never get tired of seeing new ways to mark the passage of time. Hackers come up with all manner of interesting timekeeping modalities using every imaginable material and method of moving the mechanism once per whatever minimum time unit the hacker chooses to mark.

But honestly, there are only so many ways to make a clock, and while we’re bound to see some repeats, it’s still nice to go over old ground with a fresh approach. Take this linear sliding stencil clock for instance. [Luuk Esselbrugge] has included some cool design elements that bear a closer look. The video below shows that the display is made up of four separate stepper motors, each driving a vertical stencil via a rack-and-pinion mechanism. There a simple microswitch for homing the display, and a Neopixel for lighting things up.

The video below shows that the stencils move very, very slowly; [Luuk] says that this is to keep the steppers as quiet as possible. Still, this means that some time changes take more than a minute to accomplish, which is a minor problem. The Neopixel also doesn’t quite light up just one digit, which should be a pretty easy fix for version 2. Still, even with these issues, we like the stately movements of this clock, and appreciate [Luuk]’s attempts to make it easier to live with.

Don’t let the number of clocks you see on these pages dissuade you from trying something new, or from putting your twist on an old design. Start with fridge magnets, an old oscilloscope, or even a bevy of steel balls, and let your imagination run wild. Just make sure to tell us all about it when you’re done.

Continue reading “A Linear Stencil Clock Built For Quiet Operation”

MIDI Slide Whistle Shows The Value Of A Proper Fipple

We pride ourselves on knowing the proper terms for everyday things: aglet, glabella, borborygmi, ampersands. But we have to confess to never having heard of a “fipple” before finding this interesting MIDI-controlled slide whistle, where we learned that the mouthpiece of a penny whistle or a recorder is known as a fipple. The more you know.

This lesson comes to us by way of a Twitter post by [The Mixed SIgnal], which showed off the finished mechanism in a short video and not much else. We couldn’t leave that alone, so we reached out for more information and were happy to find that [The Mixed SIgnal] quickly posted a build log on Hackaday.io as well as the build video below.

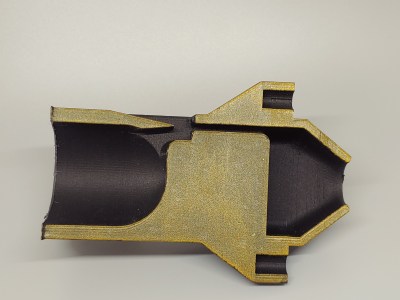
The slide whistle is a homebrew version of the kind we’ve all probably annoyed our parents with at one time or another, with a 3D-printed fipple (!) and piston, both of which go into a PVC tube. Air is supplied to the pipe with a small centrifugal blower, while a 3D-printed rack and pinion gear of unusual proportions moves the piston back and forth. An Arduino Due with a CNC shield controls the single stepper motor. The crude glissandos of this primitive wind instrument honestly are a little on the quiet side, especially given the racket the stepper and rack and pinion make when queuing up a new note. Perhaps it needs more fipple.

While the humble author is new to fipple-isms, luckily the Hackaday editors see all and know that there two epic hacks featuring fipples to create bottle organs. These are far from the first weirdest instruments we’ve seen — a modulin, a Wubatron, and the Drum-Typeulator all fit that bill well. But we like what [The Mixed Signal] has done here, and we’re looking forward to more.

Continue reading “MIDI Slide Whistle Shows The Value Of A Proper Fipple”