Hackaday Podcast 045: Raspberry Pi Bug, Rapidly Aging Vodka, Raining On The Cloud, And This Wasn’t A Supercon Episode

Hackaday editors Mike Szczys and Elliot Williams talk over the last three weeks full of hacks. Our first “back to normal” podcast after Supercon turns out to still have a lot of Supercon references in it. We discuss Raspberry Pi 4’s HDMI interfering with its WiFi, learn the differences between CoreXY/Delta/Cartesian printers, sip on Whiskey aged in an ultrasonic jewelry cleaner, and set up cloud printing that’s already scheduled for the chopping block. Along the way, you’ll hear hints of what happened at Supercon, from the definitive guide to designing LEDs for iron-clad performance to the projects people hauled along with them.

Take a look at the links below if you want to follow along, and as always tell us what you think about this episode in the comments!

Take a look at the links below if you want to follow along, and as always, tell us what you think about this episode in the comments!

Direct download (60 MB or so.)

Continue reading “Hackaday Podcast 045: Raspberry Pi Bug, Rapidly Aging Vodka, Raining On The Cloud, And This Wasn’t A Supercon Episode”

Not-Quite-So-Hot Stuff: A Thermal Exam On The Latest Raspberry Pi

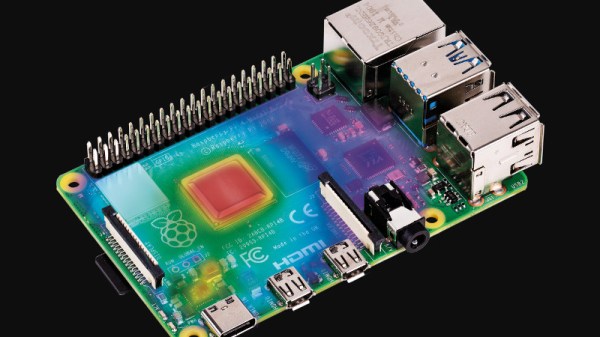
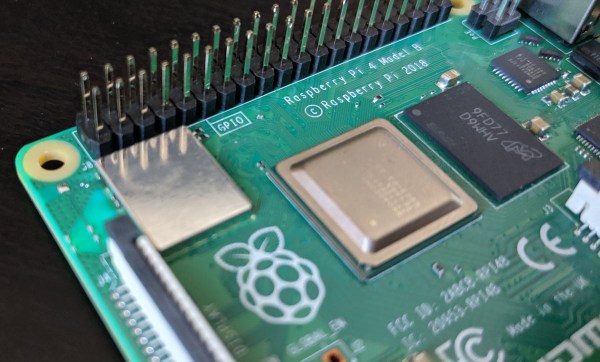
When the Raspberry Pi 4 was first launched, one of its few perceived flaws was that it had a propensity to get extremely hot. It’s evidently something the Pi people take very seriously, so in the months since they have addressed the problem with a set of firmware updates. Now they’ve taken a look at the effect of the fixes in a piece on the Raspberry Pi web site, and it makes for an interesting comparison.

The headline figure is that all updates together remove about a watt of power from the load, a significant quantity for what is still a board that can run from a capable phone charger. Breaking down the separate parts of the updates is where the meat of this story lies though, as we see the individual effects of the various USB, memory, power management and clocking updates. In temperature terms they measure an on-load drop from 72.1 °C to 58.1 °C, which should be a significant improvement for any Pi 4 owner.

There is a debate to be had over in what role a computer such as a Pi should serve. As successive revisions become ever more desktop-like in their capabilities, do they run the risk of abandoning the simplicity of a cheap Linux box as a component that makes us come back for more? It’s a possibility, but one they have very well addressed by developing the Pi Zero. They have also successfully avoided the fate of the Arduino — inexorably tied to its ATmega powered original line despite newer releases. As we have frequently said when reviewing Raspberry Pi competitors, it’s the software support that sets them apart from the herd, something this power-draw story demonstrates admirably.

Network Booting The Pi 4

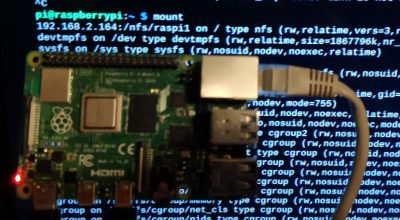
We’ve talked about PXE booting the Raspberry Pi 3B+, and then looked at the Raspberry Pi 4 as a desktop replacement. But there’s more! The Pi 4 sports a very useful new feature, the flashable bootloader. Just recently a beta version of that bootloader was released that supports PXE  — booting up over the network — which has become a must-have for those of us who have had consistently bad experiences with root filesystems on SD cards.

Pi with no SD CardWhat are the downsides, I hear you ask? You might see slower speeds going across the network compared to a high quality SD card, particularly with the Pi 4 and its improved SD card slot. PXE does require an Ethernet cable; WiFi is not enough, so you have that restriction to contend with. And finally, this isn’t a portable option — you are tethered to that network cable while running, and tethered to your network to boot at all.

On the other hand, if you’re doing a permanent or semi-permanent install of a Pi, PXE is absolutely a winner. There are few things worse than dragging a ladder out to access a Pi that’s cooked its SD card, not to mention the possibility that you firewalled yourself out of it. Need to start over with a fresh Raspbian image? Easy, just rebuild it on the PXE server and reboot the Pi remotely.

Convinced PXE is for you? Let’s get started! Continue reading “Network Booting The Pi 4”

RPi4: Now Overclocked, Net-Booted, And Power-Sipping

It has now been a few months since the launch of the Raspberry Pi 4, and it would only be fair to describe the launch as “rocky”. While significantly faster than the Pi 3 on paper, its propensity for overheating would end up throttling down the CPU clock even with the plethora of aftermarket heatsinks and fans. The Raspberry Pi folks have been working on solutions to these teething troubles, and they have now released a bunch of updates in the form of a new bootloader, that lets the Pi 4 live up to its promise. (UPDATE: Here’s the download page and release notes)

The real meat of the update comes in an implementation of a low power mode for the USB hub. It turns out that the main source of heat on the SoC wasn’t the CPU, but the USB. Fixing the USB power consumption means that you can run the processor cool at stock speeds, and it can even be overclocked now.

There is also a new tool for updating the Pi bootloader, rpi-eeprom, that allows automatic updates for Pi 4 owners. The big change is that booting the Pi 4 over the network or an attached USB device is now a possibility, which is a must if you’re installing the Pi permanently. There are some fixes that caused problems with certain HATs, in which the Pi 4’s 3.3 V line was cycled during a reboot.

With a device as complex as a Raspberry Pi it comes as no surprise that it might ship with a few teething troubles. We’ve already covered some surrounding the USB-C power, for example. And the overheating. Where the Pi people consistently deliver though is in terms of support, both official and from the community, and we’re very pleased to see them come through in this case too.

3D Printed VirtuScope Is A Raspberry Pi 4 Cyberdeck With A Purpose

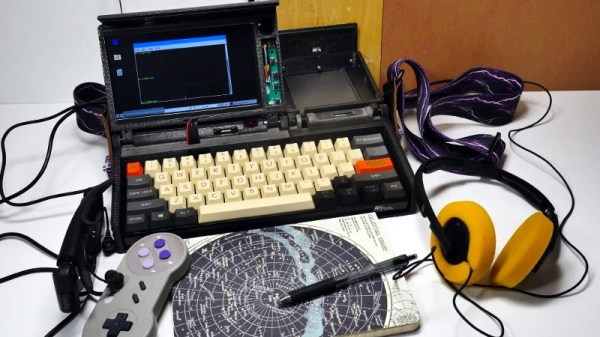
William Gibson might have come up with the idea for the cyberdeck in 1984, but it’s only recently that technology like desktop 3D printing and powerful single board computers have enabled hackers and makers to assemble their own functional versions of these classic cyberpunk devices. Often the final product is little more than a cosplay prop, but when [Joe D] (better known on the tubes as [bootdsc]) started designing his VirtuScope, he wanted to create something that was actually practical enough to use. So far, it looks like he’s managed to pull it off.

Many of the cyberdeck builds we see are based around the carcass of a era-appropriate vintage computer, which looks great and really helps sell the whole retro-future vibe. Unfortunately, this can make the projects difficult and expensive to replicate. Plus there’s plenty of people who take offense to gutting a 30+ year old piece of hardware just so you can wear it around your neck at DEF CON.

[bootdsc] deftly avoided this common pitfall by 3D printing the entire enclosure for the VirtuScope, and since he’s shared all of the STLs, he’s even made it so anyone can run off their own copy. The majority of the parts can be done on any FDM printer with a 20 x 20 x 10cm build area, though there are a few detail pieces that need the resolution of an SLA machine.

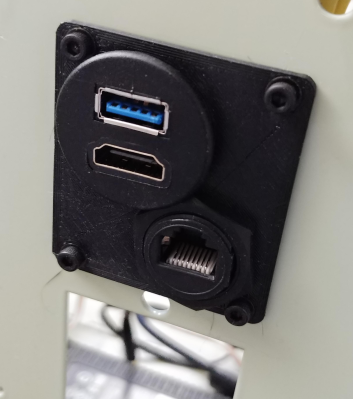
Under the hood the VirtuScope is using the Raspberry Pi 4, which [bootdsc] says is key to the build’s usability as the latest version of the diminutive Linux SBC finally has enough computational muscle to make it a viable for daily computing. Granted the seven inch LCD might be a tad small for marathon hacking sessions, but you could always plug in an external display when you don’t need to be mobile. For your wireless hacking needs, the VirtuScope features an internal NooElec SDR (with HF upconverter) and a AWUS036AC long-range WiFi adapter; though there’s plenty of room to outfit it with whatever kind of payload you’d find useful while on the go.

Documentation for this project is still in the early stages, but [bootdsc] has already provided more than enough to get you started. He tells us that there are at least two more posts coming that will not only flesh out how he built the VirtuScope, but explain why it’s now become his portable SDR rig of choice. We’re excited to see more details about this build, and hope somebody out there is willing to take on the challenge of building their own variant.

In the past we’ve seen partially 3D printed cyberdecks, and at least one that also went the fully-printed route, but none of them have been quite as accessible as the VirtuScope. By keeping the geometry of the printed parts simple and utilizing commonly available components, [bootdsc] may well have laid the groundwork for hackerdom’s first “mass produced” cyberdeck.

Continue reading “3D Printed VirtuScope Is A Raspberry Pi 4 Cyberdeck With A Purpose”

Can You Really Use The Raspberry Pi 4 As A Desktop Machine?

When the Raspberry Pi 4 was released, many looked at the dual micro HDMI ports with disdain. Why would an SBC like the Raspberry Pi need two HDMI ports? The answer was that the Pi 4 is finally fast enough to work as a desktop replacement, and the killer feature (for many of us) for a desktop is multiple monitors.

Now I know what many of you are thinking. There’s no way a $35, or even $55, credit-card-sized computer can replace a $1000+ desktop machine, right? Right? Of course not, but at the same time, yes, yes it can. So I tried to use the Pi as a desktop replacement for a week, and it worked. In fact, this article has been written almost entirely on the Pi 4 with 4 GB of memory, as well as a couple of my recent security columns. I could definitely continue working with the Pi as my daily driver for that purpose.

There are a few points of order to cover first. Initial reviews were based on the June 20th release of Raspbian, which in turn was based on the pre-release Debian Buster. Since then, Buster has released. Fixes that were queued up have landed now that the release freeze has ended. A new Raspbian image was released on July 10, and many of the initial release issues have been fixed.
Continue reading “Can You Really Use The Raspberry Pi 4 As A Desktop Machine?”

PCIe Multiplier Expands Raspberry Pi 4 Possibilities

It probably goes without saying that hardware hackers were excited when the Raspberry Pi 4 was announced, but it wasn’t just because there was a new entry into everyone’s favorite line of Linux SBCs. The new Pi offered a number of compelling hardware upgrades, including an onboard PCI-Express interface. The only problem was that the PCIe interface was dedicated to the USB 3.0 controller; but that’s nothing a hot-air rework station couldn’t fix.

We’ve previously seen steady-handed hackers remove the USB 3.0 controller on the Pi 4 to connect various PCIe devices with somewhat mixed results, but [Colin Riley] has raised the bar by successfully getting a PCIe multiplier board working with the diminutive Linux computer. While there are still some software kinks to work out, the results are very promising and he already has  a few devices working.

Getting that first PCIe port added to the Pi 4 is already fairly well understood, so [Colin] just had to follow the example set by hackers such as [Tomasz Mloduchowski]. Sure enough, when he plugged the port multiplier board in (after a bit of what he refers to as “professional wiggling”), the appropriate entry showed up in lspci.

But there was a problem. While the port multiplier board was recognized by the kernel, nothing he plugged into it showed up. Checking the kernel logs, he found messages relating to bus conflicts, and one that seemed especially important: “devices behind bridge are unusable because [bus 02] cannot be assigned for them“. To make a long story short, it turns out that the Raspbian kernel is specifically configured to only allow a single PCI bus.

Fortunately, it’s an easy fix once you know what the problem is. Using the “Device Tree Compiler” tool, [Colin] was able to edit the Raspbian Device Tree file and change the PCI “bus-range” variable from <0x0 0x1> to <0x0 0xff>. From there, it was just a matter of plugging in different devices and seeing what works. Simple things such as USB controllers were no problem, but getting ARM Linux support for the NVIDIA GTX 1060 he tried will have to be a topic for another day.

[Thanks to Paulie for the tip.]