Wood is an incredibly versatile material, but like everything else, it has its limits. Build a chair from weak wood and the worst that can happen is probably not that bad. But if you build machine tools from wood, the stakes for using the wrong wood can be a bit higher.
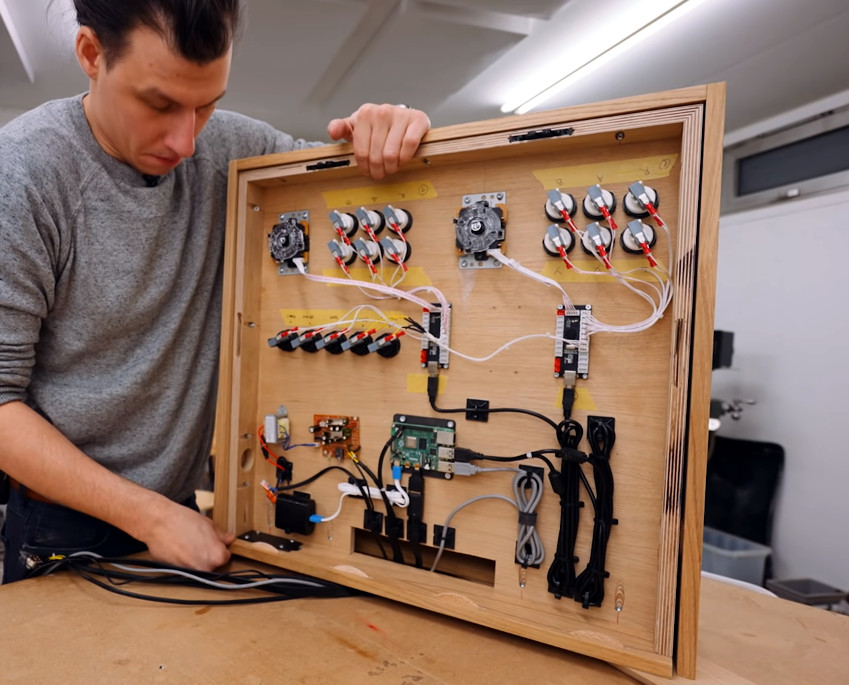
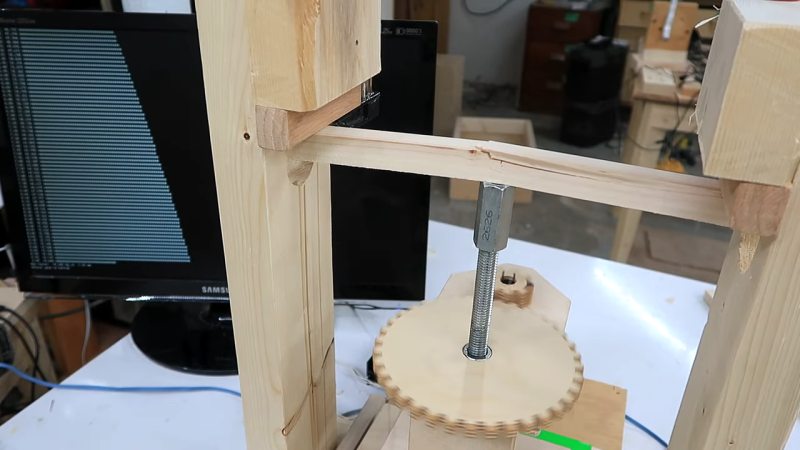
That’s the thinking behind the wood strength testing setup [Matthias Wandel] came up with. Previously, he had a somewhat jury-rigged test setup with a hydraulic bottle jack to apply force to the test piece and a bathroom scale to make measurements. That setup was suboptimal, so version two used a jackscrew to apply the force, but the bathroom scale still left the measurements open to interpretation. Version three, the topic of the video below, went with strain gauges and an A/D converter connected to a Raspberry Pi to automate data collection. The jackscrew was also integrated into the test setup with a stepper motor and, of course, [Matthias]’ famous wooden gears.
While the test rig is pretty simple in design, there’s a lot of subtlety to the calibration to make sure that it’s measuring the test material itself and not just compliance within the mechanism. It’s just another in a long line of data-gathering exercises that [Matthias] seems to groove on, like his recent woodshop electrical explorations.
Continue reading “Shop-Built Rig Measures Strength Of Wood Accurately”