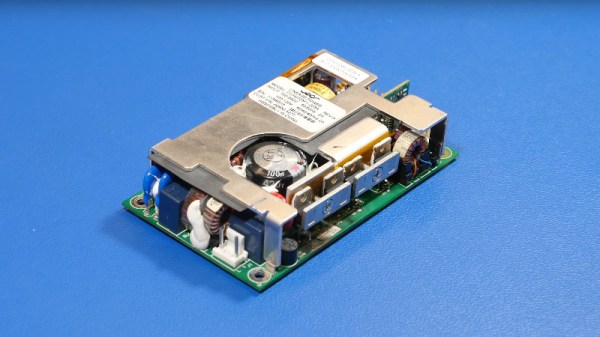
We should all be so lucky as [Salvaged circuitry], who scored a cheap Agilent oscilloscope from an online auction. Of course, its low price had a reason behind it, the ‘scope didn’t work. At fault was its power supply, the repair of which was documented in the video below.
These ‘scopes have relatively straightforward 12 V power supplies, extremely similar to off-the-shelf parts. The video is an interesting primer in switch-mode power supply repair, as the obvious failure of the filter capacitor and a MOSFET is traced further to the PSU controller chip. We see a new capacitor mounted proud of the board to reduce the risk of heat damage, and then some careful solder rework to save some lifted pads.
The result, a working oscilloscope. Maybe we’d have hacked in another 12 V supply, but given that this is a piece of test equipment perhaps it’s best to stay as close to the original spec as possible. As a parting shot he shows us an equivalent power supply, and promises us a side-by-side test in a future video.
These ‘scopes aren’t as popular in our circles as the cheaper Rigol range, but it’s worth remembering that they also have a budget model.
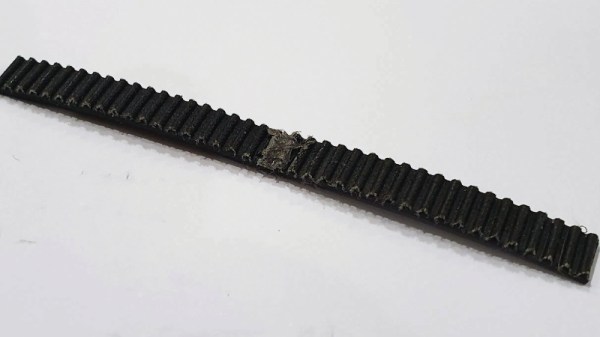
If you’ve got a 3D printer, you’re probably familiar with the reinforced belts that are commonly used on the X and Y axis. These belts either come as long lengths that you attach to the machine on either end, or as a pre-sized loop. Traditional wisdom says you can’t just take a long length of belt and make your own custom loops out of it, but [Marcel Varallo] had his doubts about that.
This is a simple tip, but one that could get you out of a bind one day. Through experimentation, [Marcel] has found that you can use a length of so-called GT2 belt and make your own bespoke loop. The trick is, you need to attach the ends with something very strong that won’t hinder the normal operation of the belt. Anything hard or inflexible is right out the window, since the belt would bind up as soon as it had to go around a pulley.
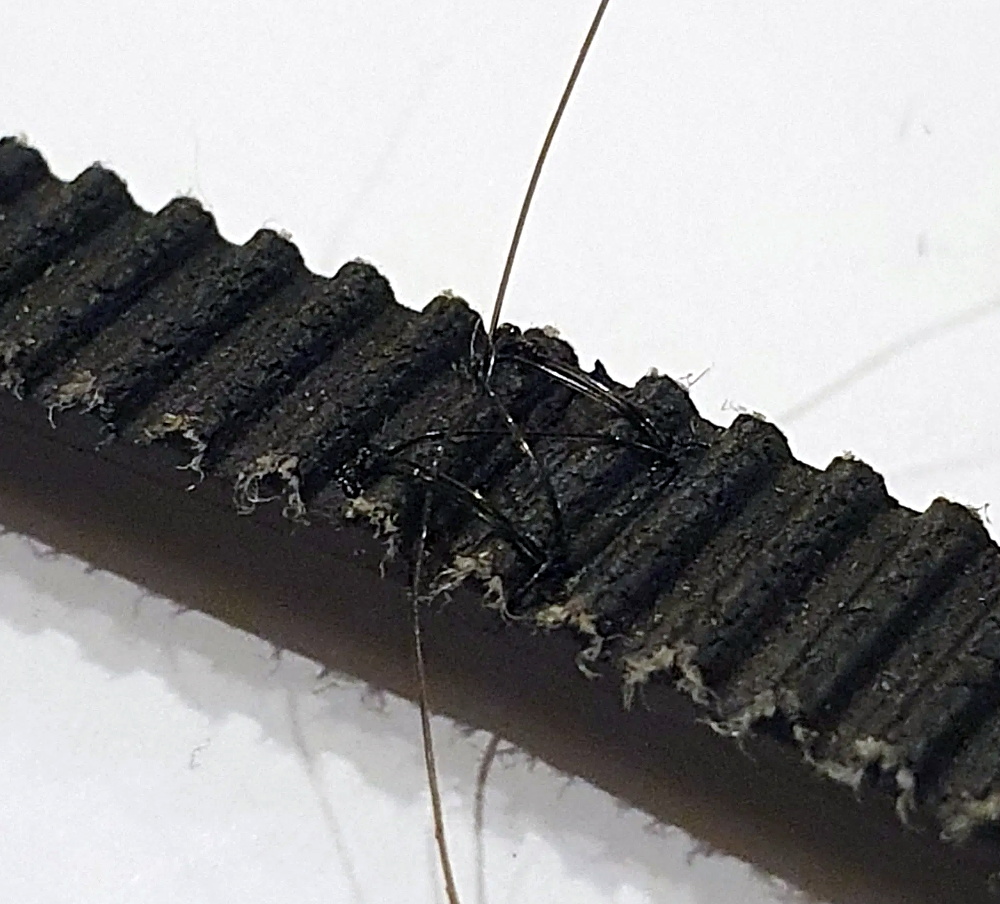
It seems the key is to cut both ends of the belt very flat, making sure the belt pattern matches perfectly. Once they’ve been trimmed and aligned properly, you stitch them together with nylon thread. You want the stitches to be as tight as possible, and the more you do, the stronger the end result will be.
[Marcel] likes to follow this up with a bit of hot glue, being careful to make sure the hardened glue takes the shape of the belt’s teeth. The back side won’t be as important, but a thin layer is still best. The end result is a belt strong enough for most applications in just a few minutes.
Would we build a 3D printer using hand-stitched GT2 belts? Probably not. But during a global pandemic, when shipments of non-essential components are often being delayed, we could certainly see ourselves running some stitched together belts while we wait for the proper replacement to come in. Gotta keep those face shields printing.
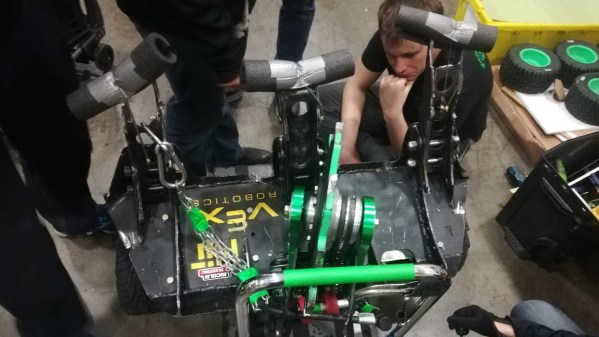
Combat robots have been a thing for a while, but we don’t normally get a close look at the end results of the sort of damage they can both take and deal out. [Raymond Ma] spent time helping out with season four of BattleBots and wrote about the experience, as well as showed several pictures of the kind of damage 250-pound robots can inflict upon each other. We’ve embedded a few of them here, but we encourage you to read [Raymond]’s writeup and see the rest for yourself.
The filming for a season of BattleBots is done in a relatively short amount of time, which means the pacing and repair work tends to be more fast and furious than slow and thoughtful. [Raymond] says that it isn’t uncommon for bots, near the end of filming, to be held together with last-minute welds, wrong-sized parts, and sets of firmly-crossed fingers. This isn’t because the bots themselves are poorly designed or made; it’s because they can get absolutely wrecked by the forces at play.
There’s not much economic sense in fixing a decade-old desktop computer, especially when it’s the fancy type with the screen integrated into the body of the computer, and the screen is the thing that’s broken. Luckily for [JnsBn] aka [BEAN] the computer in question was still functional with a second monitor, so he decided to implement a cheap repair to get the screen working again by making it see-through.
The only part of the screen that was broken was the backlight, which is separate from the display unit itself. In order to view at least something on the screen without an expensive replacement part, he decided to remove the backlight altogether but leave the display unit installed. With a strip of LEDs around the edge, the screen was visible again in addition to the inner depths of the computer. After a coat of white Plasti Dip on the inside of the computer, it made for an interesting effect and made the computer’s display useful again.
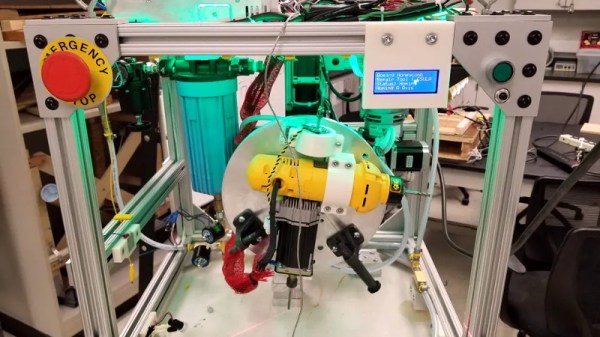
No, it’s not the kind of honeycomb you’re probably thinking of. We’re talking about the lightweight panels commonly used in aerospace applications. Apparently they’re rather prone to dents and other damage during handling, so Boeing teamed up with students from the California State University to come up with a way to automate the time-consuming repair process.
The resulting machine, which you can see in action after the break, is a phenomenal piece of engineering. But more than that, it’s an impressive use of off-the-shelf components. The only thing more fascinating than seeing this robotic machine perform its artful repairs is counting how many of its core components you’ve got laying around the shop.
Built from aluminum extrusion, powered by an Arduino Due, and spinning a Dewalt cut-off tool that looks like it was just picked it up from Home Depot, you could easily source most of the hardware yourself. Assuming you needed to automatically repair aerospace-grade honeycomb panels, anyway.
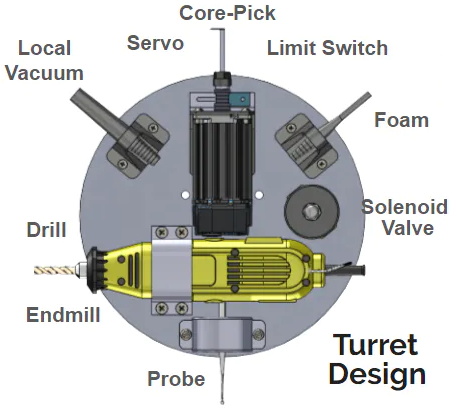
At the heart of this project is a rotating “turret” that holds all the tools required for the repair. After the turret is homed and the condition of all the cutting tools is verified, a hole is drilled into the top of the damaged cell. A small tool is then carefully angled into the hole (a little trick that is mechanical poetry in motion) to deburr the hole, and a vacuum is used to suck out any of the filings created by the previous operations. Finally a nozzle is moved into position and the void is filled with expanding foam.
Boeing says it takes up to four hours for a human to perform this same repair. Frankly, that seems a little crazy to us. But then again if we were the ones tasked with repairing a structural panel for a communications satellite or aircraft worth hundreds of millions of dollars, we’d probably take our time too. The video is obviously sped up so it’s hard to say exactly how long this automated process takes, but it doesn’t seem like it could be much more than a few minutes from start to finish.
Faced with a broken USB dongle for our wireless devices, most of us would likely bin the part and order a replacement, after all the diminutive size of those things probably means hard to impossible repairability, right? Well, [The Equalizor] took it as a challenge and used the opportunity to practice his microscopic soldering skills just for funsies.
The wireless adapter in question, which came from one of his clients who accidentally bent it while it was plugged into a laptop, refused to be recognized by a computer under any circumstances. After sliding out the metal casing for the USB plug and snapping off the plastic housing, [The Equalizor] discovered that the slightly bent exterior hid a deeply cracked PCB. Then, with an inspection of the severed traces and lifted components, it was simply a matter of reflowing solder a few times to try to make the board whole again. Once the dongle was confirmed working, a new 3D shell was printed for it, replacing the original which had to be broken off.
It might not seem extraordinary to some people, but this video is a good example to show that repairs to delicate electronics in such a small scale are feasible, and can serve to reduce the amount of electronic waste we constantly dump out. Just because some electronics seem dauntingly elaborate or beyond salvaging, it doesn’t always mean there isn’t light at the end of the tunnel. You can see the work performed on this tiny dongle after the break.
At a recent swap meet, [digitalrice] found what appeared to be a like-new QIDI X-Plus 3D printer. It wasn’t clear what was wrong with it, but considering it retails for $900 USD, he figured the asking price of $150 was worth the gamble. As you might expect, the printer ended up being broken. But armed with experience and a supply of spare parts, he was able to get this orphaned machine back up and running.
The first and most obvious problem was that the printer’s Z axis didn’t work properly. When the printer tried to home the axis, one of the motors made a terrible noise and the coupler appeared to be spinning backwards. From his experience with other printers, [digitalrice] knew that the coupler can slip on the shaft, but that didn’t appear to be the case here. Removing the stepper motor and testing it in isolation from the rest of the machine, he was able to determine it needed replacing.
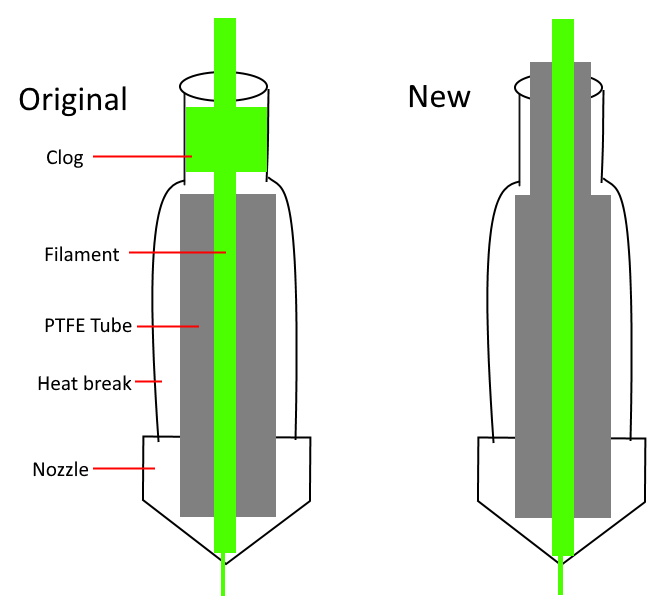
Improving the printer’s filament path.
Unfortunately, the spare steppers he had weren’t actually the right size. Rather than waiting around for the proper one to come in the mail, he took an angle grinder to the stepper’s shaft and cut off the 5 mm needed to make it fit, followed by a few passes with a file to smooth out any burrs. We’re not sure we’d recommend this method of adjustment under normal circumstances, but we can’t argue with the results.
The replaced Z motor got the printer moving, but [digitalrice] wasn’t out of the woods yet. At this point, he noticed that the hotend was hopelessly clogged. Again relying on his previous experience, he was able to disassemble the extruder assembly and free the blob of misshapen PLA, leading to test prints which looked very good.
But success was short lived. After swapping to a different filament, he found it had clogged again. While clearing this second jam, he realized that the printer’s hotend seemed to have a design flaw. The PTFE tube, which is used to guide the filament down into the hotend, didn’t extend far enough out. Right where the tube ended, the filament was getting soft and jamming up the works. With a spare piece of PTFE tube and some manual reshaping, he was able to fashion a new lining which would prevent the filament from softening in this key area; resulting in a more reliable hotend than the printer had originally.
It’s great to see this printer repaired to working condition, especially since it looks like [digitalrice] was able to fix a core design flaw. But a broken 3D printer can also serve as the base for a number of other interesting projects, should you find yourself in a similar situation. For example, replacing the extruder assembly with a digital microscope can yield some very impressive results.