As far as things go that you are likely to find during a relaxing walk in the forest, Nintendo 64 game cartridges probably do not rank high on that list. Yet this is what happened to a friend of [BlueBox Tinkers] a few years back, leaving him dying to see whether the cartridge would still work, as well as what game it is since its labels got obliterated courtesy of its time spent enjoying the outdoors. Fortunately he recently got a chance to see whether he could revive this cartridge.
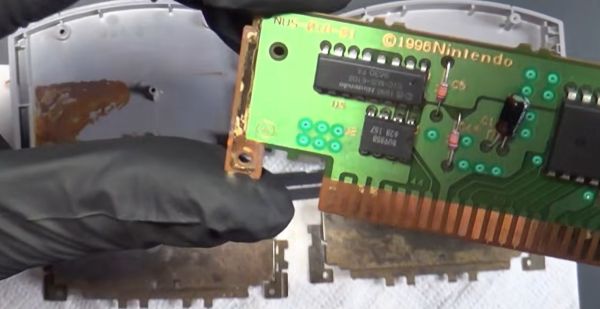
The insides look pretty much like what you’d expect after presumably months or years of exposure, with the metal shield severely corroded. The PCB does however look pretty decent still, with obvious signs of corrosion on the front-side vias, and a pretty gross-looking back side.
Unfortunately it wasn’t confirmed whether this friend tried to stick this old cartridge into an N64 console, but [BlueBox Tinkers] wasn’t going to take any such chances. First up was an inspection and deep cleaning of the PCB, showing that it had escaped real damage, with the shield having taken the brunt of the corrosion. Cleaning up the shield and the insides of the plastic shell is by far the hardest part, with the pitted metal and rust stuck on the plastic. For a full restoration you’d probably want to for a reproduction shell and shield here.
Ultimately the game turned out to still work, with the mystery game sadly fairly predictable, but with someone’s old save files still intact. Somehow it seems that what Nintendo did to make N64 cartridges dust- and child-resistant also makes it survive in the woods, so if you find one during a forest walk, it’s totally worth it to adopt it and take it home.
Continue reading “Reviving Mystery Nintendo 64 Game Cartridge Found In The Woods”