Laser Galvos And An ESP32 Recreate Old-School Asteroids

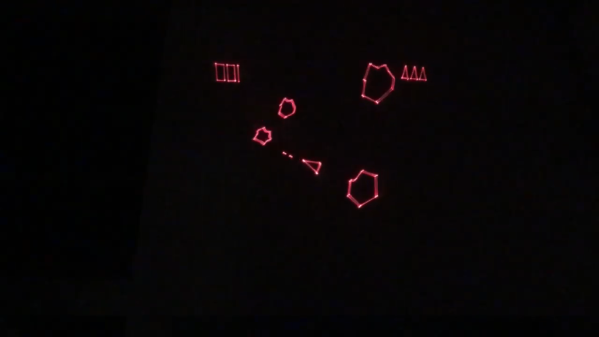
Playing Asteroids now isn’t quite what it used to be when it came out 40 years ago. At the time, the vector-scan display was part of the charm; making do with an emulator running on a traditional raster display just doesn’t quite do it for purists. But if you manage to build your own laser-projector version of the game like [Chris G] did, you’re getting close to capturing some of the original magic of the game.

There’s a lot to unpack about this project, and the video below does a good job explaining it. Where the original game used a beam of electrons flashing inside a CRT to trace out each object in the game, [Chris] substituted an off-the-shelf two-axis galvanometer from eBay and a 5-mW laser LED. This can project a gamefield on a wall up to two meters on a side, far bigger than any version of the machine ever built. The galvos are driven by op-amp drivers and an SPI DAC on a custom PCB. And in comparison to the discrete logic chips and 6502 running the original game, [Chris] opted for an ESP32.

As interesting as the hardware for this is, the real story is in the software. [Chris] does an excellent job running through his design, making the bulk of the video feel like a master class in game programming. His software is from scratch — no emulations here. As such it doesn’t perfectly reproduce the original games — no flying saucers and no spaceship explosion animations (yet) — but when coupled with the laser vector display, it certainly captures the feel of the original.

Being devoted Asteroids fans from back in the day, this one really pushes our buttons. We’ve seen laser-based recreations of the game before, but this one makes us think we can finally afford to recapture the glory of our misspent youth.

Continue reading “Laser Galvos And An ESP32 Recreate Old-School Asteroids”

Tuning Fork Keeps This Throwback Digital Clock Ticking

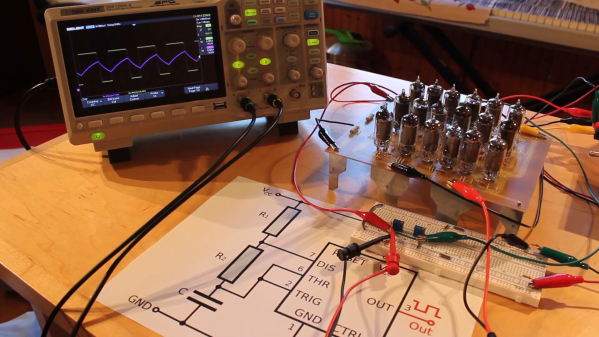
Whatever kind of clock you’re interested in building, you’re going to need to build an oscillator of some sort. Whether it be a pendulum, a balance wheel, or the atomic transitions of cesium or rubidium, something needs to go back and forth in a predictable way to form the timebase of the clock. And while it might not make the best timepiece in the world, a tuning fork certainly fits the bill and makes for a pretty interesting clock build.

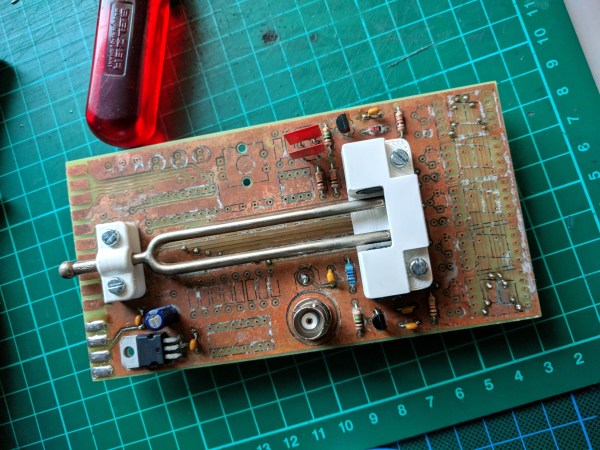
One of the nice things about this build is that [Kris Slyka] got their inspiration from a tuning fork clock that we covered a while back — we love it when someone takes a cool concept and makes it their own. While both clocks use a 440 Hz tuning fork — that’s an A above middle C for the musically inclined — [Kris] changed up the excitation method for their build. She used a pair of off-the-shelf inductors, placed near the ends of each arm and bridged by a strong neodymium magnet to both sense the 440-Hz vibrations and to provide the kick needed to keep the fork vibrating.

As for the aesthetic of the build, we think [Kris] really nailed it. Using through-hole components, old-school seven-segment displays, and a home-etched PCB, she was able to capture a retro look that really works. The RS-232 port and the bell jar enclosure complete the feel, although we’re not sure about the custom character set [Kris] designed — it’s cool and all, but makes it hard for anyone else to read without a little practice. Regardless, this is a fun build, and we’d imagine the continuous tone coming from the clock is pretty pleasing.

Continue reading “Tuning Fork Keeps This Throwback Digital Clock Ticking”

Third Time’s The Charm For This Capable Cyberdeck

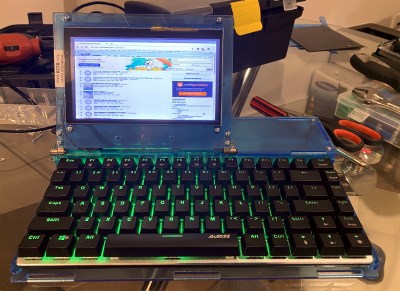
For those who decide to build their own personal cyberdeck, it’s often as much about the journey as it is the final product. The recent write-up that [Sophie Wheeler] put together about the process that lead her to build her own bespoke mobile computer is a perfect example. She went through three distinct design phases to create something that had what she describes as a “retro-futuristic, hand-built, utilitarian aesthetic”, and we think you’ll agree the final product is right on target.

At Hackaday, we’re strong believers that you can learn just as much from a failed attempt as you will from a rousing success, which is why we especially appreciate the way [Sophie] has documented this project. The basic layout and general bill of materials for his hypothetical cyberdeck had been sorted out in her head for about a year, but it took a few attempts until everything came together in a way she was happy with. Rather than pretend those early missteps never happened, she’s decided to present each one and explain why it didn’t quite work out.

This laser-cut acrylic design was difficult to assemble.

Frankly both earlier attempts look pretty slick to us, but of course the only person who’s opinion really counts when it comes to a good cyberdeck is the one who’s building it. The original acrylic design was a bit too fiddly, and while the first attempt at 3D printing the computer’s frame and enclosure went much better, it still left something to be desired.

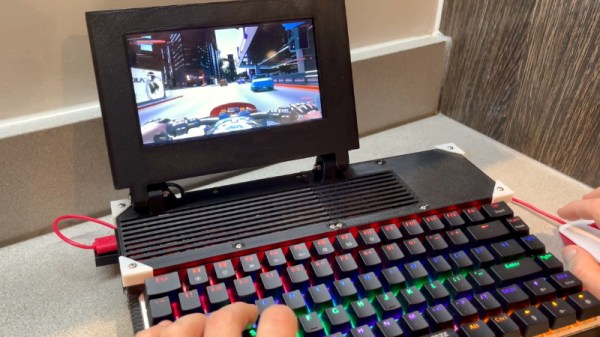
The final result is a clean and straightforward design that has plenty of room inside for a Raspberry Pi 4, UPSPack V3 power management board, 10,000 mAh battery, internal USB hub, and a AK33 mechanical keyboard. Topside there’s a 7” 1024×600 IPS LCD with touch overlay that’s naturally been offset in the traditional cyberdeck style, and on the right side of the enclosure there’s a bay that holds a KKMoon RTL-SDR. Though that could certainly be swapped out for something else should you decide to print out your own version of this Creative Commons licensed design.

In our 2020 review we noted the incredible influx of cyberdeck builds we’d seen over the last 12 months, and judging by just what we’ve seen in just these last few weeks, 2021 should be another bumper year for these unique computers.

3D Printed Pi Arcade Is An Emulation Horn Of Plenty

Let’s be honest, building a home arcade cabinet isn’t exactly the challenge it once was. There’s plenty of kits out there that do all the hard work for you, and they even sell some pretty passable turn-key units at Walmart now. If you want to put a traditional arcade cabinet in your home, it’s not hard to get one.

Which is why this wild build by [Rafael Rubio] is so interesting. The entirely 3D printed enclosure looks like some kind of art piece from the 1970s, and is a perfect example of the kind of unconventional designs made possible by low-cost additive manufacturing. Building something like this out of wood or metal would be nightmare, especially for the novice; but with even a relatively meager desktop 3D printer you’re only a few clicks away from running off your own copy.

Removable side panels allow access to the electronics.

Inside the nautilus-like enclosure is a Raspberry Pi running Retropie, a 10″ LCD panel from Pimoroni, and a GeeekPi interface board that connects up to the 8-way joystick and arcade buttons. [Rafael] has included a Bill of Materials and an assembly overview that you can follow along with, though the cavernous internal dimensions of the enclosure certainly give you ample of room for improvisation if you’d rather blaze your own path.

Like the retro-futuristic computer terminals created by [Oriol Ferrer Mesià], this arcade machine completely reinvents a traditional design that most people take for granted. Is this layout actually better than the standard arcade cabinet? It’s not really our place to say. But it’s certainly a new and unconventional approach to “solved” problem, and that’s what we’re all about.

Retro Terminals Bring Some Style To Your Desktop

It wasn’t so long ago that a desktop computer was just a beige box with another, heavier, beige box sitting next to it or maybe perched on top. They’re a bit more visually exciting these days, with even mass produced PCs now shipping with RGB lighting and clear side panels. But even so, few could really look at a modern desktop computer and call it objectively beautiful.

But [Oriol Ferrer Mesià] wonders if we couldn’t improve on things a bit. Over the last few months, he’s been experimenting with small 3D printed enclosures that reimagine the traditional desktop computer aesthetic. With their distinctively retro-futuristic style, they look like the kind of gadgets science magazines in the 1960s thought would be dotting kitchens, living rooms, and space stations by the year 2000. But unlike those fanciful creations, each one of these beauties is a fully functional computer.

A few of the designs are relatively conservative, and not entirely unlike some of the old “dumb terminals” of the 1970s. With a Raspberry Pi 4 and a tablet-sized screen, these diminutive terminals would be perfectly usable for light desktop work or some retro gaming.

But we particularly like the ultra-widescreen design that [Oriol] has come up with. With a fairly unusual 4:1 aspect ratio LCD, the printed enclosure for this one was so large that it had to be done in two pieces on his Ender 3. To keep the 8″ 1920 x 480 panel well fed, this design uses a Jetson Nano 2GB which has considerably more graphical punch than other Linux SBCs of similar size and price.

As part of the recent cyberdeck craze, we’ve seen plenty of people recreating the look and feel of vintage portable computers with 3D printed cases and modern components. Desktop creations have been far less common, but with gorgeous designs like these to serve as inspiration, that may change.

Exploring The New Super Mario Game & Watch

Nintendo has revived the classic Game & Watch, this time in glorious full-color and running the same Super Mario Bros that first graced the Nintendo Entertainment System (NES) back in 1985. Even though it’s only been on the market for a few days, [stacksmashing] has already made some impressive progress towards unlocking the full potential of this $50 retro handheld.

It will come as no surprise to the average Hackaday reader that what we’re looking at here is a pocket-sized NES emulator, but until [stacksmashing] cracked his open, nobody was quite sure what kind of hardware is was running on. Thankfully there wasn’t an epoxy blob in sight, and all of the chips were easily identifiable. Armed with the knowledge that the Game & Watch is running on a STM32H7B0 microcontroller with a nearby SPI flash chip holding the firmware, it was just a matter of figuring out how the software worked.

Connecting to the SWD header.

It didn’t take long to find that an unpopulated header on the board would give him access to the Serial Wire Debug (SWD) interface of the STM32, though unfortunately he found that the chip’s security mode was enabled and he couldn’t dump the firmware.

But he was able to dump the RAM through SWD, which allowed him to identify where the Super Mario Bros NES ROM lived. By connecting the SPI flash chip to a reader and comparing its contents with what the system had in RAM, [stacksmashing] was able to figure out the XOR encryption scheme and come up with a tool that will allow you to insert a modified ROM into an image that can be successfully flashed to the chip.

So does that mean you can put whatever NES ROM you want on the new Game & Watch? Unfortunately, we’re not quite there yet. The emulator running on the device has a few odd quirks, and it will take some additional coaxing before its ready to run Contra. But we’ve seen enough of these devices get hacked to know that it’s just a matter of time.

Continue reading “Exploring The New Super Mario Game & Watch”

Another Kind Of “Bare Metal”: 6502 Computer Powers RPN Calculator

[Mitsuru Yamada] states that one of the goals for this 6502 computer build was to make it strong enough to survive real-world usage. In that regard alone we’d call this a success; the die-cast aluminum enclosures used are a little blast from the past and lend a nice retro industrial look to the project. The main chassis of the computer fairly bristles with LEDs and chunky toggle switches for setting the data and address busses. The interior is no less tidy, with the 6502 microprocessor — date code from 1995 — and associated support chips neatly arranged on perf board. The construction method is wire wrapping, in keeping with the old-school look and feel. Even the hand-drawn schematic is a work of art — shades of [Forrest Mims].

As for programming, this machine is as low-level as it gets. Nothing but 6502 machine language here, entered manually with the toggle switches, or via an externally programmed ROM. The machine can only address 1k of memory, a limit which the code to support the RPN calculator add-on [Yamada] also built brushes up against, at 992 bytes. The calculator keypad has a 20-key matrix pad and an eight-digit dot-matrix LED display, and can do the four basic operations on fixed-point binary-coded decimal inputs. The brief video below shows the calculator in action.

We love the look of this build and we’re eager to see more like it. We’ve seen a ton of 6502 builds from discrete chips lately, and while we love those too, it’s nice to see one of the big old DIPs put back in action for a change.

Continue reading “Another Kind Of “Bare Metal”: 6502 Computer Powers RPN Calculator”