When it was released 20 years ago, the Sega Saturn was by far the most powerful video game console available. It was a revolutionary device, had incredible (for the time) graphics, and a huge library of IP Sega could draw from. The Saturn was quickly overshadowed by the Sony Playstation, and soon these devices found themselves unused, unloved, and fetching high prices on the collectors market.
After finding a Sega Saturn on a trip to Japan, [jhl] decided he would like to write some code for this machine. Unlike earlier consoles, where Flash cartridges are readily available, or later consoles, where writing directly to the on-board storage is easy, bringing up a development environment for the Saturn isn’t easy. The best method is installing a mod chip and working off of burned CDs. Instead of writing a game or two for the Saturn, [jhl] got distracted for a few years and developed an optical drive emulator.
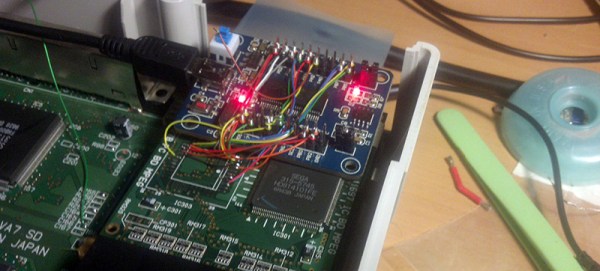
 According to [jhl], the design of the Sega Saturn is tremendously complicated. There’s an entire chip dedicated to controlling the CD drive, and after some serious reverse engineering work, [jhl] had it pretty much figured out. The question then was how to load data onto the Saturn. For that. [jhl] turned to the internal expansion port on the Saturn. This internal expansion port was designed to accept an MPEG decoder card for playing video CDs on the Saturn, but the connector presents the entire bus. By attaching a Game Boy Flash cartridge, [jhl] was able to dump the ROM on the CD controller.
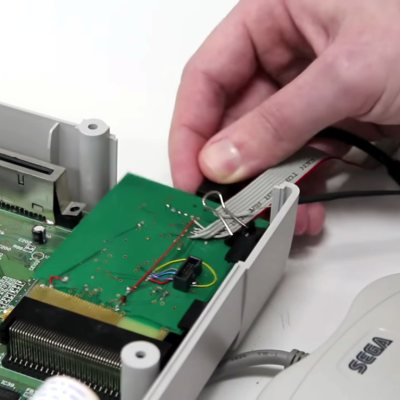
With a little bit of work, a fast ARM microcontroller, and a CPLD for all the logic glue, [jhl] was built an adapter to push CD data to the Saturn through this internal expansion port. Not only is this a boon for homebrew Saturn development, but this build also completely replaces the CD drive in the Saturn – a common failure point in this 20-year-old machine.
The formal release for this ultimate Saturn crack isn’t out yet, but it’s coming shortly, allowing anyone who still has a Saturn to enjoy all those very blocky games and develop their own games. You can check out a short, amateur documentary made on [jhl]’s efforts below.