An OLED Ring For Bluetooth Notifications

Wearables are the next frontier of amateur electronics, and [Kevin]’s Arduboy ring (link dead, try Internet Archive) is one of the best examples we’ve seen yet.

Inside the Arduboy is an nRF51822 – a chipset with Bluetooth Low Energy, an ARM Cortex M0,256k of Flash, and 16k of RAM. There’s also a an OLED and a touch button for displaying notifications from a phone, with the ability to reply to these notifications.

The enclosure for the ring is rather interesting. It’s a bit thick, but that’s for a reason – there’s a 40mAh battery stuffed along the sides of the ring. The enclosure itself is 3D printed to spec, and contrary to some beliefs, there’s nothing wrong with bending a LiPo cell once. Sure, it only has four hours of battery life with the display on, but it has a 24 hour battery life in standby mode, making it almost useful as an everyday wearable.

This is [Kevin]’s second wearable, the first being the Ardubracelet, an extremely interesting OLED bracelet with three different displays.  The Arduboy is much more compact and comes extremely close to looking like a product. You can check out the video of it below.

Continue reading “An OLED Ring For Bluetooth Notifications”

Making MicroView Wordy

Despite the MicroView shipping a ton of units, we haven’t seen many projects using this tiny Arduino and OLED display in a project. Never fear, because embedded systems engineer, podcaster, and Hackaday Prize judge [Elecia White] is here with a wearable build for this very small, very cool device.

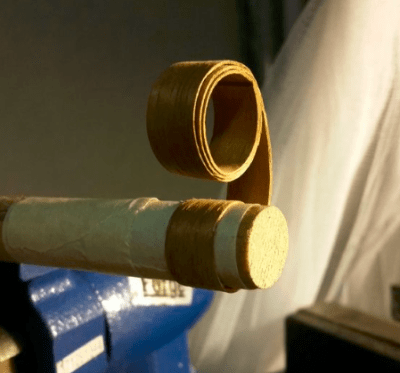
The size and shape of the MicroView just cried out to be made into a ring, and for that, [Elicia] is using air-drying bendy polymer clay. To attach the clay to the MicroView, [Elecia] put some female headers in a breadboard, and molded the clay over them into a ring shape. It works, and although [Elecia] didn’t do anything too tricky with the headers and clay, there are some interesting things you could do running wires through the clay.

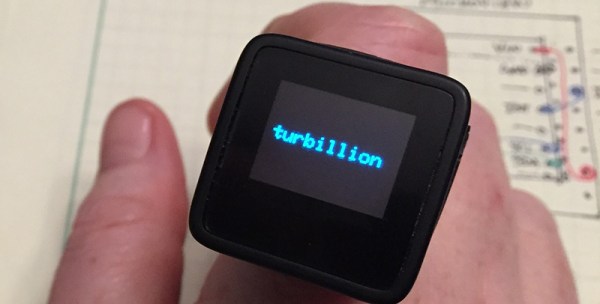
What does this ring do? It’s a Magic 8 Ball, a game of Pong controlled by an accelerometer, a word-of-the-day thing (with definitions), all stuffed into a brass silicon, OLED, and clay knuckle. Video below.

If you’re wondering, Turbillion (n). A whirl; a vortex.

Continue reading “Making MicroView Wordy”

NFC Ring Lock Box

NFC Ring Lock Box

[Nairod785] wanted to build a lock box that would lock from the inside. He started with an inexpensive, plain wooden box. This kept the cost down but would also allow him to easily decorate the box later on using a wood burning tool.

To keep the box locked, he installed a simple latch on the inside. The latch is connected to a servo with string. When the servo rotates in one direction, it pulls the string and releases the latch. When the servo is rotated in the opposite direction, the latch closes and locks the box once again.

If you are going to have a locked box, then you are also going to need a key to open it. [Nairod785] used a ring with a built-in NFC tag, similar to the ring featured back in March. Inside of the box is a PN532 NFC module. The walls of the box were a little too thick for the reader to detect the ring, so [Nairod785] had to scratch the wall thickness down a bit. The NFC module is connected to an Arduino Nano. Communications are handled with I2C.

The NFC ring actually has two different NFC tags in it; one on each side. [Nairod785] had to program both of the tag ID’s into the Arduino to ensure that the ring would work no matter the orientation.

The system is powered by a small rechargeable 5V battery. [Nairod785] wired up a USB plug flush with the box wall so he can easily charge up the battery while the box is locked. It also allows him to reprogram the Arduino if he feels so inclined. There is also a power switch on the side to conserve energy.

A Ring Of Colored Pencils

Colored Pencil Ring

[Peter] proved he has equal parts prowess, patience, and perseverance with this colored pencil ring (imgur link). The ring is made from a cross-section of several colored pencils. The idea seems simple. The build process IS simple. As always though, the devil is in the details.

[Peter] started with a cheap pack of colored pencils. They have to be hexagonal pencils, as round ones won’t work well for this build. [Peter] used two nails to align the  pencils, and medium thickness Cyanoacrylate glue to bond them together. Cyanoacrylate (aka super glue) is a very strong but inflexible bond. We’re curious if a different adhesive might have worked better for this task.

Once the block of glued pencils was dry, [Peter] drilled a hole approximately his ring size. He used a band saw to cut a rough ring blank around the hole, then headed to the wood lathe. He mounted the ring with a jam chuck, which is a piece of wood turned to an interference fit with the workpiece. The problem was that the jam chuck cracked the ring as it was being installed. [Peter] was able to glue the ring back together, and turn it down on his lathe.

Click past the break for more on [Peter’s] ring.

Continue reading “A Ring Of Colored Pencils”

NFC Ring Unlocks Your Phone

NFC Ring

This little ring packs the guts of an NFC keyfob, allowing [Joe] to unlock his phone with a touch of his finger.

The NFC Ring was inspired by a Kickstarter project for a similar device. [Joe] backed that project, but then decided to build his own version. He took apart an NFC keyfob and desoldered the coil used for communication and power. Next, he wrapped a new coil around a tube that was matched to his ring size. With this assembly completed, epoxy was used to cast the ring shape.

After cutting the ring to size, and quite a bit of polishing, [Joe] ended up with a geeky piece of jewelry that’s actually functional. To take care of NFC unlocking, he installed NFC LockScreenOff. It uses Xposed, so a rooted Android device is required.

We’ll have to wait to see how [Joe]’s homemade solution compares to his Kickstarter ring. Until then, you can watch a quick video of unlocking a phone with the ring after the break.

Continue reading “NFC Ring Unlocks Your Phone”

Adding LEDs To An Engagement Ring

ring

Once upon a time, a nerd met a girl. Things happen as they do, and eventually [Ben] wanted to create the be-all, end-all engagement ring. (here’s a cache) It’s a simple titanium affair with 23 stones around the perimeter. What makes this ring so cool, though, is that it lights up whenever [Ben] and his girl are holding hands.

The metalworking portion of the build was about as easy as you would expect machining titanium to be. After the ring was cut off its bar stock, [Ben] brought it over to a mill where 23 holes for each of the stones were drilled. The stones were affixed to the ring with  jewelers epoxy and the entire ring was buffed to an amazing shine.

The electronics are where this project really shines. Putting a battery of capacitor inside a ring is nigh impossible, so [Ben] decided to power the LEDs with an inductive charging circuit. A coil of wire wound around kapton tape serves as the inductor and a small SMD capacitor powers three very bright and very tiny LEDs.

The inductive charging unit itself is a masterpiece of hackery; [Ben] wanted the ring to light up whenever he and his ladyfriend were holding hands. To do this, [Ben]’s inductive charger is also a wearable device: a large coil of wire is the charger’s transformer and was would to fit around [Ben]’s wrist. The entire charging circuit can be easily hidden under a jacket sleeve, making for a nearly magical light-up ring.

An awesome piece of work, and one of the best jewelry builds we’ve seen in a long time. You can see the inductive coupling and shining LEDs in the video below.

Continue reading “Adding LEDs To An Engagement Ring”

The Wedding Band: Milling Titanium And Wrapping It In Palladium

You’ve got to admit that custom milling your own wedding band is pretty hard-core. In this case [Jeremy Swerdlow] is making it for his friend, but that doesn’t diminish the fun of the project. After the break you can watch him mill a titanium ring and wrap it with a palladium inlay.

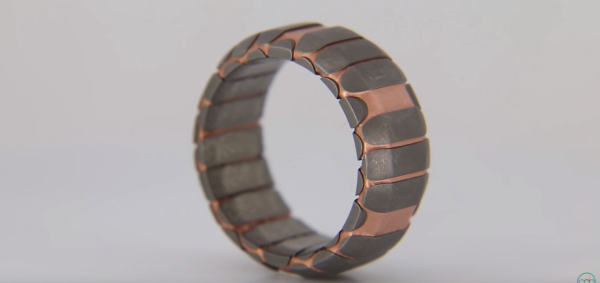
To solder palladium to titanium [Jeremy] would need special equipment, so he found another way to mate the dissimilar metals. He milled a dovetail groove in the center of the titanium band. To do that, he had to make a special cutting tool that was just the right size. Once had milled the ring’s rough dimensions, he had to fabricate a custom mandrel to hold the ring for the rest of the job. The dovetail was then filled with a palladium strip using a combination of heat and hammering. The two ends are soldered together using palladium solder. The ring in the middle shows this solder joint. To the right is a ring after the inlay is milled flush but before the final polishing which will bring out the best qualities of both metals.

If you don’t have the machine shop skills to pull this off you could always try your hand at 3d printed rings.

Continue reading “The Wedding Band: Milling Titanium And Wrapping It In Palladium”