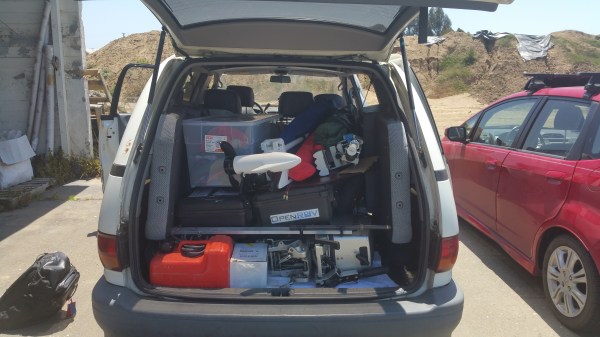
Having to work away from the convenience of a workshop can be tough. But it’s sometimes unavoidable and it always means planning ahead. When the work area also happens to be 150m under a lake’s surface, it’s much more of a challenge – but it’s both doable and more accessible than you might think. To prove it, this DIY research vessel will be part of the robotic exploration of an underwater shipwreck. It is complete with an Ethernet bridge, long-range wireless communications, remotely operated underwater vehicle (ROV), the ability to hold a position, and more. The best part? It can all be packed up and fit into a minivan. We can’t put it any better than the folks at the OpenROV Forums:
In just over a week (June 6th – 9th), a bunch of people from OpenROV are going to attempt to dive a set of specially modified deep-capable ROVs to a 50m-long shipwreck at a depth of 150m below lake Tahoe. We’ll be using a deployment architecture that we’ve been perfecting over the years that involves a very small boat keeping station over the dive site while the rest of the people on the expedition run the mission from a remote location via long-range broadband radio. Since the mission control site will have an internet connection, we’ll be able to live stream the entire dive over the internet.
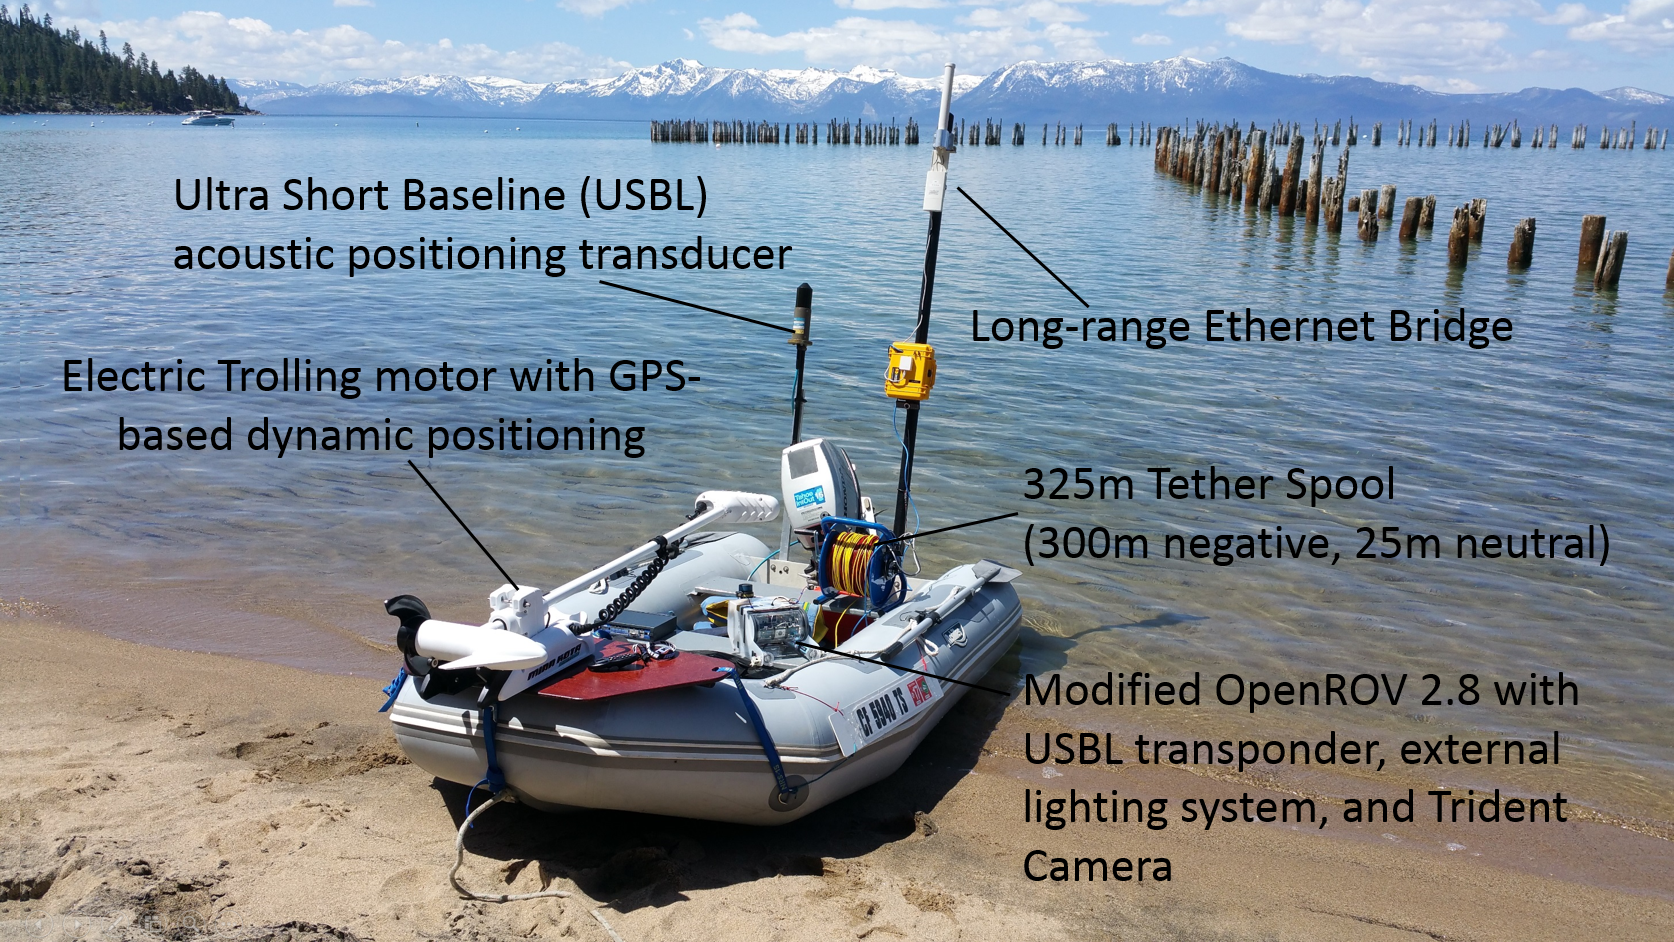 The purpose of the design was “to demonstrate that many of the capabilities one might think would require a large research vessel can actually be achieved with off-the-shelf parts that are more portable and much less expensive. […] There’s a lot to discover down there, and the technology readily available these days can allow us to explore it.” This mindset happens to wonderfully complement the kickoff of the Citizen Scientist Challenge portion of the 2016 Hackaday Prize.
For those times when your work can remain on solid ground, one method is to sidestep the entire issue of working away from the workshop by simply making your whole work area mobile like this incredible conversion of a truck trailer to a mobile lab.

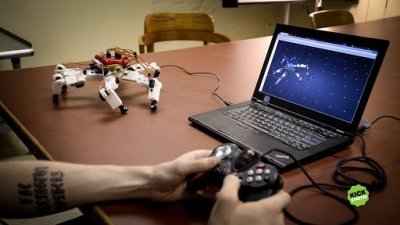
 Building a robot can be very simple — assembling pre-configured parts or building something small, quick, and cute — or it can be an endeavour that takes years of sweat and tears. Either way, the skills involved in building the ‘bot aren’t necessarily the same as those it takes to program the firmware that drives it, and then eventually the higher-level software that makes it functional and easy to drive.
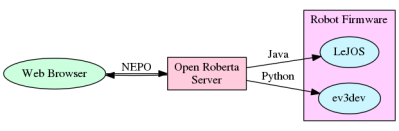 Open Roberta is the user-facing middleware in a chain of software and firmware bits that make a robot work in a classroom environment. For the students, everything runs inside a browser. OR provides a webserver, robot programming interface and language, and then converts the output of the students’ programs to something that can be used with the robots’ firmware. The robots that are used in classrooms are mostly based on the Lego Mindstorms EV3 platform because it’s easy to put something together in short order. (But if you don’t have an EV3, don’t despair and read on!)
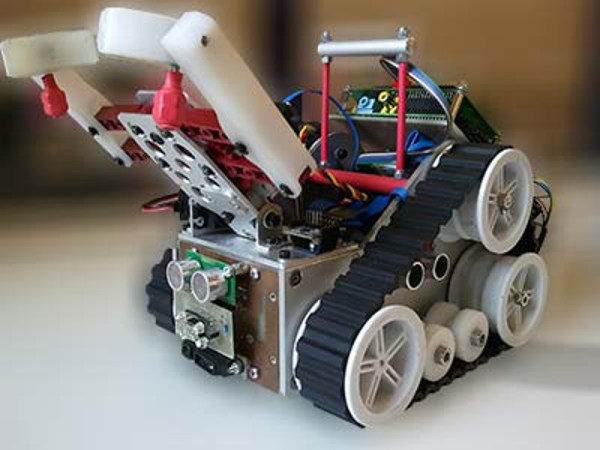

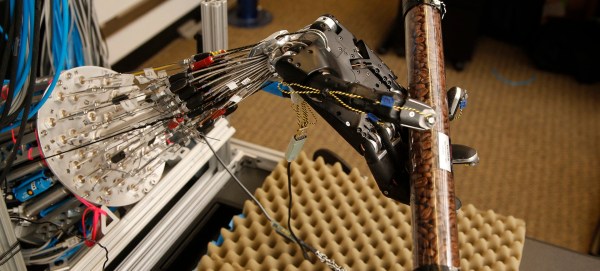
 “This is the year of the general purpose home robot!” “2016 is going to be for robots like 1976 was for the home computer!” The problem with statements like those is the fact that we’ve been hearing them since the 1970’s. General purpose home robots still have a long way to go. Sure, we’ve got Roomba, we’ve even got self-driving cars. But we don’t have Rosie from the Jetsons. And while I don’t think we’re going to get to Rosie for a while, there are some simple challenges that can spur development in that direction. One need look no further than one’s own laundry room.
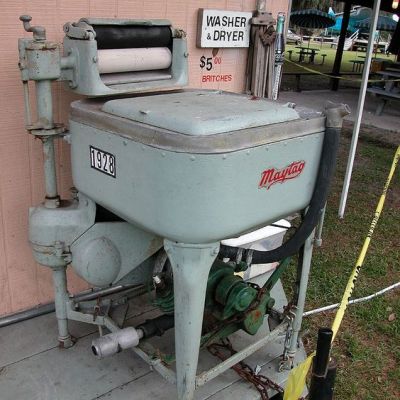 Using machines to wash and dry laundry isn’t a new concept. Washers and dryers have become commonplace enough that we don’t think of them as robots. Hamilton Smith patented the rotary washing machine in 1858. Maytag has had home machines available for nearly 100 years. Many of the early machines were powered by gasoline engines, as electricity wasn’t common in rural farmhouses. Things have improved quite a bit since then! From the dryer we transfer our laundry to a basket, where it has to be folded. It is this final step that cries out for a homemaking automaton to take this chore out of Everyman’s hands.
 [Rand] fixed the problem by adding a second ESP8266 module. The first is the listener. It listens for WiFi access points. Once an AP is found, it sends this information to the second jammer” module via a unidirectional single line serial link. The jammer module pumps out deauth packets at full speed. He even managed to create a single executable which performs as both listener and jammer. At boot, the software sends out a series 0xFF bytes through the serial port. The listener has its serial transmit pin directly connected to the jammer’s serial receive line. When the jammer receives the 0xFF bytes, it jumps into the correct function. This was more than enough to kick that pesky Android phone off the network. As with the original article, we have to stress that you should only use modules like these for testing on your own equipment. Be careful out there folks!